Practices with a Xero integration
From 30 September 2021, Xero Developer Services have confirmed that no API calls can be made to a Xero account using OAuth1.0 authentication, because this authentication method has been deprecated. An error will be returned after this date if you attempt to connect to Xero through Bp VIP.net from version Topaz (2.1.526.051) or earlier.
IMPORTANT Best Practice Software recommend that practices with a Xero integration upgrade to version Topaz Revision 1 (2.1.526.056) before September 30 2021 to to mitigate any errors. After upgrading, you must also reconfigure your Xero account using the new OAuth2.0 authentication framework before you can resume exporting financial data to Xero. Instructions on setting up your Xero integration for OAuth2.0 are available here.
If your practice is unable to upgrade to Bp VIP.net version Topaz Revision 1, you will have to follow the steps below to perform a manual export of Xero data until you can upgrade.
NOTE The manual process is complex and may require assistance from your practice's financial manager or accountant, because there is no automatic mapping of data.
If you are unable to upgrade to Topaz Rev 1 before September 30
Until the Xero integration has been upgraded to OAuth2.0, you must:
- At the end of each day, manually export transaction data for that day to a comma-separated-value file (.csv or CSV). You can only export transaction data for a single day at a time from Bp VIP.net.
- Edit the CSV file to remove rows for transactions that should not be imported into Xero.
- Manually import the finalised CSV file into Xero through the Xero interface.
Your accountant or your Xero representative can assist you with determining which transaction types, and which columns in the CSV file, should be imported into Xero. Note these steps, because they will need to be performed on the CSV file exported at the end of each day. See What should I keep in the CSV file? for more information.
You can either import each day's CSV file one at a time, or merge CSV files after they have been edited in step 2 and import a week's worth of transaction data, for example.
Export transaction data to CSV
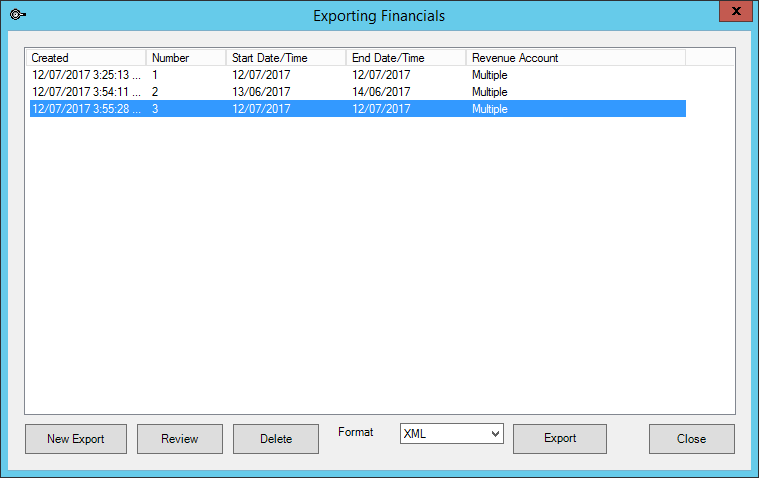
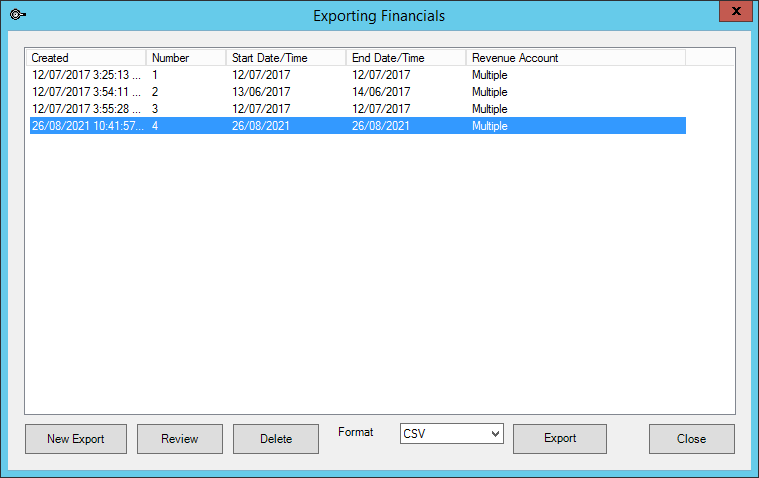
- From the main screen of Bp VIP.net, select File > Accounts > Export. The Exporting Financials window appears. In the following example, three batches have already previously been created for export.
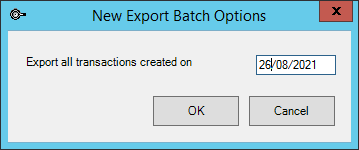
- Click New Export. The New Export Batch Options window appears.
- Select the date to export transactions for and click OK. All transactions between midnight the previous day and midnight at end of the selected day will be included. You will be prompted to select the revenue accounts to export.
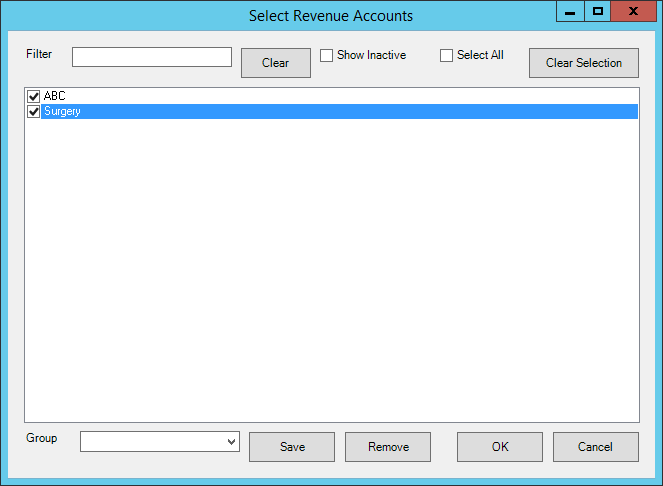
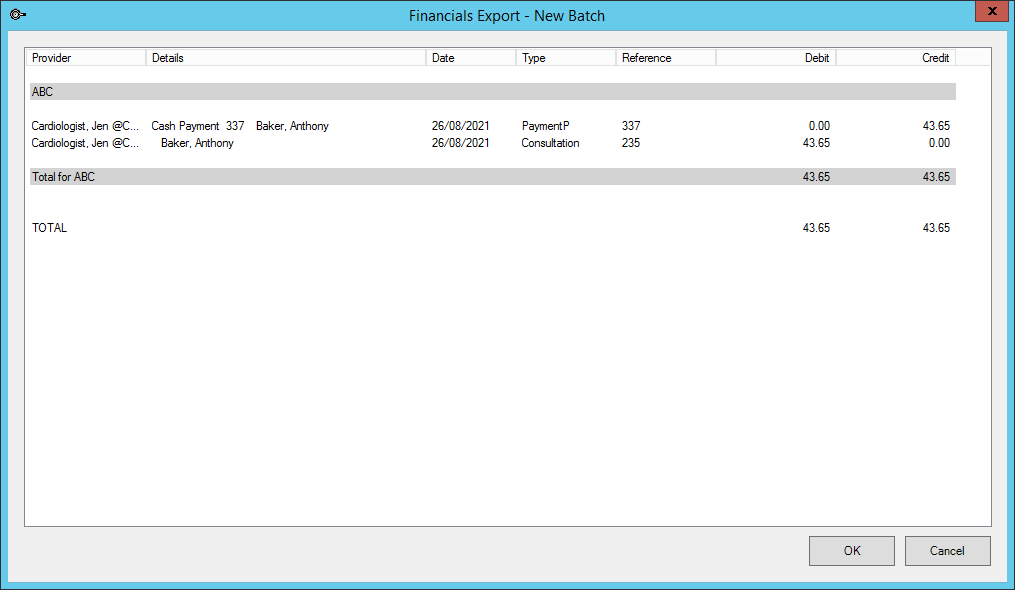
- Tick the Revenue Accounts to export transaction data for and click OK. The Financials Export window will appear, showing the transactions to include in the exported batch.
- Click OK to return the Exporting Financials window. Your new batch to export will be shown in the list. Select a Format of 'CSV'.
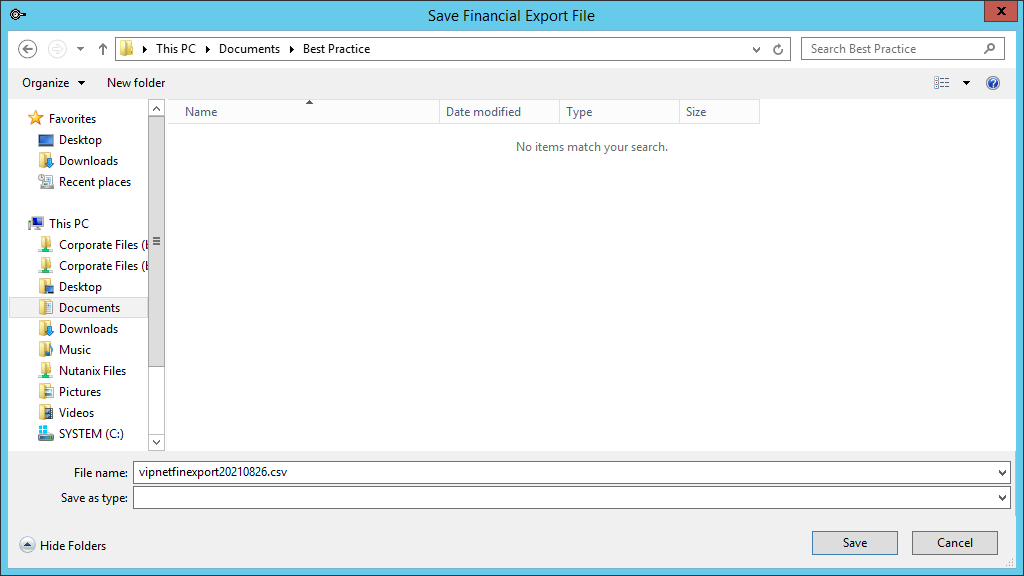
- Click Export. Bp VIP.net will prompt you for the location and filename to save to. The default filename has a timestamp.
- Click Save. Bp VIP.net will begin exporting the selected day's transactions. Depending on the volume of transaction data, this could take up to 60 minutes for very large volumes. When the export is finished, Bp VIP.net will alert how many records were successfully exported.
- You can open the export CSV file in a spreadsheet application such as Microsoft Excel to edit the rows and columns in the file.
What should I keep in the CSV file?
Not all transaction data from Bp VIP.net is imported into Xero through the Xero integration with Bp VIP.net. Some transaction types should not be imported.
The export CSV file will look something like:
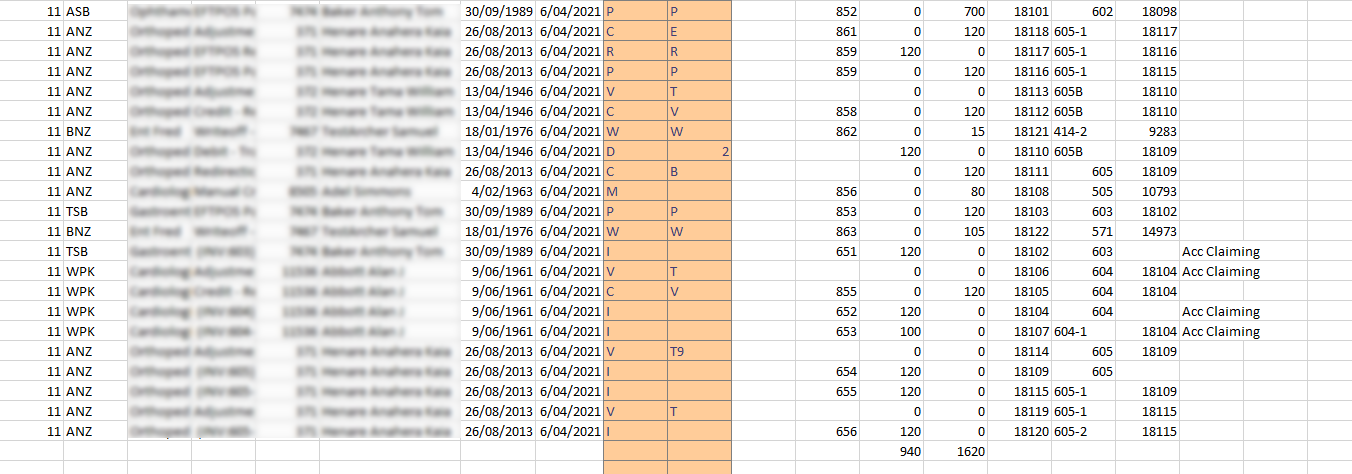
The columns shown in colour are the type1 and type2 columns, which represent the transaction type in Bp VIP.net. You may have to work with your accountant or your Xero representative to determine which transaction types should remain in the CSV file. Transaction types that should not be imported should have the row deleted from the CSV file in a spreadsheet application.
Last Modified 26 August 2021