Autotexts can be used to make the process of sending out patient reminders easier, especially bulk reminders. You can set an autotext to use as the default for both manual or 'one-off' bulk reminder events and scheduled appointment reminders using a Profile in the Send Bulk Appointment Reminders window.
Sending manual bulk reminders is useful if you need to change the date and time at which reminders are sent, or send reminders out for specific providers or appointment types only. Scheduled automatic reminders do not need a staff member to trigger the reminder event, but scheduled reminders are always sent out the morning before matching appointments . You can only set the time of sending for scheduled reminders.
For example, you may have a scheduled reminder with a boilerplate SMS message that is sent out daily for all regular appointments. However, an oncologist at the practice prefers to manually send out appointment reminders for his or her patients with a targeted reminder message.
On this page:
- Set the default appointment reminder autotext
- Set up default appointment reminders
- Send custom bulk reminders
- Send automatic appointment reminders.
To set up autotexts, go to Setup > Autotext. See Create an Auto Text for more information.
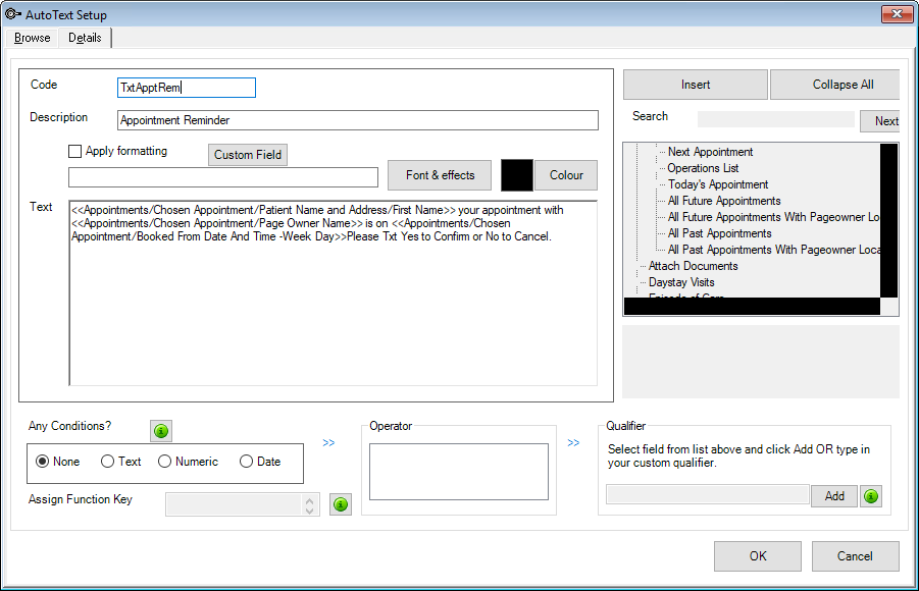
Set the default appointment reminder autotext
You can set an autotext as the default reminder text for appointment reminders sent from Bp VIP.net's appointment book.
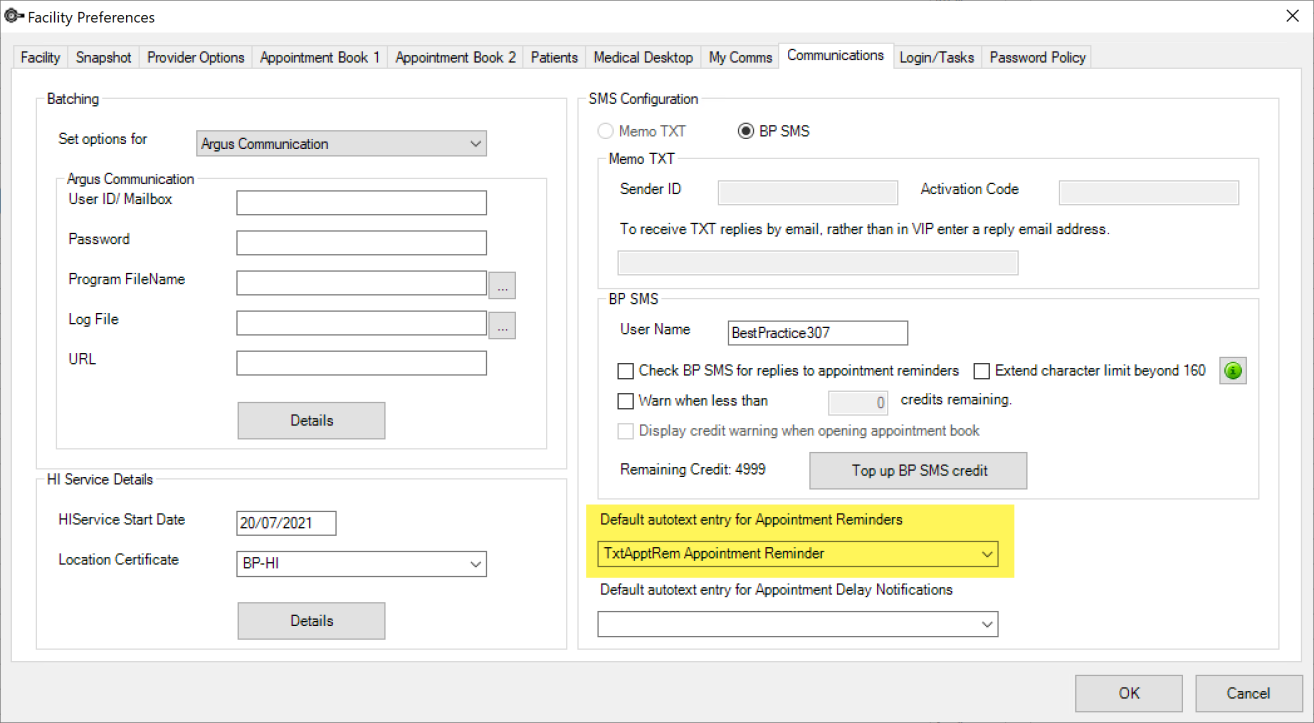
- Go to Setup > Facility Preferences > General Preferences > Communications.
- Under Default autotext entry for Appointment Reminders, select an autotext to send.
- Click Ok to save the default autotext.
Set up default appointment reminders
The 'Default' profile in Send Bulk Appointment Reminders stores the settings for manual or staff-initiated bulk reminders.
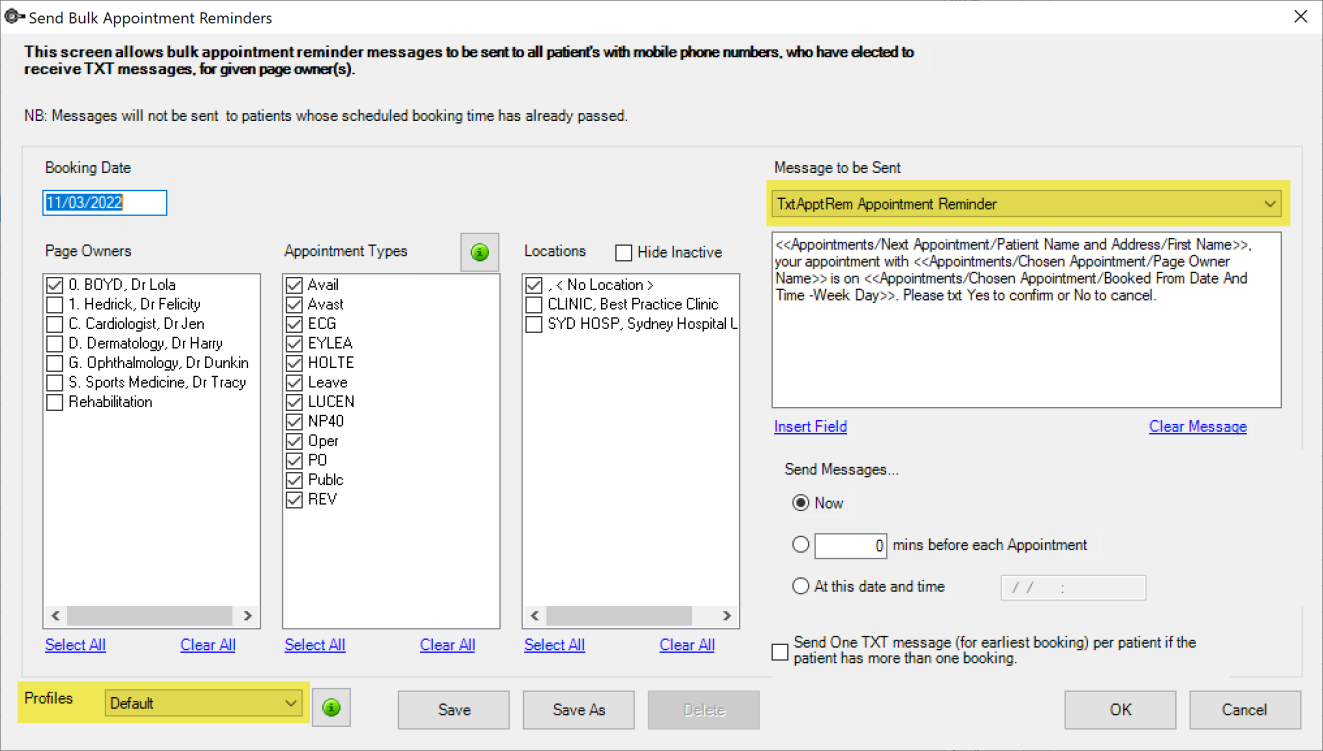
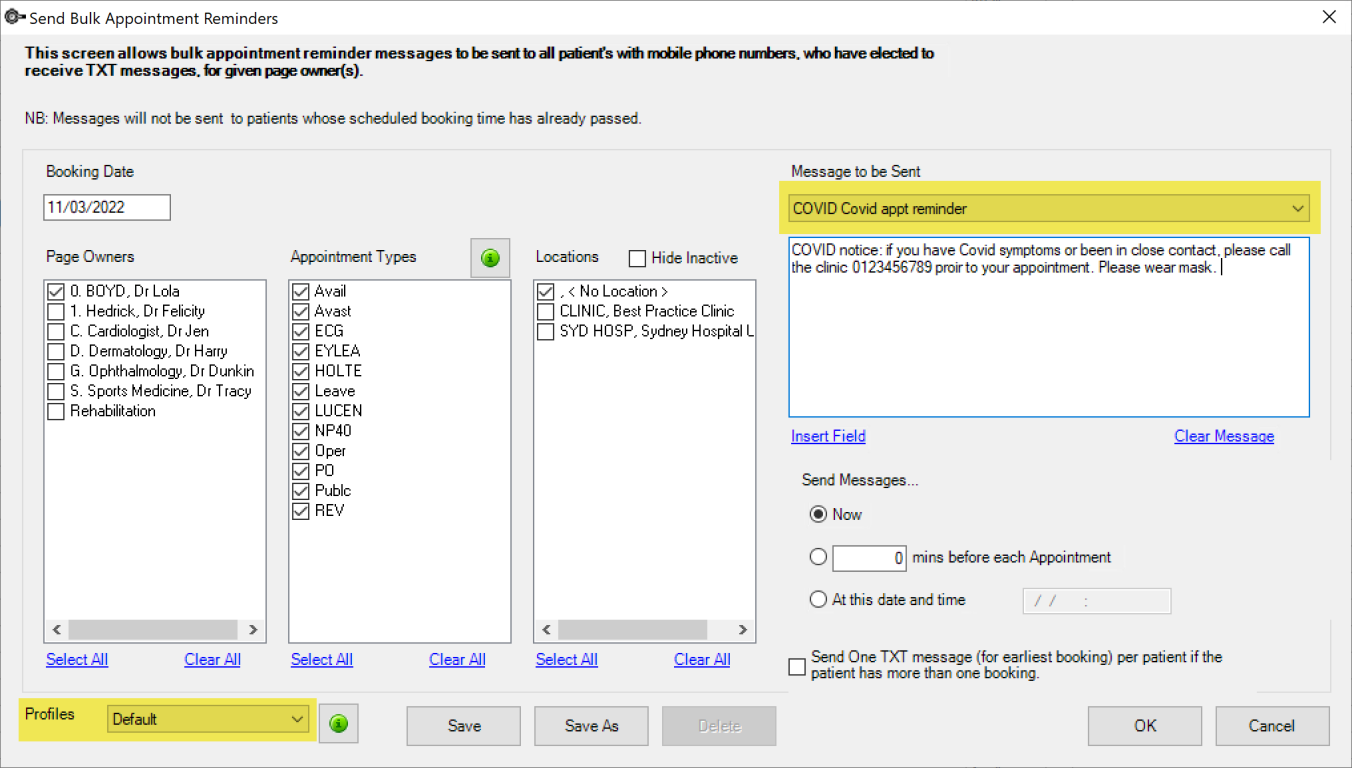
- On the Appointments Book toolbar, go to Send TXT Messages > Send Bulk Appointment Reminder Messages.
- The autotext you selected as the default for the practice will be automatically selected under the Message to be sent field.
- Make sure a Profile of 'Default' is selected in the bottom left.
- Select the Booking Date, appointment book Page Owners, Appointment Types, and Locations to apply to the Default bulk reminders profile.
- Select when to Send Messages. from the time settings on the right hand side. Manually sending bulk reminders provides much finer control over when reminders are sent.
- If you want to apply the changes permanently to the Default profile, click Save and accept.
- Otherwise, click OK to apply these changes to the current bulk reminders only. Bp VIP.net will send all matching appointment reminders.
![]()
Send a non-default bulk reminder
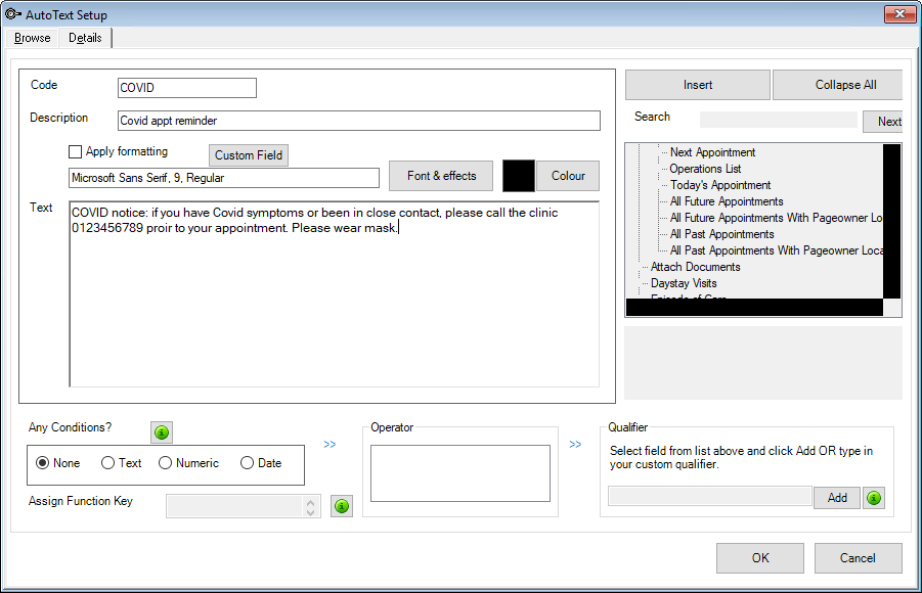
You may need to create and send a new broadcast message, for example, a COVID reminder message.
- Create the autotext for the message. See Create an Auto Text for more information.
- On the Appointments Book toolbar, go to Send TXT Messages > Send Bulk Appointment Reminder Messages.
- Under the Message to be sent field, select the message you just created.
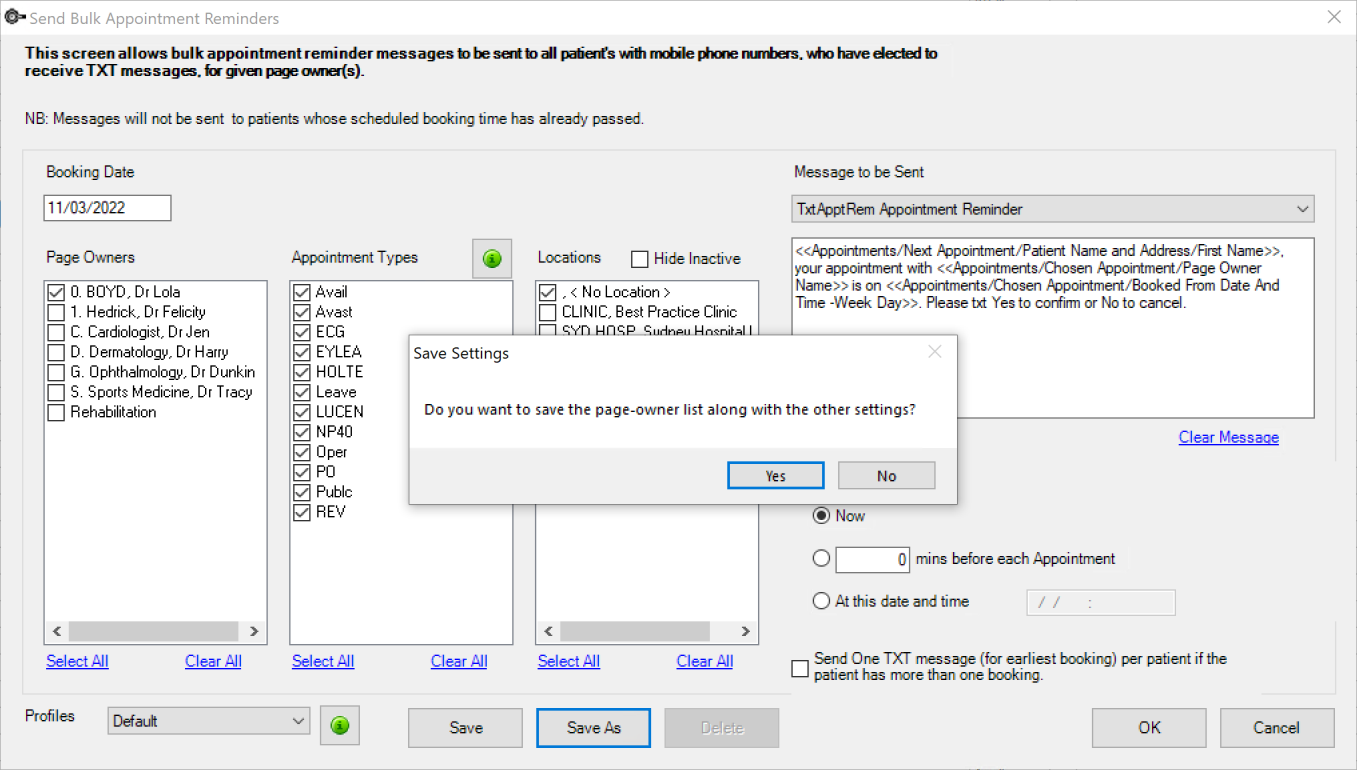
- Make any changes to the Page Owners, appointment types, locations, and when to Send Messages for your custom reminder.
- Click Save As at the bottom of the screen. Bp VIP.net will prompt you to confirm that you want to include changes to the Page Owners list for this profile.
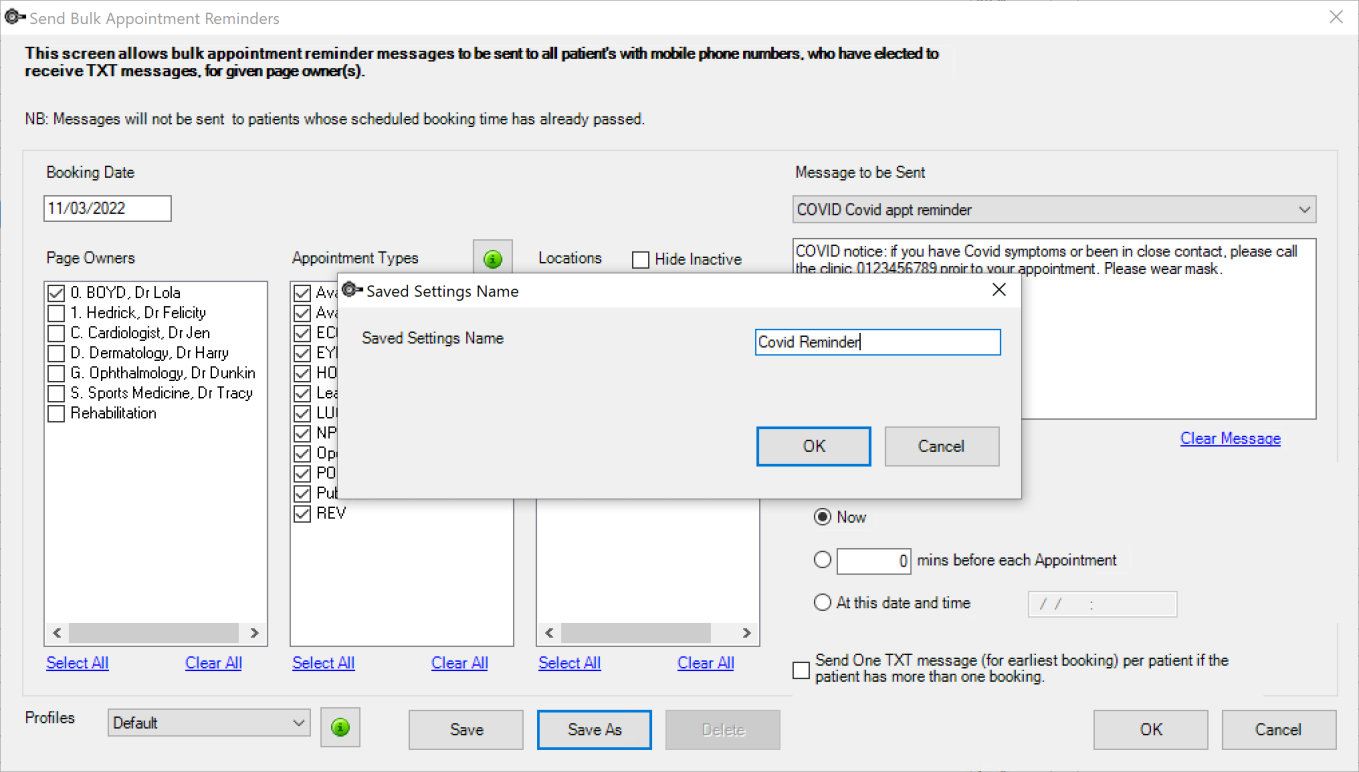
- Enter a profile name and click OK to save.
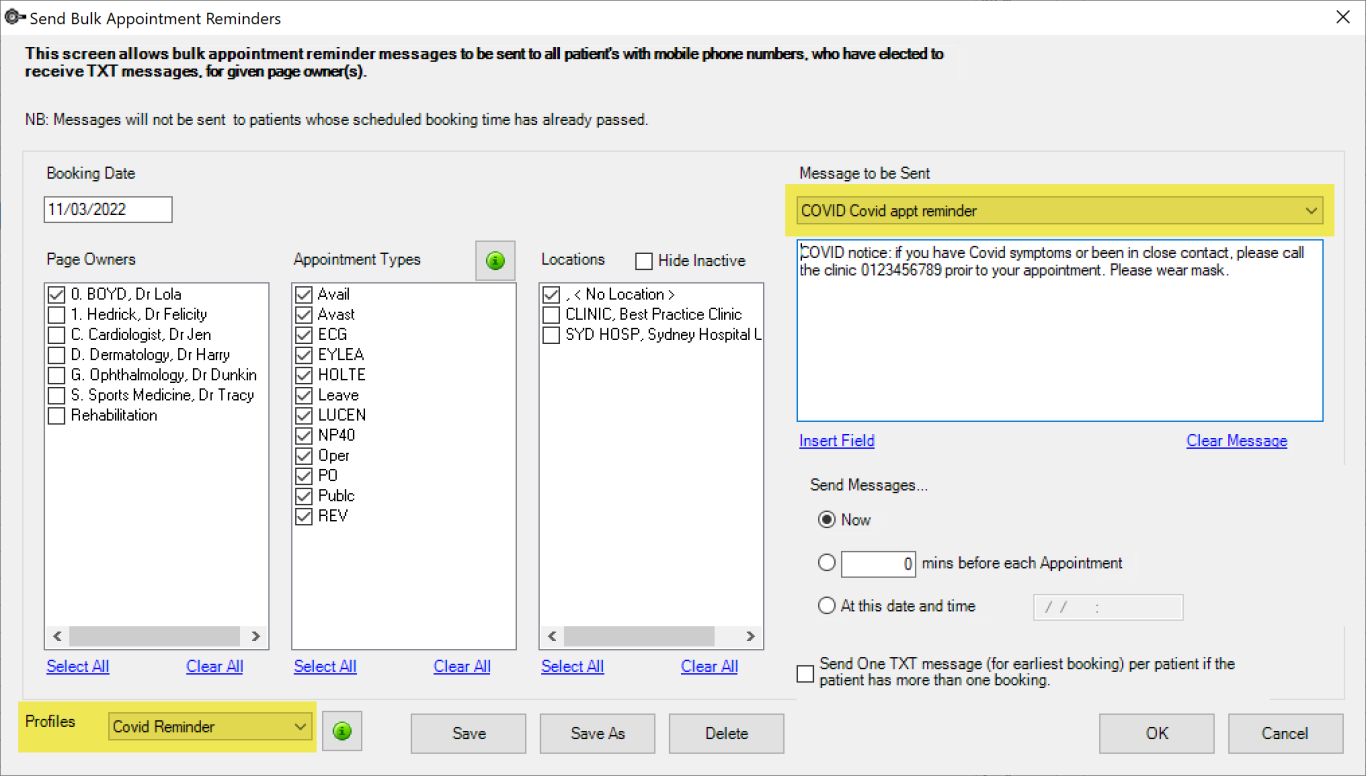
- The Profile will show the new entry.
- Click OK to send the bulk reminder for the new profile.
![]()
NOTE If you click OK at this point and send the selected message leaving the Profile as 'Default', the selected message will become the default message for future bulk reminders.
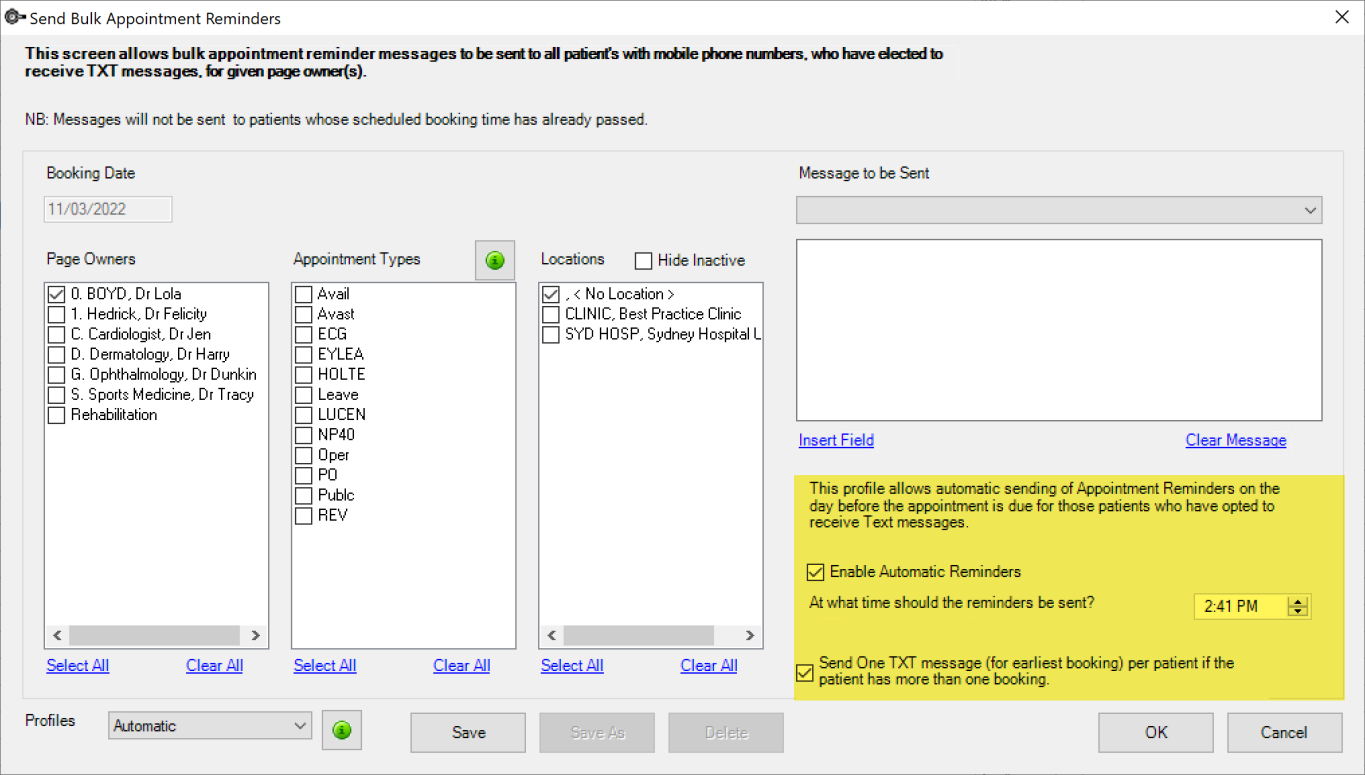
Send scheduled appointment reminders
The 'Automatic' profile will send scheduled bulk reminders for appointments the day before matching appointments, at the time specified in the schedule. The process is the same for a non-default profile, except for the choice of sending time.
IMPORTANT Automatic or scheduled reminders are always send the day before the matching appointment. You can specify the time that reminders are sent.
- On the Appointments Book toolbar, go to Send TXT Messages > Send Bulk Appointment Reminder Messages.
- Change the Profile to 'Automatic'.
- Select a defined autotext as the Message to be sent.
- Select the Booking Date, Page Owners, Appointment Types and Locations to send reminders for.
- Tick Enable Automatic Reminders to turn on scheduled reminders. You can untick this option and leave all other settings if you need to temporarily disable scheduled reminders.
- Set the time of day at which reminders will be sent the day before the appointment.
- Tick Send One TXT Message... if patients have more than appointment that day and you do not want to send a reminder for each appointment. This can reduce the credits spent in a bulk reminder event.
- Click Save to save the automatic reminder setup.
- Click OK.
![]()
NOTE When selecting Send One TXT Message.. the additional appointments will still be displayed in the Preview TXT Messages screen. Only the Appointment Reminder for the earliest booking will be sent.

Last modified: 18 October 2022