There are three ways to claim from a Health Fund in Bp VIP.net:
In the No Gap claiming method, the patient does not have any out of pocket expense. The doctors’ fees and the Health Fund fees match.
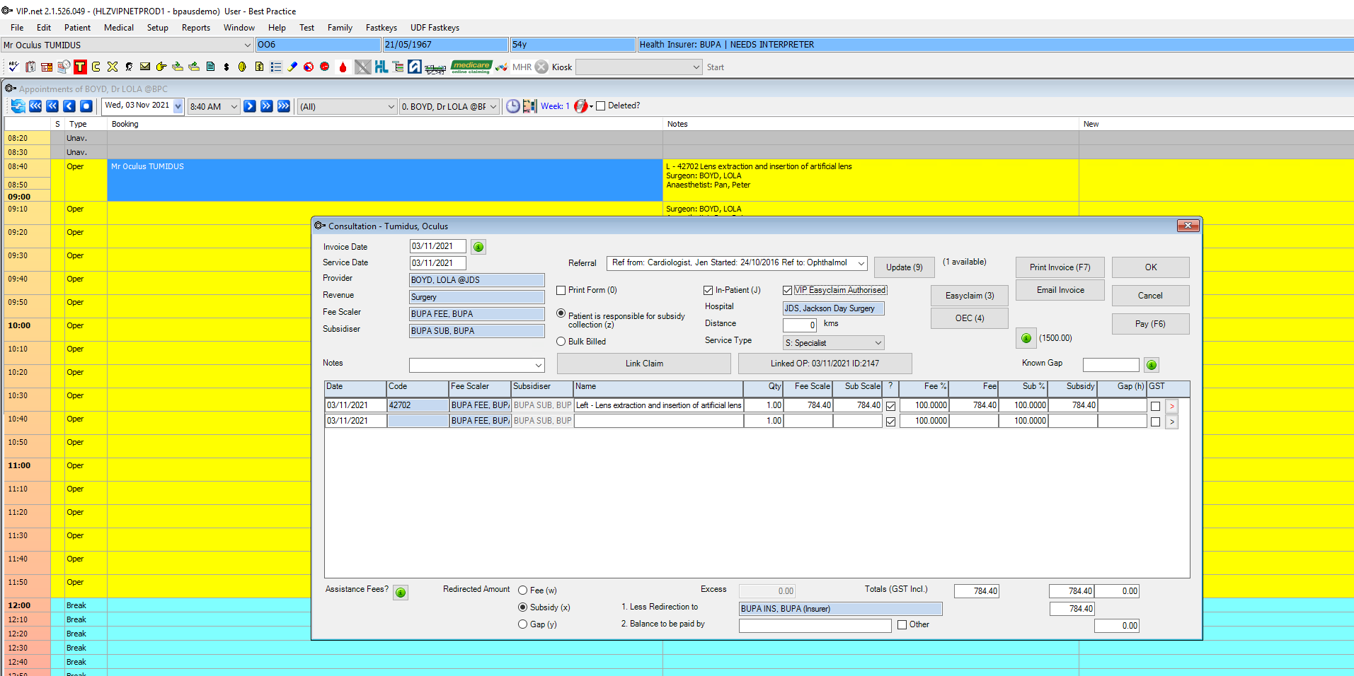
- Select the appointment and click the dollar sign in the toolbar, or press F5 to bill from the appointment. The Consultation window will appear.
- Enter the Code for the first item from the consultation.
- Note the patient’s Health Fund from the snapshot and enter the Health Fund into the Fee Scaler.
- Press the Tab key. The corresponding subsidiser for the fee scaler will populate the Subsidiser field.
- Repeat steps 2 to 4 for each item from the consultation.
- Enter the patient's Health Fund (same as step 3) in the Less Redirection to field.
- Select the check box Medicare Authorised.
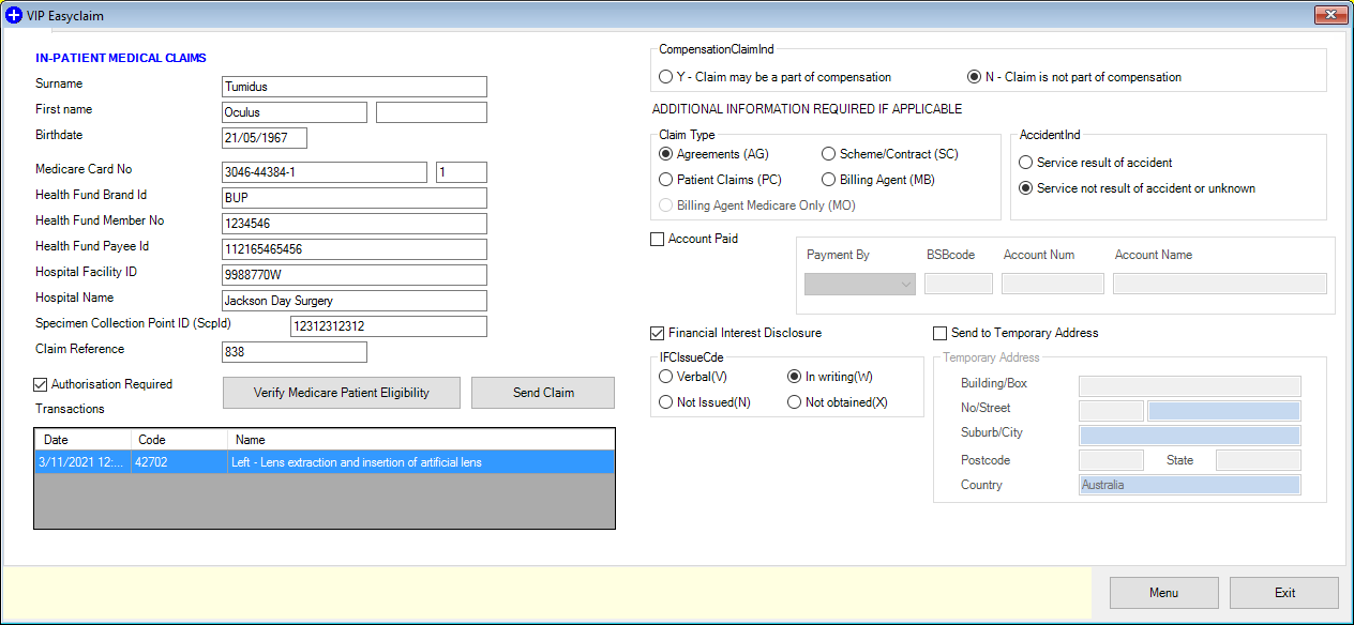
- Press the Medicare button. The In-Patient Medical Claims screen will pop up.
- Check all details are correct.
- Press Send Claim button to send the No Gap claim.

If the fund is part of an umbrella organisation, such as Australian Health Service Alliance, the umbrella organisation will populate the Subsidiser field.
NOTE The Fee and Subsidy columns will contain the same value, resulting in a No Gap claim for the patient.

Item Ordering for Health Fund Subsidisers
When a Health Fund is used as a Subsidiser, items on the invoice must be ordered from the highest to lowest subsidiser fee for claiming to be valid. This setting must be enabled for each Subsidiser in Bp VIP.net.
- Log in to Bp VIP.net as an administrator with access to the Setup Charges function.
- Select Setup > Charges from the menu.
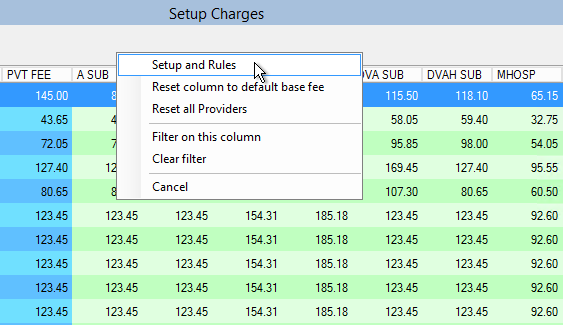
- Right-click the heading column for the subsidiser (green section) that you want to set item ordering for, and select Setup and Rules.
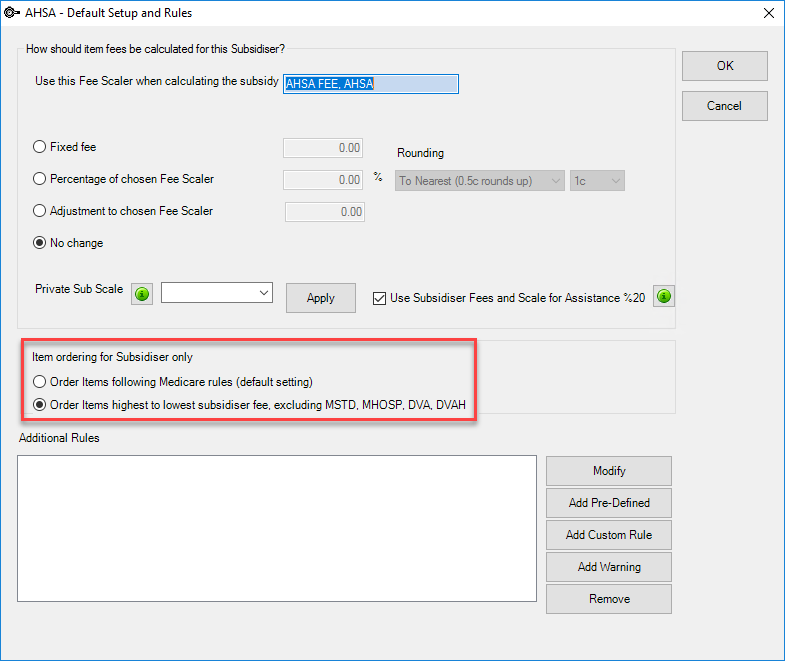
- The Default Setup and Rules window will appear.
- Select Order Items highest to lowest subsidiser fee, excluding MSTD, MHOSP, DVA, DVAH.
- Select OK to save.


Last modified: 28 June 2022