A Practitioner's Availability is their working hours, or bookable times, as displayed in the appointment book. Availability is set in a defined schedule, but can also be switched off ad hoc if necessary.
In this article:
About Practitioner Availability
Practitioner Availability is used to set a Practitioner's working hours to display when they will be available to see patients and from which locations. Practitioner Availability uses an appointment to set a practitioner's available time in the calendar. These can be set to recur daily, weekly, monthly; to end on a specific date or to continue indefinitely.
The Location set in the Practitioner Availability appointment sets a Location/Not Available label at the top of a Practitioners Diary. A slash and colour change is used to denote a change in location during the day.
![]()
When an Appointment is made, the Location of the appointment is automatically selected based on the practitioner. This information is based on Practitioner Availability which can effect the Provider Number and contact details used on an invoice as well as the location information sent in an SMS Reminder.
Practitioner Schedule
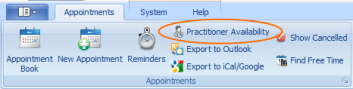
Select Appointments > Practitioner Availability to access the Practitioner Schedule screen.
|
Field |
Description |
|---|---|
|
Day/Week View button |
Click this button to toggle between Day and Week view for the selected practitioners. |
|
Practitioners |
Select the Practitioners you wish to view and create a schedule for. |
|
Work Week Includes |
If your working week includes a Saturday and/or Sunday, select these boxes accordingly to show the relevant days within the Week view. |
|
Calendar |
Select the date for when you would like to set your availability. Click Today to move the calendar to display Today's date. You can also create a recurring appointment so that your availability will be set the same for each selected day. |
|
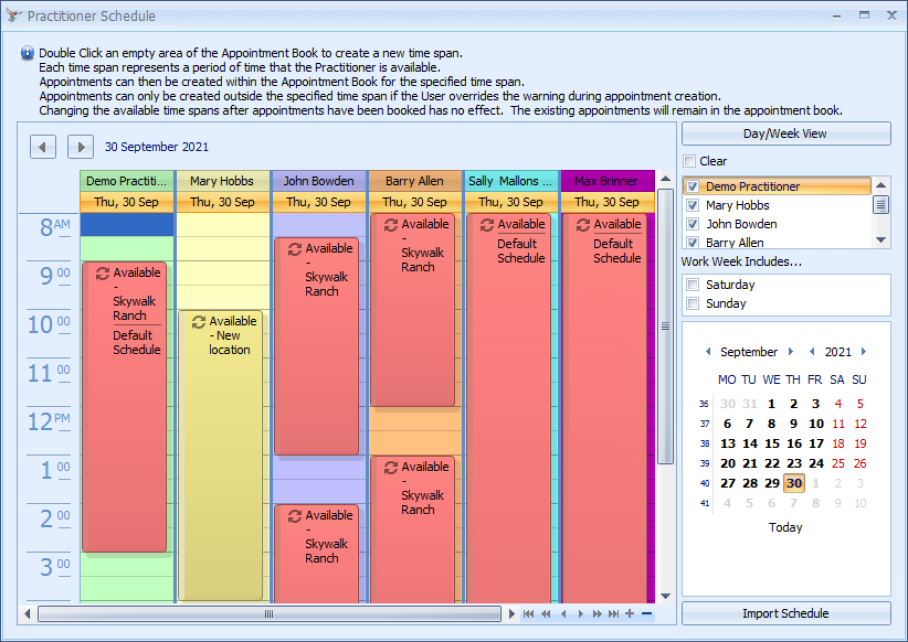
Practitioner Schedule |
The practitioner schedule shows those time slots available for the selected practitioners. The colours and name indicate different locations. |
Practitioner Availability Menu Options
From the Practitioner Schedule, screen right-click on the provider's name to open additional menu options.

|
Field |
Description |
|---|---|
|
Create New Appointment |
Select New Appointment to create a new availability timeslot within the calendar. This option can also be invoked by double-clicking on any timeslot within the Practitioner calendar. |
|
Create New Recurring Appointment |
Select New Recurring Appointment to create a series of recurring availability timeslots within the calendar e.g. every Tuesday. This option can also be evoked by double-clicking on any timeslot within the Practitioner calendar and selecting the Recurrance button. |
|
Go to Today |
Moves the visible calendar to today. If the Week View is displayed then today is highlighted. |
|
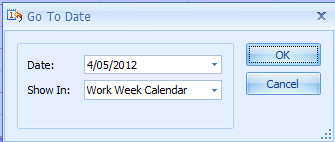
Go to Date... |
Displays the Go To Date form.
The date selected is displayed in the Practitioner Availability calendar in the view selected. |
|
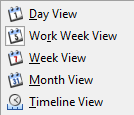
Change View to |
Use the Change View To option to change the view of the Practitioner Availability schedule displayed. |

Setting Practitioner Availability
To create a new available time slot:
- Select the date and double click the appropriate start time, or select the date, right click and select New Appointment.
- The Available for Appointments... form is displayed.
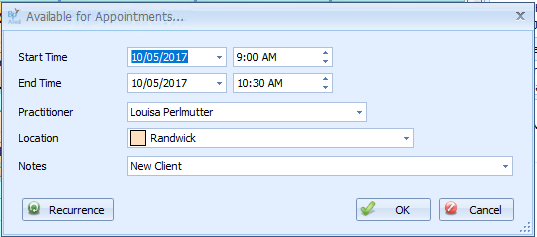
- Select the Start Time and End Time required by either using the arrows or typing in the date and time.
- Select the Practitioner from the drop-down list.
- Select the Location from the drop-down list.
- Click OK if this is a one off available timeslot. Click Recurrence if this is a recurring available timeslot.
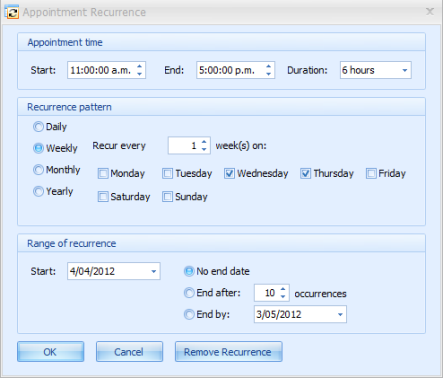
- The Appointment Recurrence form is displayed.
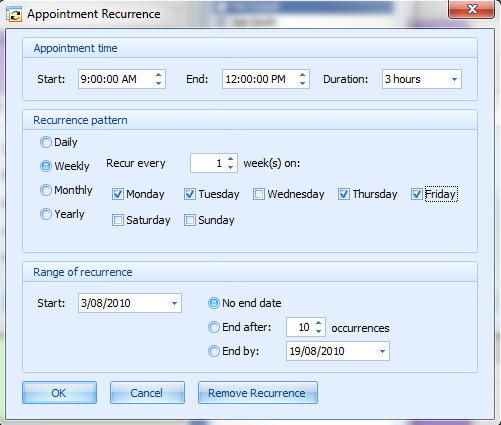
- The Appointment time will default in for the Available for Appointments form.
- Select the Recurrence pattern for how often the meeting is to recur.
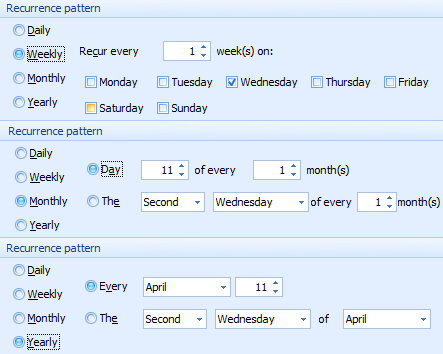
What values need to be selected depend on whether a Daily, Weekly, Monthly or Yearly option are chosen as shown in the second image above.
- Select the Range of Recurrence - how many occurrences of the meeting are to be created or the date of the last occurrence.
- Start date will default from the Available for Appointments form.
- Click OK to save the Recurrence.
- Click OK to create the Availability schedule.
TIP A recurring availability appointment can also be created by selecting the date, right clicking and choosing New Recurring Appointment.
Make a Practitioner Not Available
Sometimes a Practitioner may not be available to work their usual hours, for example, they go on holiday. There are two ways to set up Bp Allied to avoid making appointments on those days.
- Set a Meeting Appointment for each day that the practitioner is away. A recurring Meeting appointment could also be used. The steps for using these options can be found in the linked pages.
- Set the Practitioner Availability Scheduler to "Not Available" as shown below. How to use this option is covered below.

To set the Practitioner Availability to "Not Available" there needs to be no appointment timeslots set for the days that the Practitioner is away. The appointment is end dated and a new appointment series is created from the date they are back at work. Using this method if a practitioner is not available for a longer period of time. When used in conjunction with Visible Calendars > Show only available option, the Practitioners calendar will not display on the days the practitioner is not available.
TIP If your practitioner availability is set using individual appointments, these can just be deleted for the relevant days.
Updating the Practitioner Availability Schedule - End Dating a recurring schedule
- Select Appointments > Practitioner Availability.
- The Practitioner Schedule form displays.
- Double click on the relevant Practitioners appointment in the schedule.
- The Open Recurring Item dialogue box will display.
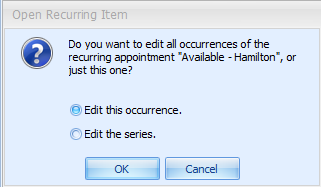
- Click on Edit the Series.
- Click OK.
- The Available for Appointments... screen will display.
- Click Recurrance.
- The Appointment Recurrence screen will display.
- Go to the Range of Recurrence section.
- Set the End by: date to the last day of work.
- Click OK.
- Click OK.
- Repeat for any additional timeslot appointment series for the relevant practitioner.
- Create a new series of available timeslots for the Practitioner from the date they return.
Find a Practitioner's Free Timeslots
The Find Free Time screen is used to find the next available appointment times for a particular practitioner or for all practitioners.
Select Appointments > Find Free Time from the top toolbar.
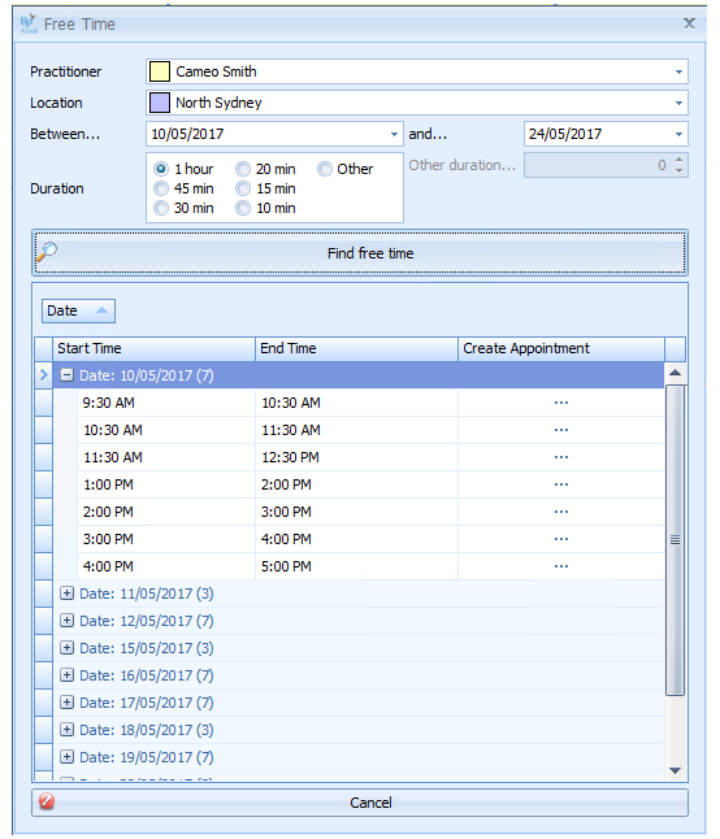
- Select the Practitioner you wish to find the available time for, or select Any to search for the available time for all Practitioners.
- Select the Location for which the appointment is to be made. This defaults to the location currently selected in the Status Bar.
- Select the date range for which the appointment is required by either using the drop down arrows to select the date from the calendar displayed or by typing in the date required.
- Choose the duration of the appointment by clicking on the radio button or choose Other if the duration required is not listed.
-
Use the drop arrows to change the value to the required Duration. This field increments in 10 minute intervals or type in the Duration required.
- Click Find free time to see a list of available times within the Results Window below, based on the options selected above.
- The results are grouped by Date as the Date field is displayed in the Group By box.
- Click on the + to expand the results for a specific date.
- See the Reports section for more information on Grouping and Filtering results.
- Click the Create Appointment button to create a new appointment within this time slot.
- Click Cancel if you do not wish to proceed with making an appointment.
NOTE This field is enabled when the Other Duration radio button option is selected.
The Results Window lists all appointments available during the date range selected for the duration selected.


 AU
AU 