You can create multiple custom views of the Appointment Book and switch between views at any time. A view is an appointment book that shows only the providers you have selected. Appointment book views have been designed to allow larger practices to manage practitioner diaries in groups. These groups might relate to location or discipline.
On this page
Before you start
- The Personal View is the default for all users and is based on the view that is set up in Options > Calendars > Calendars I can see.
- Regardless of view type, a user can only see calendars that they have been allowed access to via an administrator using Calendar Administration, or by an individual user allowing a user access. The user will see all calendars they have permissions to view in the custom appointment book views. Calendars cannot be turned on and off as can be done in Personal View.
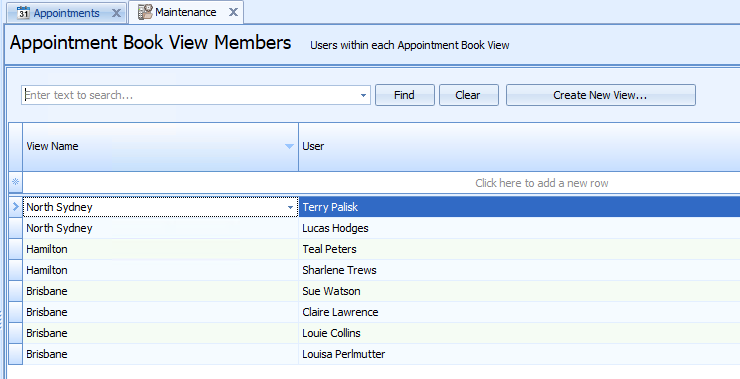
Set up appointment book view
Appointment book views are set up to create a custom view based on any grouping that the practice wants. After the groupings have been named then the practitioners are assigned to them.
Add a new View Name
- Go to Data Maintenance > Appointment Book View Members.
- Click Create New View.
- Enter the View Name.
- Click OK. The view name will be added to the View Name drop down list.
TIP This can also be added inline like drop down lists in the Client Details. Read more...
Add users to a view
- A user can be added to multiple views
- Disabled users are not displayed in the drop down list and can not be added to a view.
- When a user is disabled they are automatically removed from any view except the Personal View.
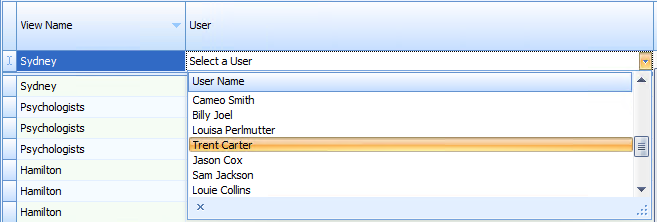
- Click Add New Row at the top of the list.
- Select a View Name.
- Tab to User and select the relevant user.
- Tab off the row to add the row to the list.
Removing a view name (added in error or duplicate)
If a view name has been added in error this can be deleted if it has not been assigned to a view.
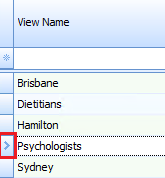
- Go to Data Maintenance > Appointment Book View.
- Highlight the row to be deleted by clicking on the chevron > icon on the left-hand end of the row.
- Press Delete on your keyboard. The row will be removed.
TIP If the row can not be deleted due to linked records, you may need to unlink a record first.
Switching between views
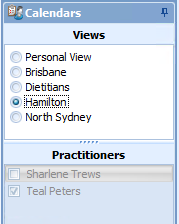
- Views can be switched between via the Calendars option on the right hand tool bar. Use this option to switch between the personal view and the other views created above.
- Calendar navigation buttons are also disabled when in a custom view.
- Only calendars that the logged-in user has permission to view will be shown as “ticked” in the Practitioners list. Use Calendar Administration to change a users access.
- If a calendar is unticked, the logged-in user does not have permission to view this practitioner’s calendar.
- Users cannot change which calendars are displayed in a custom view via the Practitioners tab. This option is only available for the Personal View.
When in Personal View
- Tick or untick Views to be displayed in the appointment book.
- To configure access to each Calendar see Options > Calendars or with Administrative access via Options > Calendars > Calendar Administration.
- Only the calendars that the user has permission to view are displayed here.
- If Show Available is turned on, the Calendars can not be turned on or off from this option. They must be turned on using the Show option in Options > Calendars.
When in a custom Appointment Book view
- Only calendars that the logged in user has permission to view will be shown as “ticked” in the Practitioners list.
- If a calendar is unticked, the logged in user does not have permission to view this practitioner’s calendar.
- Users cannot change which calendars are displayed in a custom view via the Practitioners tab. This option is only available for the Personal View.
- Changes to custom views are managed in Data Maintenance > Appointment Book View Members.
NOTE The Tab View has a limit to the number tabs that can be displayed on screen which is dependent on the user’s screen resolution. A maximum of 23 tabs can be displayed on a resolution of 1280 x 1024. Best Practice Software recommends the use of custom appointment book views if all required calendars cannot be displayed.


 AU
AU 