Creating a quote allows proposed services to be sent via Tyro HealthPoint to a client’s health fund, to establish the rebate to be paid against the service(s). The rebate amount is correct at the time of submission and is subject to change. Creating a quote for a client to send to a health fund can give the client an estimate of the gap they will be required to pay for a particular service.
In this article:
Before you start
All quotes must be sent for a single:
- Practitioner,
- Modality,
- Service date. This is automatically set to the date that the quote is submitted.
Multiple appointments or items that occur on the same day can be sent on the same quote to a maximum of 16 items.
A quote is submitted in the same way as a claim, but is Rejected by the client after swiping their health fund card. When the claim is rejected by the patient, the rebate and loyalty details for the items are saved and the claim is set to a status that is disregarded by the health funds. If a quote is accidentally accepted, Bp Allied will automatically send a cancellation of the claim to ensure it is not paid.
TIP See Create and Send a HealthPoint Claim
There are two methods to create a quote:
- From an appointment via the right-click menu, select Create Quote.
- From the Invoices toolbar, click Create Quote.
Quote numbering
Quote numbers are based on the same numbering as used by invoices. If Invoice Number per Location is enabled, the quote number will be based on the Location selected.
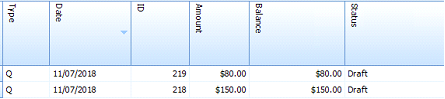
A Quote is displayed in the transaction grid in the Invoice screen with the Q marker in the Type column.
Create a quote via the right-click menu
-
From the Appointment Book, right-click on the relevant appointment and select Create Quote to automatically link the quote to the appointment
-
A new quote will be created for the selected client based on the Consultation Type, Practitioner and Location selected in the appointment.
-
The Add Item button can be used to add additional appointment or non-appointment items.
-
Once a quote has been created, it can be accessed and unlinked from the right-click menu on the appointment.


NOTE Please note that all items claimed for need to occur on the same day to be submitted.

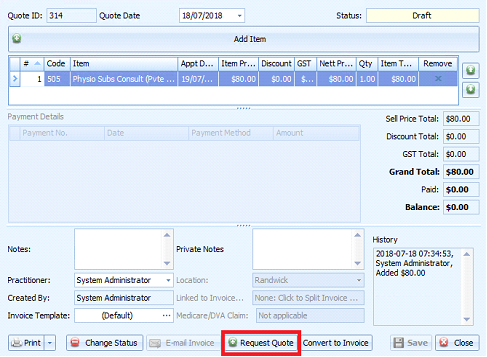
Create a quote via New Quote button
- From the Invoices screen, select the relevant client from the Bill to drop-down.
- Click the New Quote button.
- Select the Location.
- Select Add Item.
- Select the Item to be quoted on.
- If no appointment has been made, leave the Appointment field blank, as [Select an Appointment Date/Time].
- Click the Add button to add the item to the appointment, without an Appointment Date.
- The Add Item button can be used to add additional appointment or non-appointment items.


NOTE Please note that all items claimed for need to occur on the same day to be submitted
Requesting a Quote
- From the Quote, click the Request Quote button.
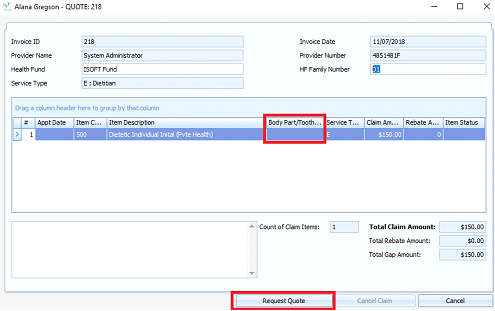
- The Request Quote screen will display. See About the Claim & Quote Screen for more information.
- Add a Body Part/Tooth Number if required (3 digit maximum). Details can be obtained from the relevant Health Fund.
- Click Request Quote.
-
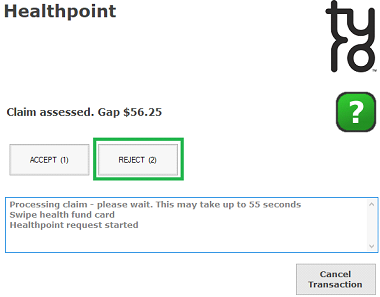
Request the client to swipe their Health Fund card. The claim is assessed by the fund and the client acceptance screen is displayed.
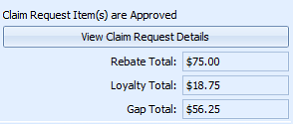
- Click REJECT.
- This will save the rebate, loyalty and gap amount for the relevant items that have been assessed, and will not send the claim for payment to the fund.
- If Accept is accidentally pressed, an automatic cancellation is initiated. The client is required to swipe their health fund card to process the cancellation.
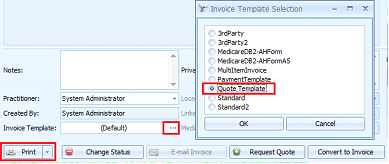
- Select Quote Template.
- Click Ok.
- Click Print.
TIP A quote can be printed in the same way as an invoice. In the Invoice Template field, select the ellipses […] to display the Invoice Template Selection screen. A default Quote Template can be set in Options > Invoices. The Quote template can be amended to include logos and practice details. The content of the grid and the totals available cannot be changed.


 AU
AU 