myPractice has been rebranded Bp Allied, a product of Best Practice Software.
Support is available Monday to Friday, 9am to 5pm AEST Version 4.18 Published 5 December 2019
Email: alliedsupport@bpsoftware.net Click RemoteSupport from within myPractice for assistance Phone: 1300 40 1111 (in Australia) or 0800 40 1111 (in New Zealand)
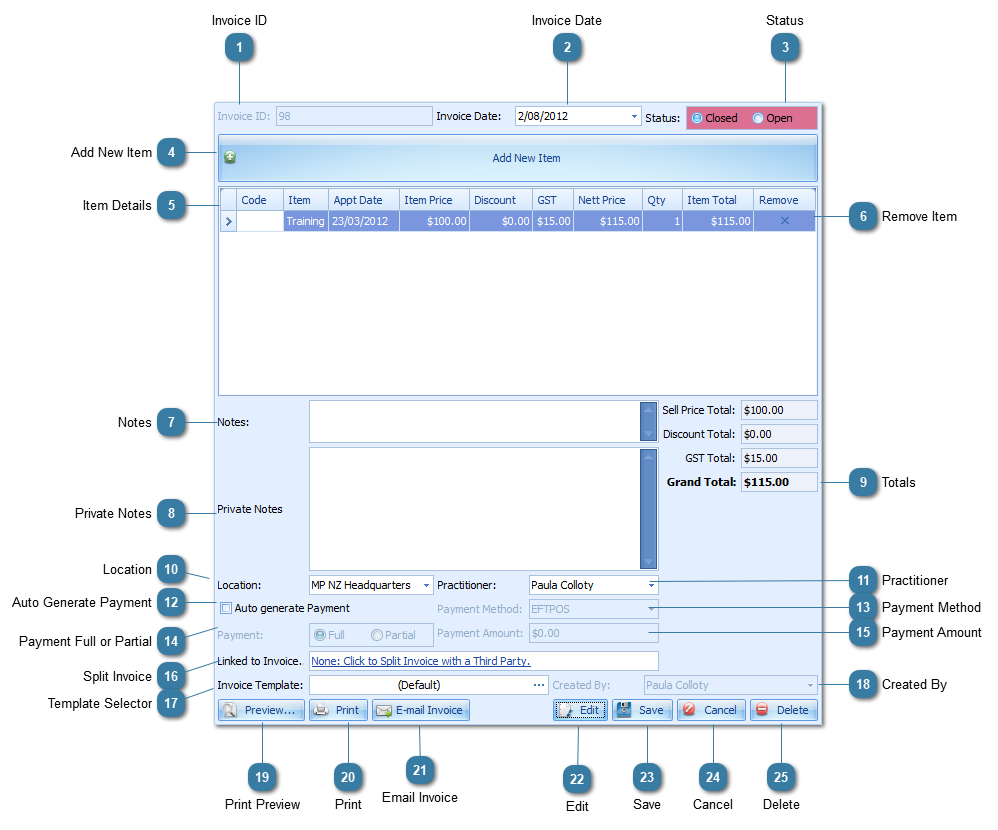
Editing an Invoice
Invoices can be edited both at the time of creation or at a later date. The fields on the Invoice screen are explained below.
To edit an Invoice
Click Edit
The fields are are greyed out will become editable
Invoice ID
Displays the Invoice ID number, please note this number is automatically generated but you can set your next Invoice ID and Payment ID under System > Options > Invoices > Invoice Numbering Options.
The size of the Notes and Private Notes fields seen on the screen can be customised as fields within the Client Details can be. These are the only fields within the Invoices screen that can be changed.
Displays the selected payment method that is either set by default or the actaul payment method once payment has been made and associated with the invoice.
If the field that needs editing is greyed out then the Edit button needs to be clicked to enable it to be edited. Most fields can be edited with the exception of the Invoice ID and the Created by fields. These are never editable.