Choosing Print Preview allows the viewing of a document as it would be printed by your printer. Print Preview opens in a window separate to the Bp Allied window. it needs to be closed before you can continue to use Bp Allied.
To view, click on Print Preview
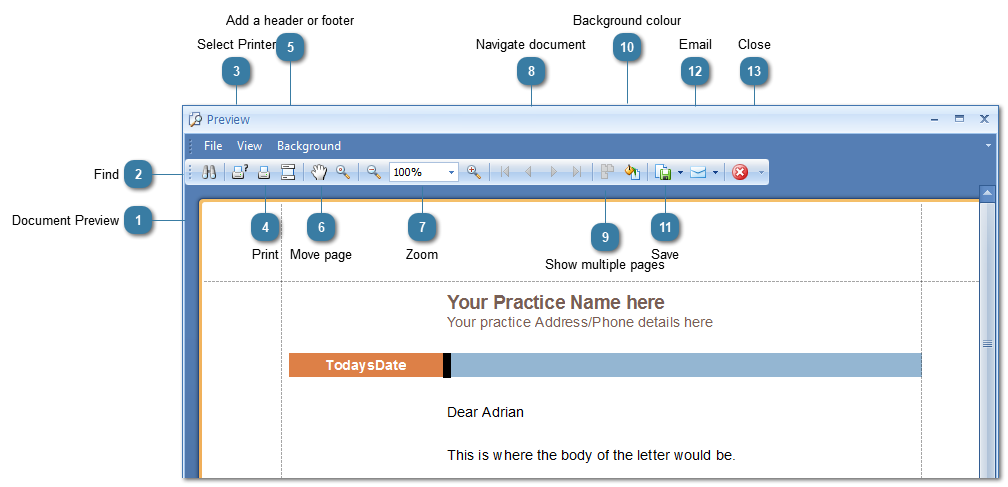
Print Preview displays
 Document PreviewA preview of your document.
|
|
 FindSearch for text in the document
|
|
 Select PrinterSelect the Printer to print to
|
|
 PrintClick the Printer icon to print to your default printer
|
|
 Add a header or footerInsert a header or footer into the Document
Ordinarily this would be done in Bp Allied on the template to save recreating it for each document.
|
|
 Move pageClicking the hand allows use of the mouse to move (or Pan) the document
|
|
 ZoomClick to Zoom in or out
|
|
 Navigate documentUse the arrows to move backwards and forwards through a multi-page document
|
|
 Show multiple pagesShow multiple whole pages at once
|
|
 Background colourChange the background colour of the document.
Ordinarily this would be done in Bp Allied on the template to save changing it for each document.
|
|
 SaveSave the Document. There are several file types available including PDF.
Ordinarily this would be done in Bp Allied so that it can be saved to the Client record
|
|
 EmailEmail the Document. There are several file types available including PDF.
Ordinarily this would be done in Bp Allied so that it can be saved to the Client record
|
|
 CloseClose the Preview
|
|