
This article describes the process for creating invoices and payments outside of the appointment workflow and the receipting process. For guidance on creating an invoice from an appointment, see Create an Invoice from an Appointment.
In this article:
Before you begin
Ensure the following information has been added to the Practice and locations screen:
- your business name
- NZBN
- practice information
- location details
- invoice information
- bank details
- GST settings.
See Set Up Your Practice for more information on setting up these details.
Create an invoice outside of the appointment workflow
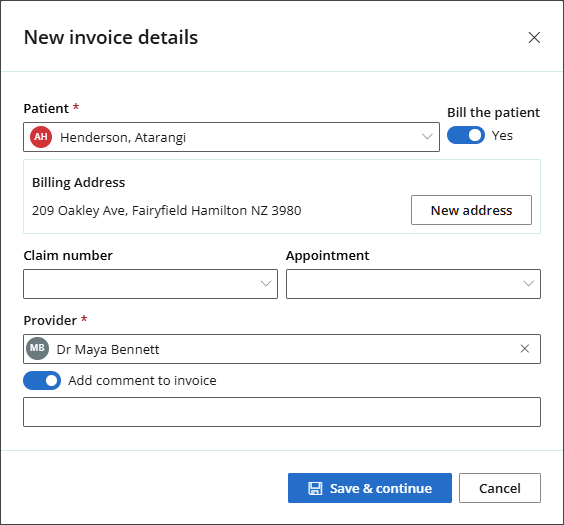
- Select Finance > New invoice. The New invoice details screen will appear.
- Search for the Patient that the invoice is for, or create a new patient if required.
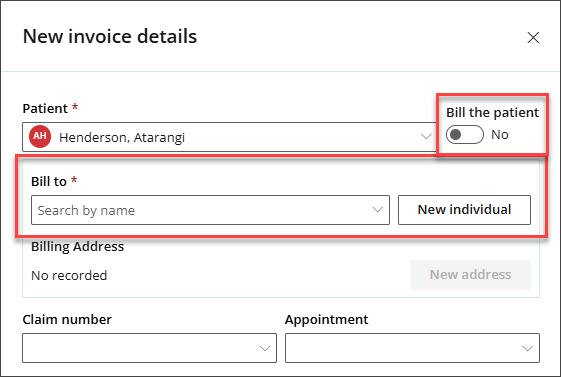
- Toggle the Bill to patient switch to Yes if the invoice is being billed to the patient.
- If the invoice is not to be billed to the patient, in the Bill To: field, search for the individual by name or click New Individual to add a new person for billing purposes.
- If the invoice is associated with a claim, select the Claim from the dropdown.
- If the invoice is related to an appointment, select the Appointment from the dropdown.
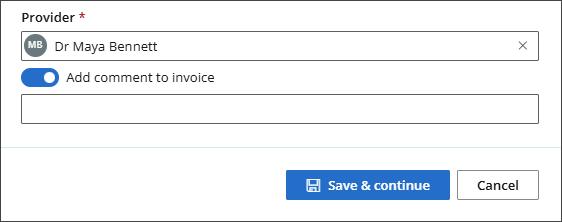
- Select a Provider from the dropdown.
- To Add a comment to the invoice, activate the toggle and enter your comment in the text box field.
- Click Save & continue.
- The New Invoice screen will be displayed, featuring a single line item. Select the Service date and then search for the Item number.
- To bill multiple item numbers, click the + Add dropdown and select either Add Single line item or Search for / Add multiple items.
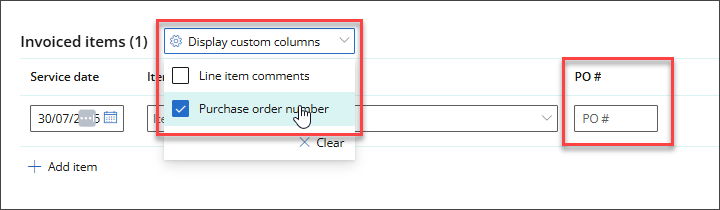
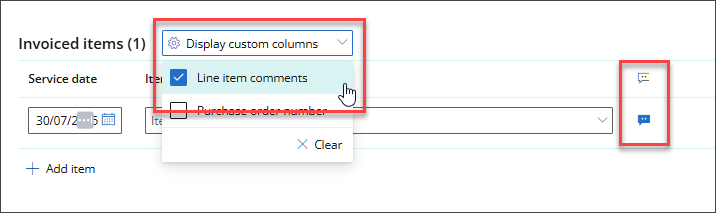
- If the invoice items require the entry of a purchase order number, go to the Display custom columns sub-menu and tick Purchase order number. The PO# column on the invoice will display; enter the purchase order number.
- To include a line item comment, go to the Display custom columns sub-menu and tick Line item comments. A comment icon will appear on the invoice.
- To edit the Bill To, Provider or Invoice Notes, click the pencil icon in the top-right corner. The New Invoice Details modal will open. Make your changes, then click Save & continue.
- Click Pay to save the invoice and proceed to the New Payment screen.

TIP Depending on the configuration of the item number in fees and schedules, you may have the option to change the quantity or fee for items listed on the invoice.
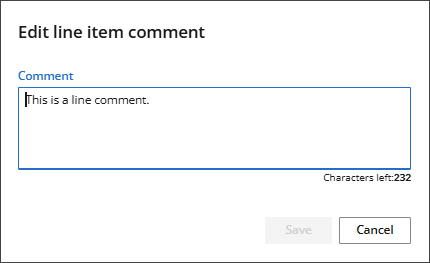
Clicking this icon opens the Edit line item comment modal, enter your comment and click Save.

Create a payment without an invoice
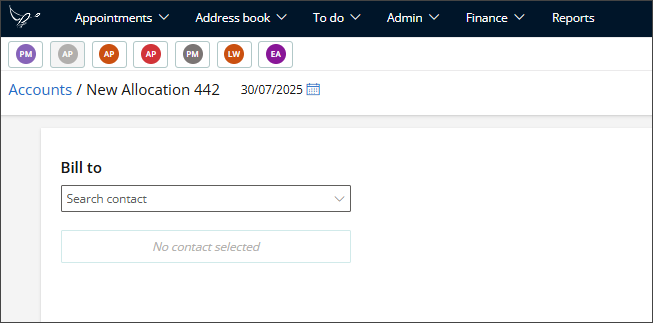
- To create a payment without an invoice, go to Finance > New Payment. The New Payment screen will appear.
- Search for a patient or contact to Bill To. The Accounts screen will appear.
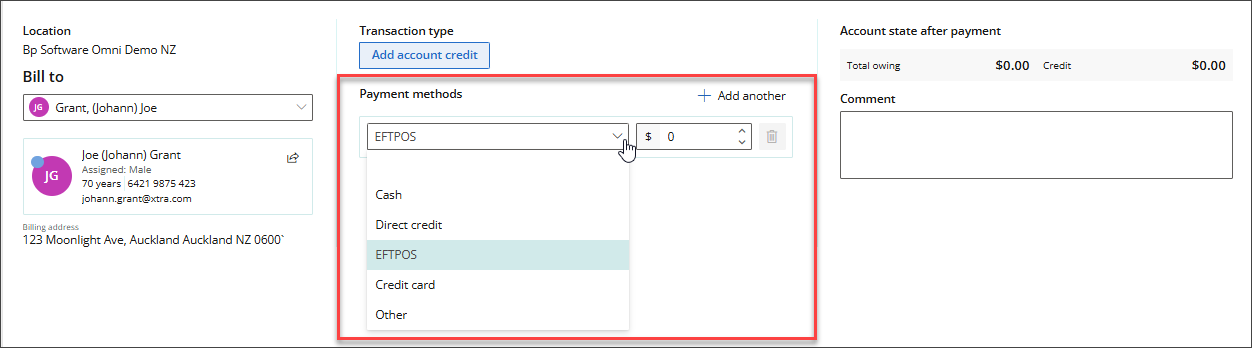
- Select a Payment method from the available options and enter the payment Amount.
- To process the payment, click Save.
TIP Any unpaid invoices for the patient or contact will be shown in the Invoice items list.
If the patient wants to use multiple payment methods, click Add another. Select a Payment method from the available options and enter the desired amount for the second payment method in the Amount field.
NOTE If a Paid invoice is incorrect, the payment needs to be reversed before the invoice can be adjusted.
Making and adjusting payments
Receipting
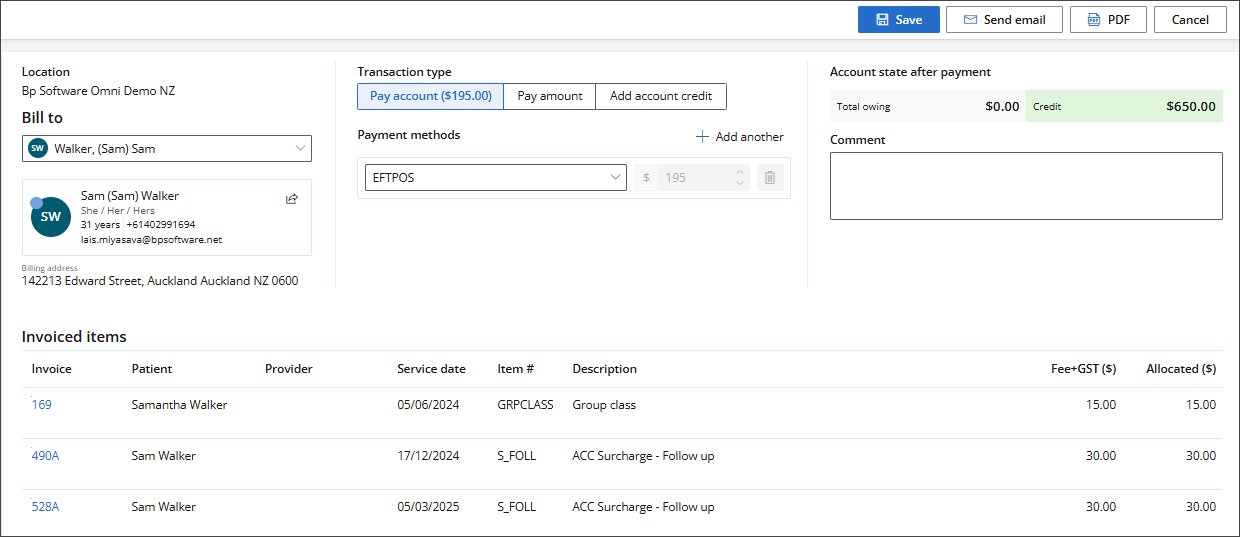
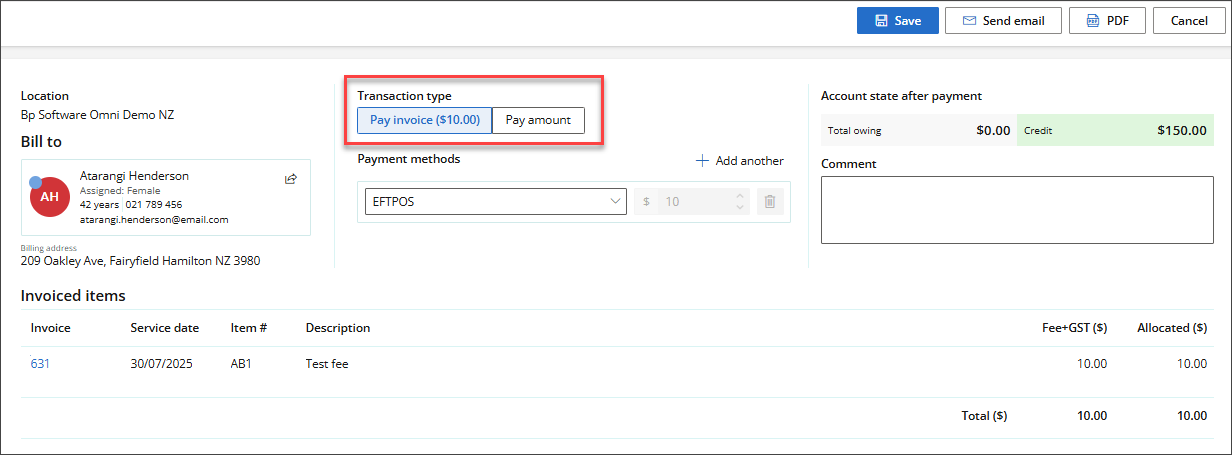
After selecting the Pay button from an invoice, you will be directed to the Payment screen.
The default Transaction type for invoices is Pay invoice; however, you may use different options, such as Pay amount.
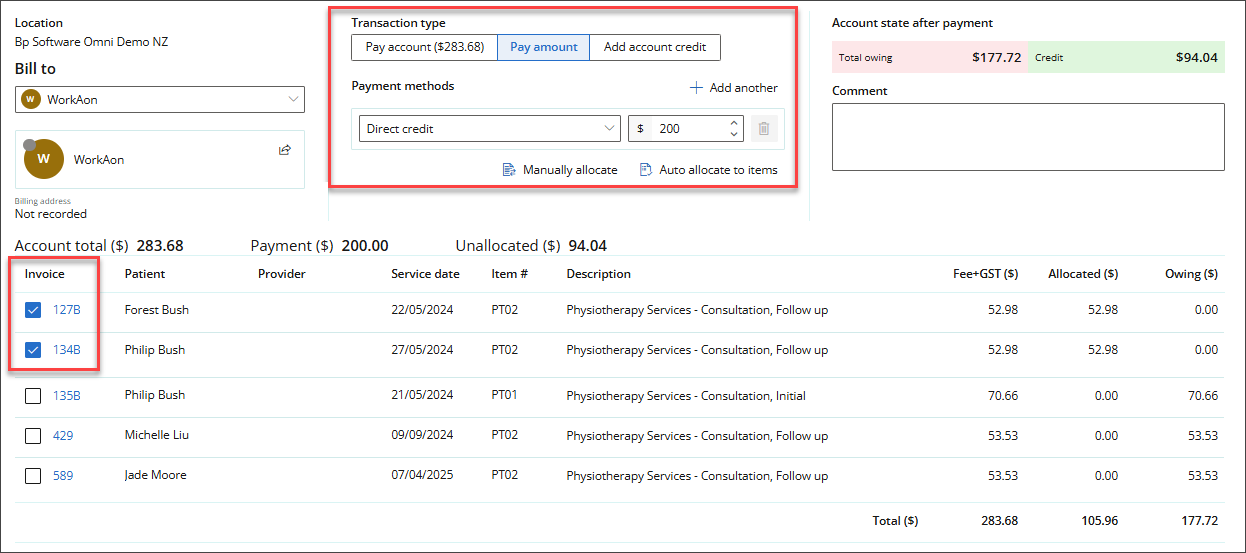
If you are receipting a payment for an account holder that covers multiple patients, set the Transaction Type to Pay amount.
If the payment amount is greater than the total owing on the account, any excess will be credited to the account. To allocate payments to specific patients, tick each invoice that has been paid.
The default Payment method is EFTPOS; however, it can be changed to account credit, cash, direct credit, credit card, or other options.
Once you have allocated the payment amount, use the action buttons located at the top right of the screen (Save, Send Email, or PDF) to complete the process.
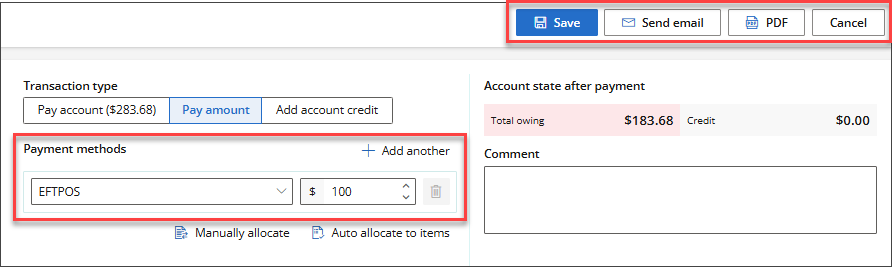
- Save will take you back to the appointment book
- PDF will generate a PDF copy that can be used to send to the patient/client
- Send email will generate this receipt and send it directly to the clients email
- Cancel will take you back to this patients' account screen
Email a tax invoice
NOTE Before emailing a tax invoice, ensure that an email address is recorded in the patient’s demographic details and that the practice has an email address entered in Location details.
- Select Finance > General accounts and search for the patient you wish to send the tax invoice to.
- Select the invoice in the Details column. The Invoice screen will appear.
- Select Send email from the options on the top-right of the screen.
Last updated: 30 July 2025.


 AU
AU 