This article explains how to create and pay a private invoice once a provider has added services to an appointment, and how to email tax invoices.
Before you begin
Ensure the following information has been added to the Practice and locations screen:
- your business name
- NZBN
- practice information
- location details
- invoice information
- bank details
- GST settings.
See Set Up Your Practice for more information on setting up these details.
Create an invoice from an appointment
NOTE You can not change the patient, provider or appointment details while invoicing directly from the appointment book.
- When the appointment status changes to With provider, an envelope icon will appear on the appointment in the appointment book.
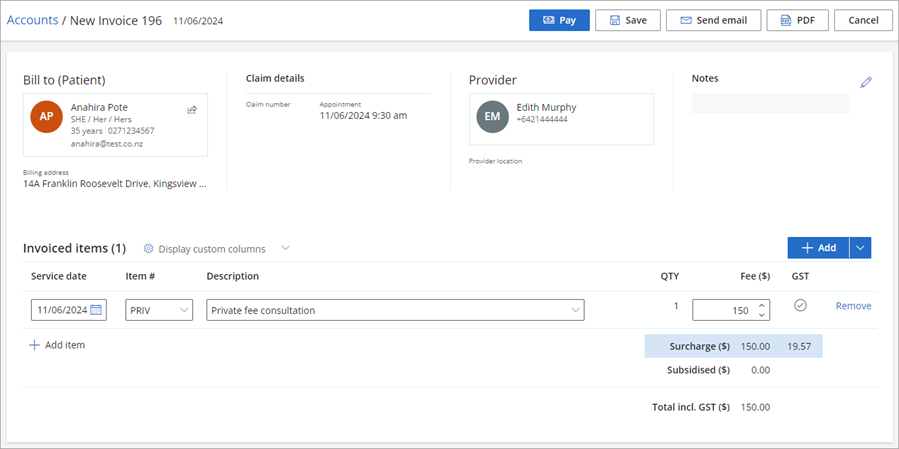
- Click Add item to add items to the invoice if required. Search for the item by number or description.
- If items on the invoice require a purchase order number to be entered, toggle Include purchase order number on and enter the purchase order numbers in the PO# column.
- If required, click the 'edit' (pencil) icon in the top-right corner to change who the invoice is billed to.
- If required. click the 'open' icon to edit the patient or clients details, or to edit the Bill to details if the invoice is not billed to the patient.
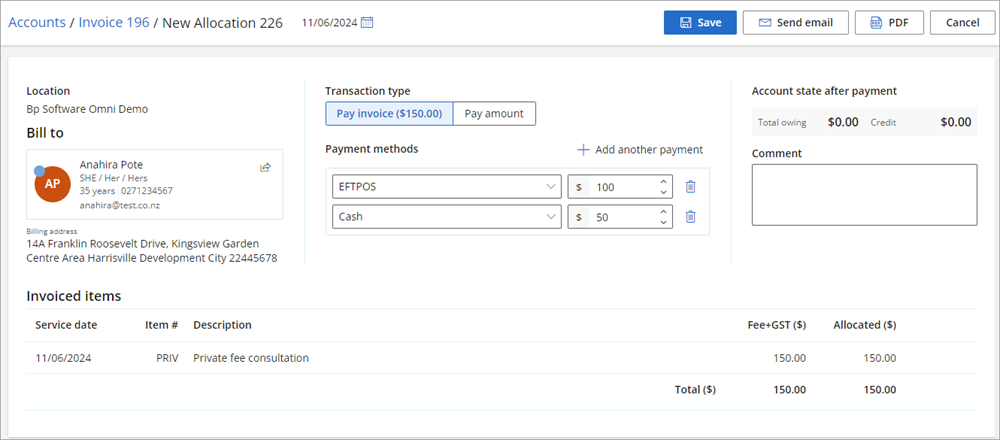
- Click Pay to save the invoice and proceed to the New Payment screen.
![]()
Once the patient or client has returned to the front office to pay for the appointment, click the appointment to bring up the context menu and select Invoice. The New Invoice screen will appear. The Invoice header contains the account holder, provider and invoice notes.

Depending on how the item number has been set up in fees and schedules, you may also have the option to change the quantity or fee for items on the invoice
If the invoice is not being paid straight away, click Save to save the invoice, or click PDF to save the invoice and generate a PDF copy.
Invoicing group appointment patients
For Group appointments, select the appointment from the appointment book. Once the patient is ready to be invoiced the envelope icon will appear next to their name. Select the envelope from this screen to invoice the patient.

Pay an invoice
- In the New Payment screen, select the Payment method from the list of options.
- If the patient has unpaid invoices allocated to them, you will have the option to pay the full account.
- Click Save to save the payment, or click PDF to save the payment and generate a PDF copy of the receipt.
If the patient or client wishes to use more than one payment method, click Add another payment. Select the payment method from the list of options and enter the amount they wish to pay via the second payment method in the Amount field.

Email a tax invoice
Once an invoice has been paid, you can email a copy to the patient.
Before you can email the patient a tax invoice, ensure that the patient has an email address listed in their demographic details, and that the practice has an email address entered in Location details.
- Select Finance > General accounts and search for the patient you wish to send the tax invoice to.
- Select the paid invoice in the Details column. The Invoice screen will appear.
- Select Send email from the options on the top-right of the screen.
Finalise an appointment with no charge
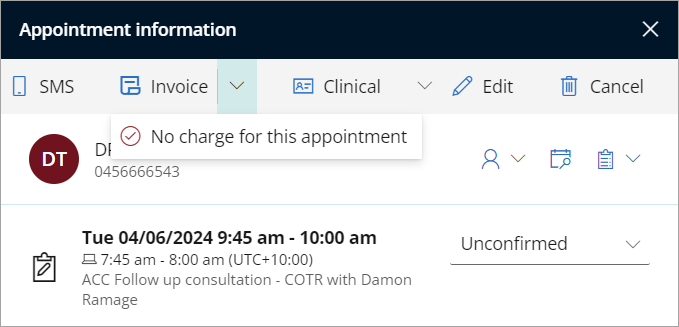
- Click on the appointment booking to open the Appointment information screen.
- Click on the Invoice drop-down menu and select No charge for this appointment.
- Enter a reason for the no charge appointment.
- Click Save with no charge.
NOTE This selection may only be edited up to the point at which the Invoice is finalised.

Related topics
Last updated 11 July 2024