IMPORTANT eOrdering should be configured through the eOrdering setup screen available via Contacts > Setup.
This article describes how to create a template to use for imaging requests.
Unlike pathology forms, there is no standard imaging request form. You can assign a single request layout to more than one imaging laboratory.
Create an imaging request layout
- Select Setup > Preferences > Imaging from the main Bp Premier screen.
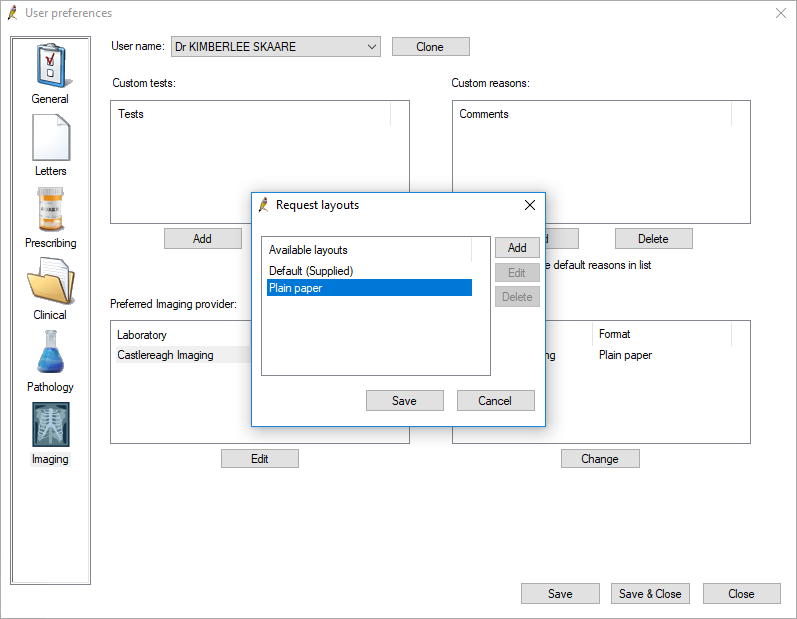
- Select the imaging provider that you wish to set up the layout for and click Change to display the Request layouts screen.
- Any imaging layouts will appear as well as the default ‘Plain paper’ layout.
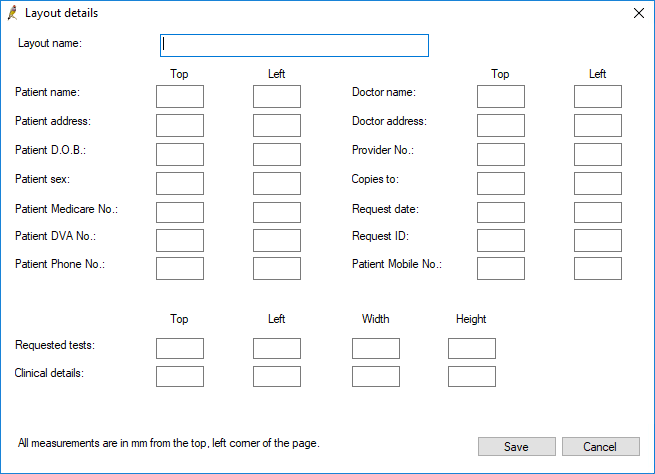
- If the lab requires you to use preprinted stationery and it is not already listed, you will need to create a layout that suits their stationery. Click Add. The Layout details screen will appear.
- Enter the measurements in mm from the top left corner of the page for each element. Click Save.
- The new layout name will now appear in the Request layouts screen. Select the new layout name and press Save to update the imaging provider to use this layout.
- Check that the provider now shows the new layout name under the Format column.
- You can assign the new layout to any other imaging providers you create.
- In the Preferred Imaging Provider drop-down list, select the default imaging provider for the logged-in user. The imaging provider selected here will be automatically selected when the user creates an imaging referral from the patient record.
- Click Save & Close to close the User preferences screen.


Related topics
Last updated: 31 May 2024.