
This article describes how practices can use the Bp Premier Reporting Tool to import MyMedicare Patient CSV lists from HPOS, review them, and then update the MyMedicare registration statuses of the relevant patients in Bp Premier in bulk.
In this article:
Before you Begin
To set up and use the Bp Premier Reporting Tool, you will need the following:
- The user name and password of a Bp Premier user with the Reports permission set to Allow access.
- A CSV file containing the exported MyMedicare Registered Patient List from HPOS. See Export MyMedicare Patient List as a CSV file from PRODA > HPOS for more information.
TIP The MyMedicare Registered Patient List CSV file should not be edited before importing into Bp Premier; incorrect formatting may cause the Bp Premier Reporting Tool to error.
Click here to view the release notes for the Bp Premier Reporting Tool.
Which fields will be updated by the MyMedicare Import Registration Status Utility?
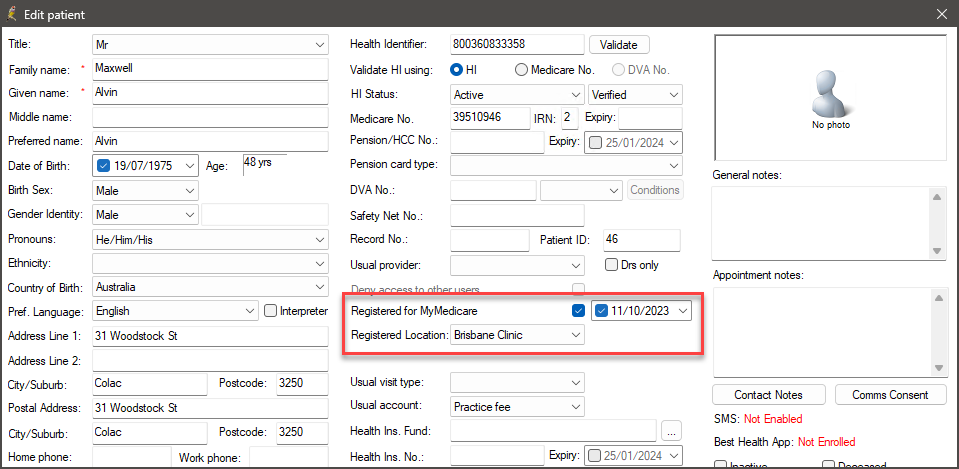
The MyMedicare Import Registration Status Utility updates the following fields in the patient demographic window:
- Registered for MyMedicare
- MyMedicare registration date
- Registered Location
The MyMedicare Import Registration Status Utility will not record the Preferred GP in the Usual Provider field; the patient's Preferred Provider must be modified manually.
Download and install the Bp Premier Reporting Tool
- Click here to Download the Bp Premier Reporting Tool.
- The file will download to the default download directory for your version of Windows, such as Favourites > Downloads. Alternatively, you may be asked to Open or confirm that you want to download the file.
- Copy the downloaded file to the Bp Premier server or any workstation and double-click the file to start the installation.
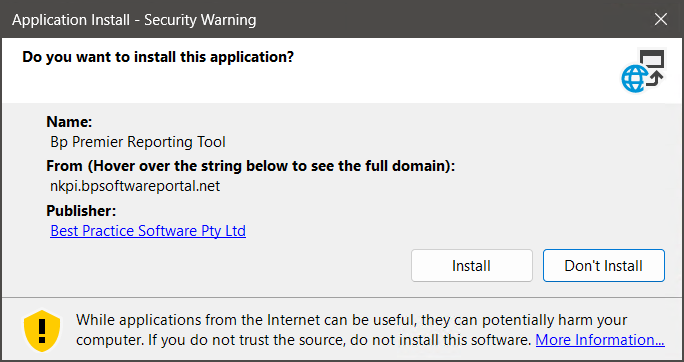
- Windows User Access Control or SmartScreen may prompt for permission to proceed. Click Yes. The Application Install screen will appear.
- Click Install. A progress dialog will show the report utility being installed.
- When the utility has been installed, the Bp Premier Reporting Tool will open. A Bp Premier Reporting Tool icon will also be created on the Windows desktop.

Run the Bp Premier Reporting Tool
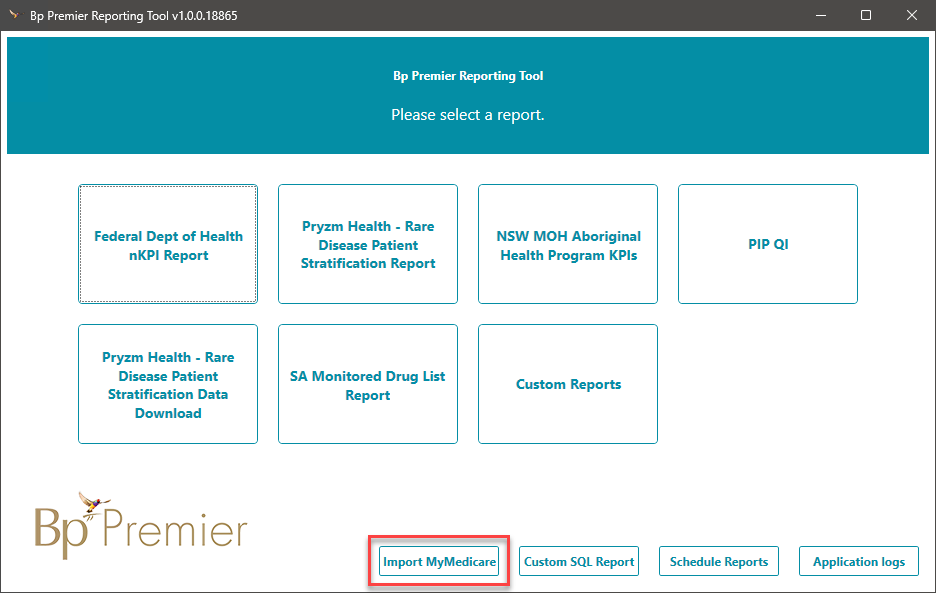
- To launch the Bp Premier Reporting Tool, double-click the Bp Premier Reporting Tool desktop icon.
- Click Import MyMedicare. The login panel will appear.
- Enter the user name and password of a Bp Premier user. The user must have the Reports permission set to 'Allow access'. A file explorer window will open.
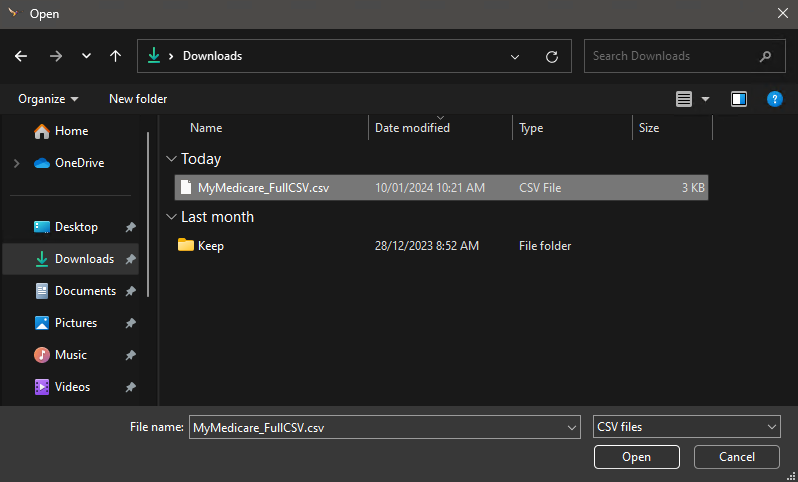
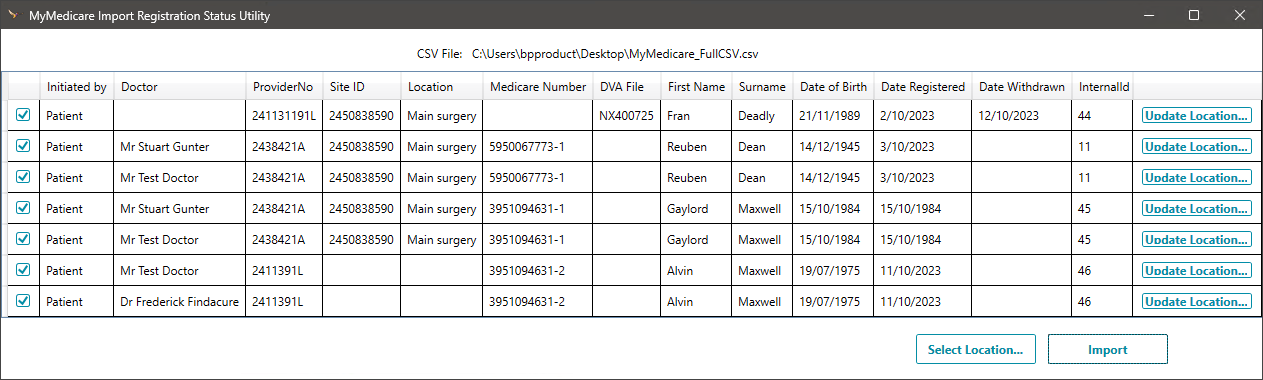
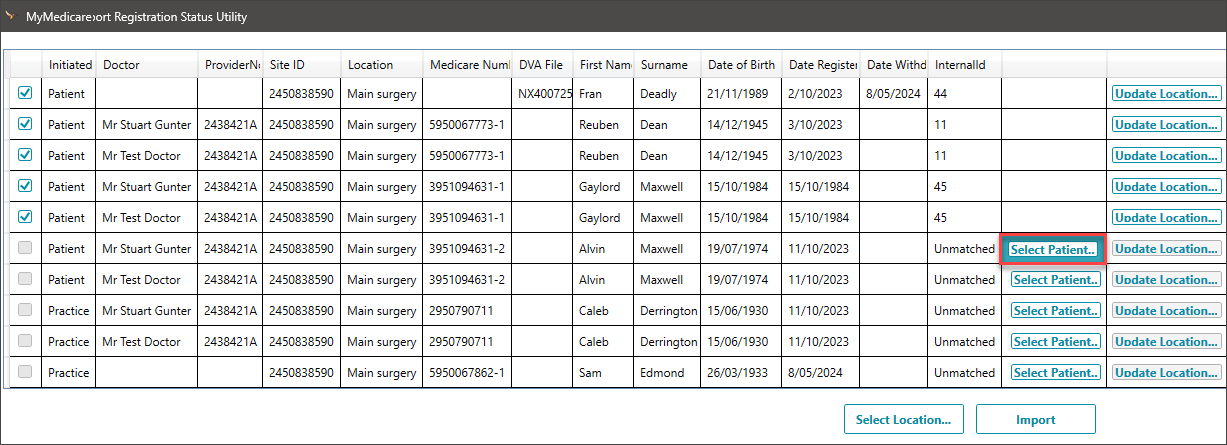
- Browse to the folder containing the CSV file for the MyMedicare Registered Patient List, select the file, and click Open. The MyMedicare Import Registration Status Utility screen will appear.
- The MyMedicare Import Registration Status Utility analyses the imported CSV file and attempts to:
- Match the Organisation Site ID in the CSV file to the MyMedicare Site ID recorded for a location in Bp Premier (if one has been recorded in Bp Premier).
- Match the Preferred GP in the CSV file to a User's Provider Number in Bp Premier.
- Match the Patient Information from the CSV file to the Patients in the Bp Premier database using their first name, surname, date of birth, and DVA/Medicare number.
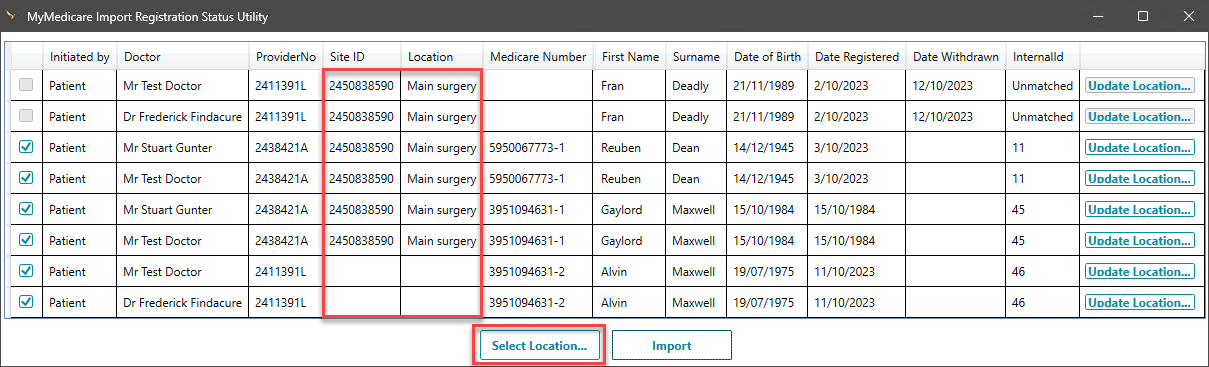
- Manually review the Patient List. To prevent the MyMedicare Registration Status from being updated for specific patients, deselect the check box in the far-left column.
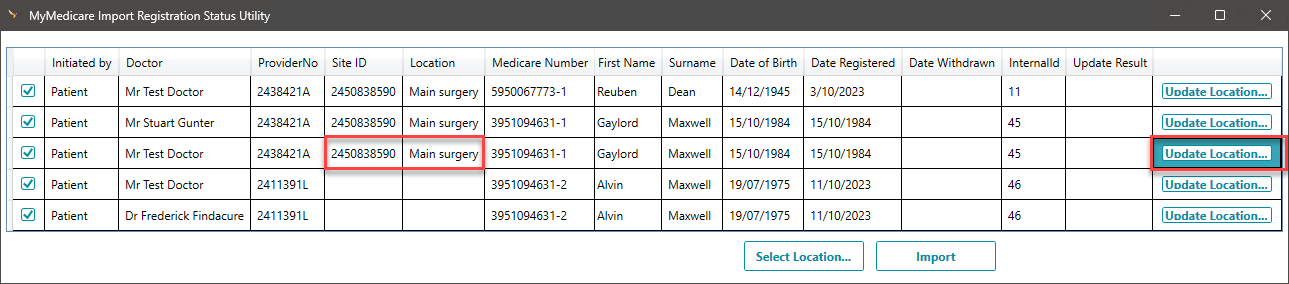
- To update the Registered Location for a single patient, click Update Location.
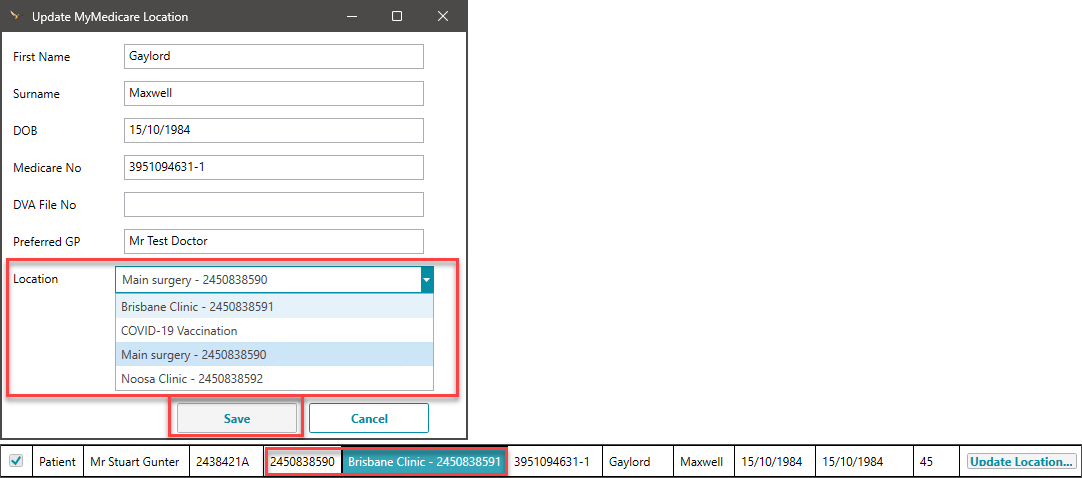
- The Update MyMedicare Location screen will appear. Select the Practice Location from the Location drop down menu, and click Save. The Registered Location will be updated for a single patient.
- To update the Registered Location for all patients, click Select Location.
- The Select Practice Location screen will appear. Select the Practice Location from the Location drop down menu, and click OK.
- Once you've reviewed the Patient List and are satisfied with the data, click Import.
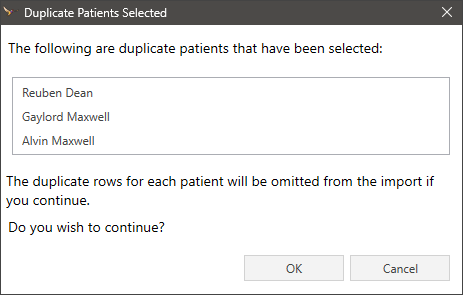
- If the dataset contains duplicate patient rows, you will be presented with the Duplicate Patient Selected prompt. To continue, click OK on the Duplicate Patient Selected prompt. The My Medicare Registration Status Utility will ignore the data in the second row, while the data in the first row will be imported into Bp Premier.
- The MyMedicare Import Success prompt will summarise what has or has not been imported.
- Click OK to return to the MyMedicare Import Registration Status Utility.
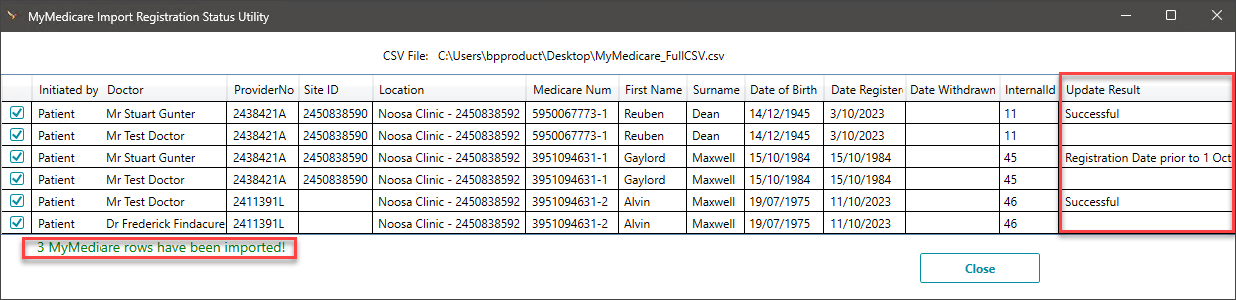
- The Update Result column will display the import outcome for each row.
- The Import process is complete. Click Close.

If the patient cannot be matched to an existing patient in the Bp Premier database, the InternalID field will show Unmatched, and the check box next to the patient's name is deselected and disabled. To match unmatched patient records directly in the MyMedicare Import Registration Status Utility, see Manually Match Unmatched Patient Records.


The Registered Location will be updated for all patients.

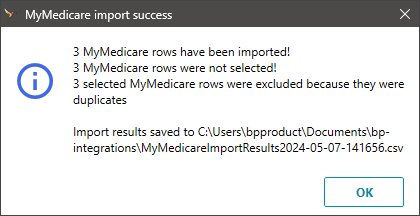
The results of the MyMedicare Import will be saved to a CSV file on your computer. Take note of the file location in the MyMedicare Import Success prompt.

Manually match unmatched patient records
If the patient cannot be matched to an existing patient in the Bp Premier database, the InternalID field will show Unmatched, and the check box next to the patient's name will be deselected and disabled.
- To manually match the patient with Active Patients in Bp Premier, click Select Patient.
- When the Search for the Patient screen is launched, the utility performs an initial search and presents the user with results that correspond to the surname or date of birth.
- If the patient cannot be matched by surname or date of birth, you can use the Enhanced Patient search functionality to find patients using the following information:
- first name
- surname
- combination of surname and first name
- preferred name e.g. surname, preferred Name
- home phone number
- work phone number
- mobile number
- email (add an @symbol to the search text to search for an email address e.g. admin@brisbanestreetpractice.com)
- home address
- postal address e.g. 1 Brisbane Street
- record number
- preferred name
- Medicare number
- IHI
- postcode
- date of birth e.g. DD/MM or DD/MM/YYYY, 02/01/91.
- When the desired patient has been found, select them from the list and press OK.
- If the patient cannot be matched with an Active patient, the patient's MyMedicare registration status must be manually entered into the patient demographics in Bp Premier. See Record the patient's MyMedicare registration status for more information.
NOTE The search will only return Active Patients in Bp Premier.
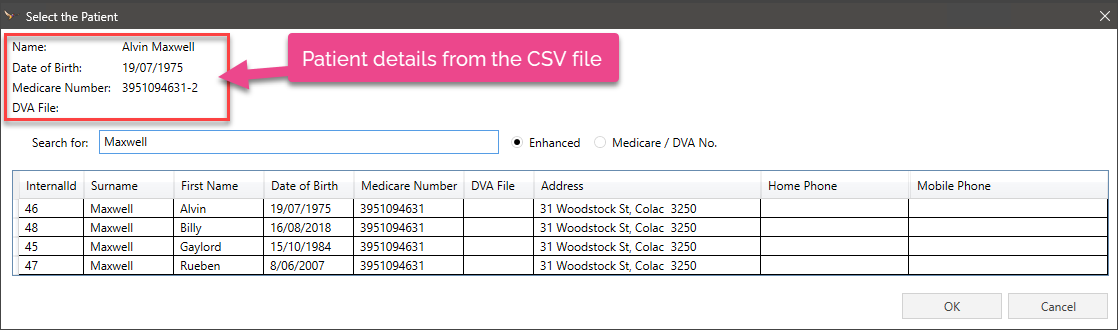
To search for the patient using only their Medicare/DVA number, change the radio button from Enhanced to Medicare/DVA No.
IMPORTANT Do not press Enter on the keyboard to initiate the Search; type in the search parameter, and the list will automatically update with the results.
Repeat the steps 1–4 for all patients with an Unmatched status in the InternalID column.
Last updated: 08 May 2024.


 AU
AU 