If you have received notification that your certificate is due to expire, follow these instructions to update and ensure your My Health Record functions correctly.
Before you begin
Ensure the default HPI-O number for your practice has been added under Setup > Practice details > Change, and any location-specific HPI-O numbers have been added under Setup > Practice Details > Practice Locations > Edit if your practice has them.
Ensure the HPI-I numbers for each provider in your practice have been added under Setup > Users > Edit.
Ensure you know where your default (practice-wide) NASH certificate and any location-specific NASH certificates are located.
When importing or renewing the NASH certificate, if you only have a single HPI-O for the practice then the NASH certificate should always be imported for the 'Default' location. If you have multiple locations with different HPI-O numbers then a NASH can be imported for each location. However, a NASH certificate still needs to be imported for 'Default' as this certificate will be used for the nightly check on whether a patient has a My Health Record.
The certificate chosen for the 'Default' location can be any NASH certificate as long as it matches the HPI-O entered under Setup > Practice details > Change.
Ensure that you have your NASH PIC passphrase(s) available.
When performing all procedures below, log in to Windows on the Bp Premier server as a Windows administrator user.
Enable UAC (User Access Control) in Windows on the Bp Premier server, if your version of Windows enables UAC. UAC is required to grant permissions to the user to install certificates to the Windows certificate store.
Check the NASH certificate expiry date
Follow the instructions on any Bp Premier workstation that has successfully uploaded to My Health Record online.
- Click the Windows logo in the bottom left of the toolbar, or click the Windows logo button on the keyboard.
- Click the Search icon (magnifying glass) in the top right to slide in the Search bar.
- Type 'internet options' into the Search bar and select Internet Options from the list. The Internet Properties screen will appear.
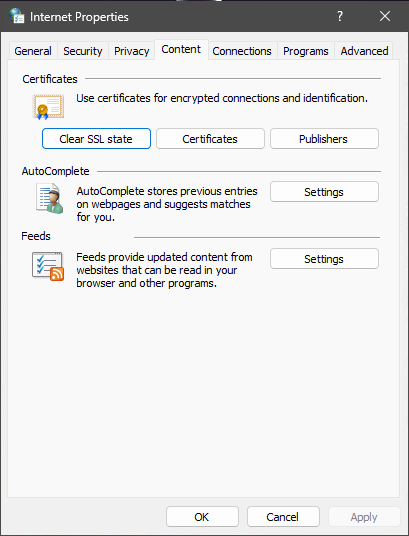
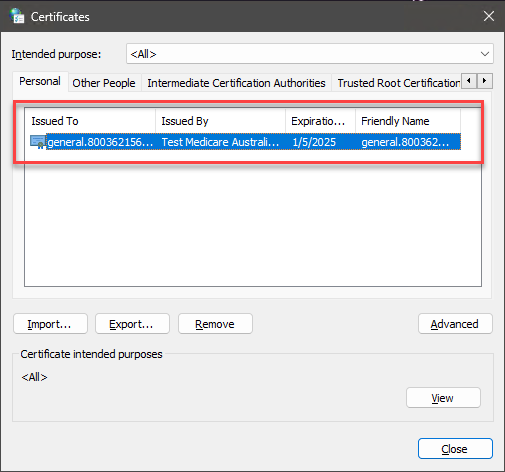
- In the Internet Properties screen, select the Content tab. Click Certificates. The Certificates screen will appear.
-
The NASH certificate is indicated in red. The name should be ‘general’ followed by the HPI-O number for the practice.

Your version of Windows may be different to the screenshot above.

NOTE If there are multiple NASH certificates shown, the current certificate will have the latest expiry date.
Import the NASH Certificate
- Copy your downloaded digital NASH certificate file (or files wish to use separate NASH certificates for individual locations) to the Bp Premier server, or insert the memory stick that contains the certificate file(s).
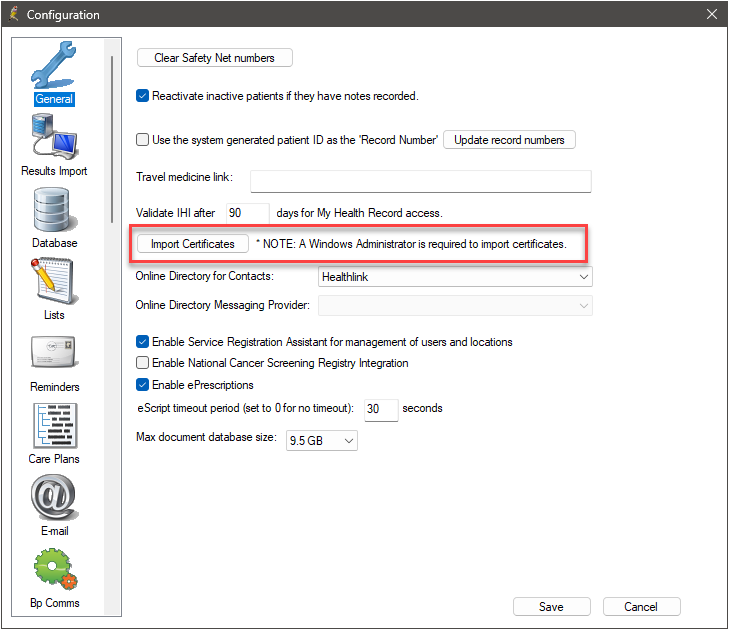
- From the Bp Premier home screen, select Setup > Configuration. The Configuration screen will appear.
- Click Import Certificates. If prompted by Windows, select Yes to Do you want to allow this app to make changes to your device?. The Certificate Manager Login screen will appear.
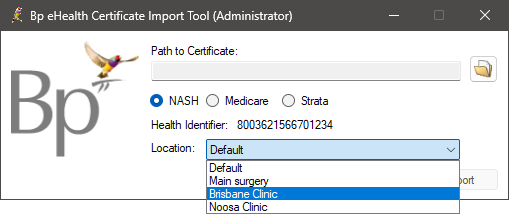
- Select your name from the User: drop-down menu, enter your password and click Login. The Bp eHealth Certificate Import Tool will appear.
- Select NASH. The Location: menu will be enabled.
- Select the folder icon, navigate to and select the NASH certificate, and click Open.
- Type your Certificate Passphrase in. This is the PIC code provided to the practice by Medicare when you applied for your NASH certificate.
- Click Import.
- If you wish to use separate NASH certificates for individual locations, repeat this process for all locations that require a NASH certificate.
- Once all required NASH certificates have been imported, click Save.

If you wish to use separate NASH certificates for individual locations, from the Location: menu, select the location that you wish to add a NASH certificate to.
If you wish to add a default NASH certificate for all locations, select Default.

The complete guidelines on how to configure Bp Premier for My Health Record can be accessed here.
Related topics
Last updated: 10 August 2023.