This article explains how the appointment book colours indicate the status of an appointment and how to progress appointments through the appointment book workflow.
Appointments have a coloured background that indicates the current position of the patient in the appointment workflow, from Waiting to Paid. The legend along the bottom of the appointment book shows these statuses:

The At billing, Invoiced, and Paid statuses are convenient for staff to scan the appointment book and see which appointments need an invoice created, which need to be paid, and which can be completed. The colours cannot be customised.
If you use appointment reminders, you may also see appointment attendance statuses against appointments in the appointment book. These display as green, red, or yellow dots. See Check appointment reminder replies for more information.
Progress an appointment
You can use the status legend to move appointments along the appointment book workflow.
If you select an appointment and click Waiting, the appointment slot will turn yellow and the status will be updated to ‘Waiting’. You can click the With Doctor, At Billing, and Completed colours to progress the appointment along the appointment workflow.
|
Legend status |
Represents |
|---|---|
|
|
The provider’s session has the slot marked as unavailable for that time, or a user has manually marked the slot as unavailable. |
|
|
The provider’s session has the slot reserved for ‘on the day’ or walk-in type appointments only. These appointments can only be booked into on the actual day of the appointment. |
|
|
A user has marked the patient as ‘Arrived’ and the patient is waiting in the waiting room before consultation. |
|
|
A provider has clicked Start visit and is currently performing the consultation. |
|
|
The provider has completed the consultation and finalised the visit. The account for the patient is ready to be created. If a patient account is ‘Held’ or ‘Cancelled’, the status will be At billing. |
|
|
An invoice has been created for the patient and is waiting payment. If an invoice is part-paid, ‘Stored’, or ‘Written off’, the status will remain ‘Invoiced’. Payment reversals and adjustments that leave all or part of the invoice unpaid will revert the status to ‘Invoiced’. NOTE Written-off invoices have a status of ‘Invoiced’ so that they are not missed during end-of-day activities. Your practice will have guidelines for closing off appointments that cannot or do not need to be paid. For example, a senior staff member could review and manually change the status of such appointments to ‘Completed’. |
|
|
The invoice has been paid in full, or a Direct Bill account has been batched, paid, and reconciled. |
|
|
A user has manually marked the appointment as ‘Completed’, or the consultation ended and an invoice did not need to be generated. |
|
|
A user marked the appointment as ‘Did not attend’. |
|
|
When creating the appointment, a user marked the appointment as ‘Urgent’. The Urgent status background will over-ride all other statuses until ‘At billing’ or later is reached. |
|
|
Indicates that the provider has an appointment in another location for that time slot. See How do I see providers from other locations? for more information. |
Enable Invoiced and Paid statuses
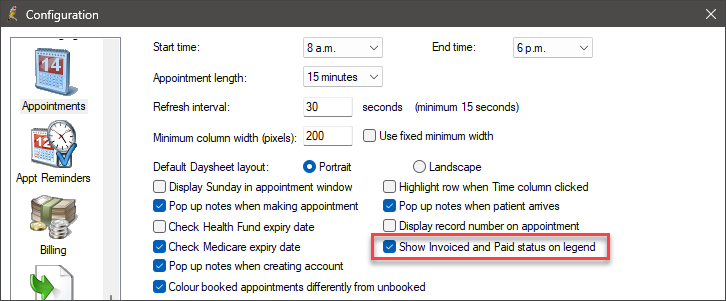
To include the 'Invoiced' and 'Paid' statuses, you need to enable a configuration setting. You may need user permissions to do this.
Best practice recommend always having this option enabled unless your practice is bulk bill only. Enabling the Invoiced and Paid statuses helps with keeping track of appointment completion, prevents unpaid invoices, and ensures the billing process is completed correctly.
- Log in to Bp Premier as a user with access to configuration settings.
- Select Setup > Configuration from the main menu. Select the Appointments tab.
- Tick the option Show Invoiced and Paid status on legend and click Save.
- If the appointment book is open, close and reopen the appointment book.
Find an appointment’s invoice number
If an appointment has a status of ‘Invoiced’ or later, the invoice number is added to the notes in the Appointment details screen. Double-click an appointment to view this screen:
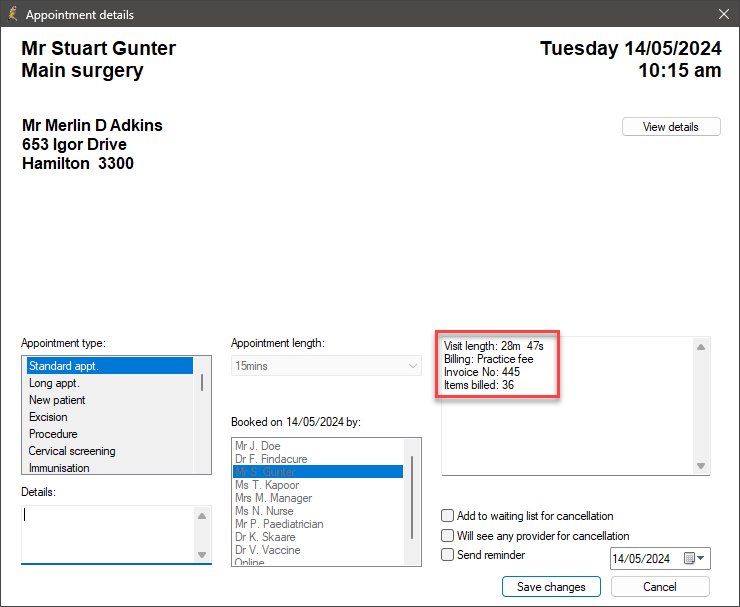
Invoices that are cancelled or written off will retain the invoice number in the appointment details. Held accounts will populate the appointment details with an invoice number, but if a Held account is deleted, the invoice number will be removed. (A held account is not an invoice until paid or actioned.)
How do I see providers from other locations?
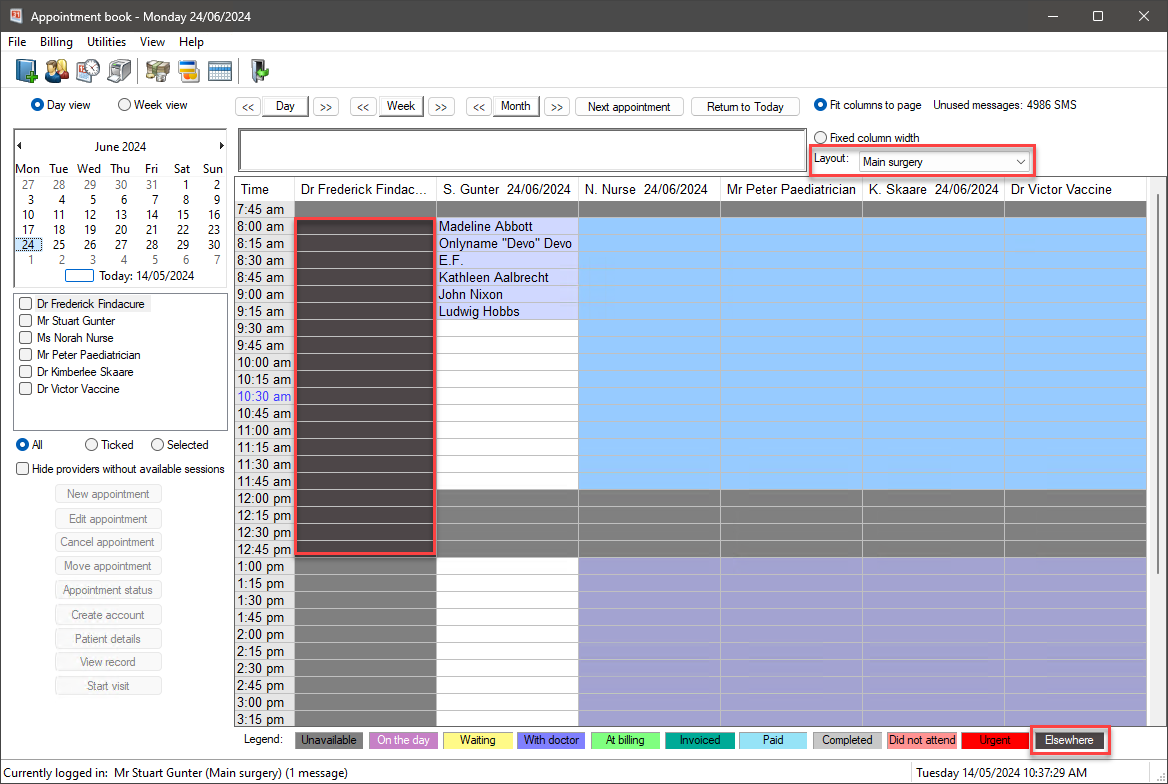
Providers can attend more than one practice location. If you select a location-based layout for display in the appointment book, the appointment status elsewhere indicates that a provider has an available session for that time period, but at a different practice location.
In the example image below, provider F. Findacure is marked as ‘elsewhere’ for that appointment book day, with elsewhere being a practice location other than ‘Main Surgery’.
To identify the location attended by a provider who is elsewhere, select the appointment and press F10 or right-click and select View Text. Notes for the appointment book will be displayed.
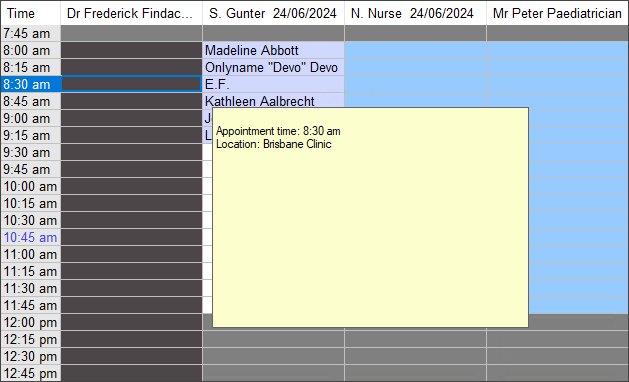
You cannot book an appointment directly into an ‘elsewhere’ time slot. To make a booking in that slot, change the layout to a provider-based layout, or the layout for the provider’s location.
Hiding providers with no appointments
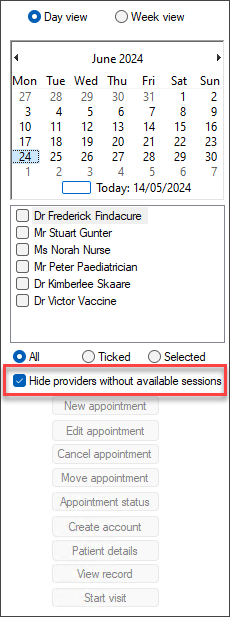
The option Hide Providers without available sessions on the left hand side will hide all providers who do not have bookable sessions at the layout location that day. This preserves space for appointments that can be booked.
Information correct at time of publishing (17 March 2025).


