This article explains the steps recommended for migrating Bp VIP.net to a new server.
From the old server
-
Back up the Bp VIP.net database from SQL Server Management Studio.
-
Delete any existing PRODA B2B Devices under Setup > PRODA > Activation if using an Australian database.
-
Go to Reports > Report Builder and click the URL to open SQL Server Reporting Services. Download all existing custom reports and save in a shared network folder accessible to all workstations.

-
If using an Image Database Folder, go to Setup > Facility Preferences > General Preferences > MyComms.
Note the location path of the image database folder and go to the folder location in Windows Explorer. Copy or move the folder to the same location on the new server.
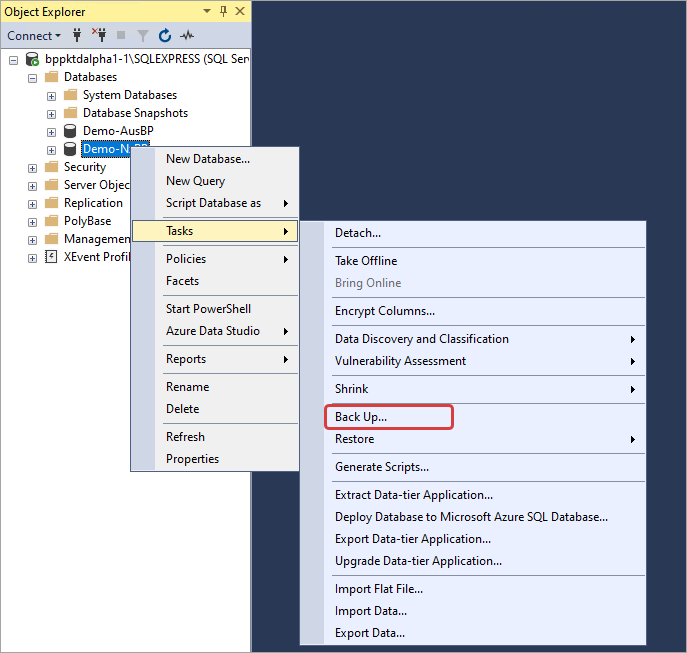
See the Knowledge Base article Back up the database for further instructions.
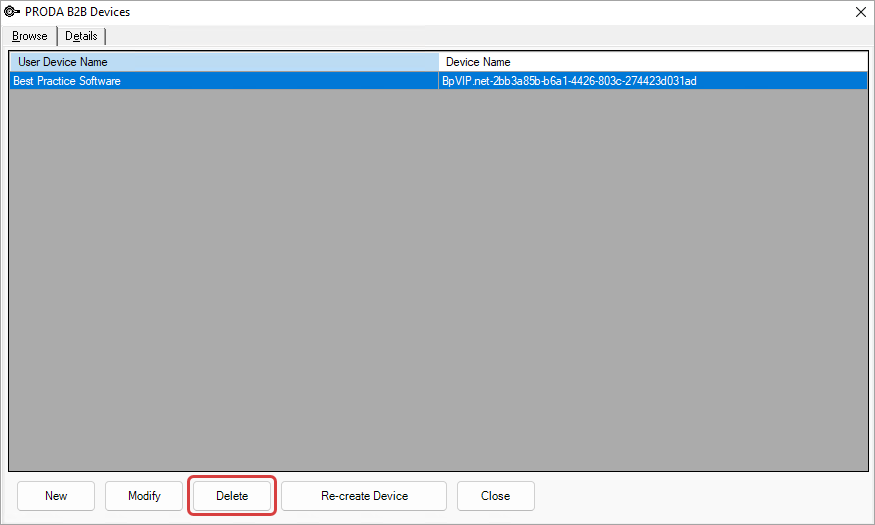
See Register and manage a B2B device for further details.
See the Knowledge Base article Create a report in Report Builder for more information.
TIP Copying the entire image database folder may take some time depending on the size of the folder. For larger databases, the contents of the folder can be copied over in sections to the new server.
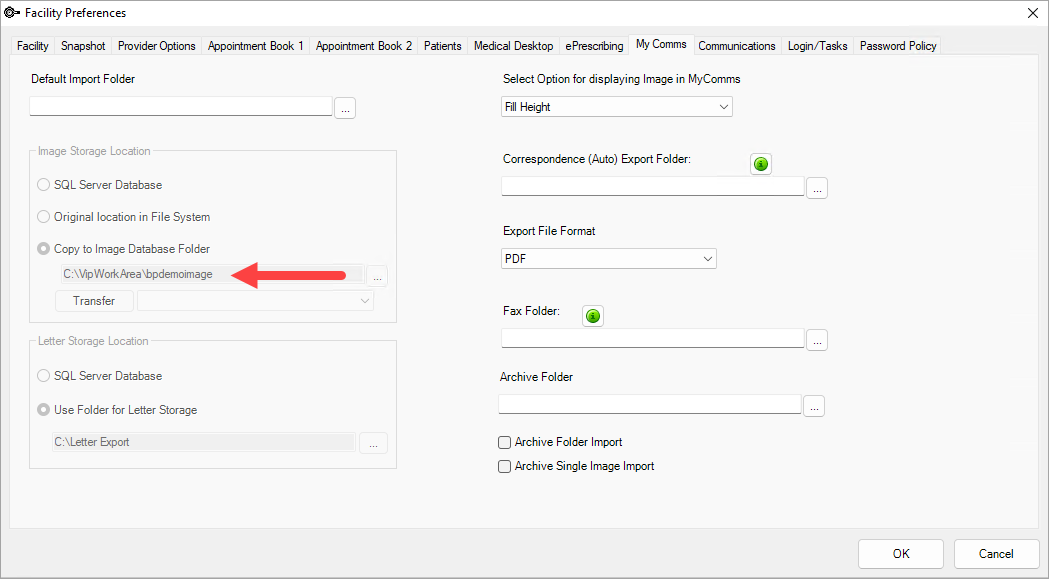
NOTE The Image and Letter Storage Location options in the MyComms tab are disabled for all users and can only be accessed by the Best Practice Software support team.
See the Images Folder Knowledge Base article for further instructions.
On the new server
- Install SQL Server Reporting Services.
- Install VIP.net on the new server. The database can be restored from a backup from either SQL Server Management Studio or from Bp VIP.net.
- Edit the RSD Communication settings for Argus, Healthlink or Medical Objects from Setup > Facility Preferences > General Preferences > Communications. Update the In and Out Directory to the folder location on the new server.
- Update the Receiving directory in the Investigations tab of the Organisation Details screen for all pathology and radiology organisations in Bp VIP.net.
- Go to Reports > Report Builder, click the URL to open SQL Server Reporting Services and upload the previously saved reports from the old server.
- Run Bp VIP.net as an administrator and go to File > Utilities > VIP Service Controller and click Install Service. See Configure and Start VIPServices.net for more information.
- Register the PRODA B2B Device. See Register and manage a B2B device for further details.
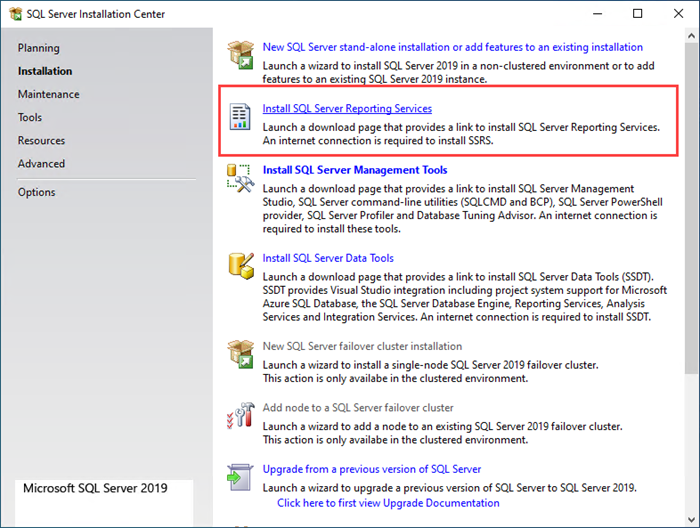
See the article Set up SQL Server reporting services and the Bp VIP.net System Requirements for further instructions.
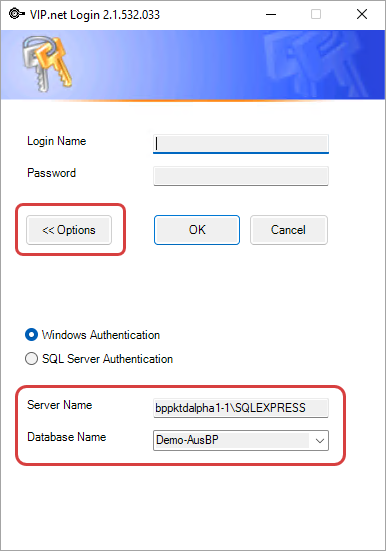
When restoring a database from Bp VIP.net enter the Server and Database Name when logging in. Bp VIP.net will prompt to restore from a backup.
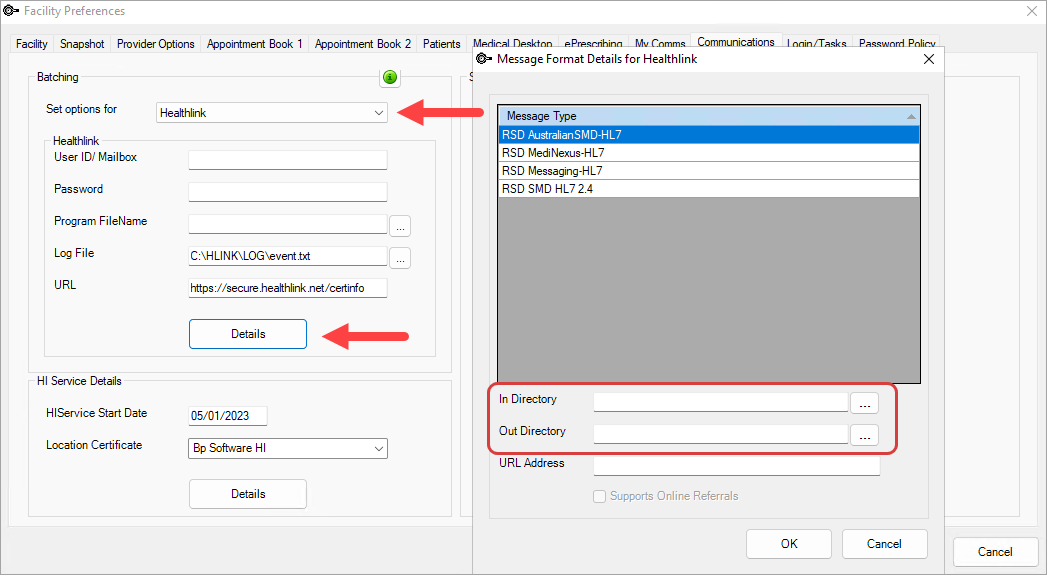
See the Knowledge Base article Set up RSD for more information.
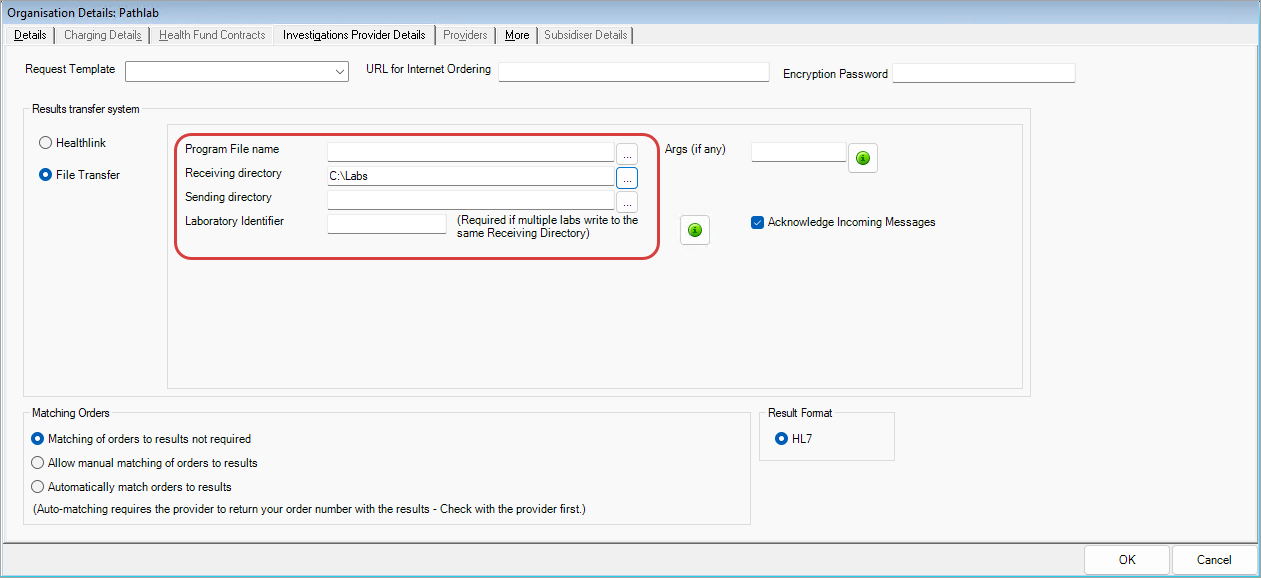
See Set up pathology and radiology ordering for more information.
Related topics
- Bp VIP.net System Requirements
- Install Bp VIP.net
- Install the database
Last modified: 21 August 2023