This article explains how to download and run the Bp VIP.net Installation Wizard when upgrading or installing the software for the first time.
Where do I download the installation file?
If you are installing Bp VIP.net for the first time, your Bp VIP.net representative will supply the installation file to you or download the file to your system remotely.
If you are upgrading, you can download the installer file from within Bp VIP.net after the version has been publicly released.
Where do I install Bp VIP.net?
- Copy the install file to and run the upgrade from the SQL Server database computer first. This will upgrade the Bp VIP.net database structure in preparation for terminal server or workstation upgrades.
- If your practice uses Terminal Services, run the installation from the Terminal Server after upgrading the database server.
- Copy the setup.zip upgrade file to the folder nominated in Setup > Facility Preferences > General Preferences > Login/Tasks tab > New version location field. This field must contain a UNC path to a network location accessible by Bp VIP.net workstations. When a user next logs in to a workstation, Bp VIP.net will detect that a new setup.zip file exists in this folder and will automatically upgrade the workstation.
Install Bp VIP.net
- Go to Help > What's New.
- Download the upgrade zip file by right-clicking on the link and selecting Save Link As or Save Target As.
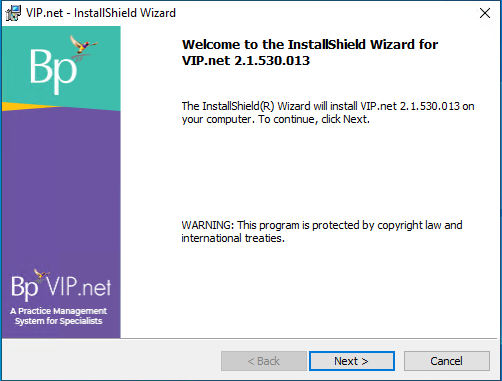
- Copy the file to the Bp VIP.net server machine and double-click the file to begin the installation. The Bp VIP.net InstallShield Wizard will open at the Welcome panel. Click Next to begin.
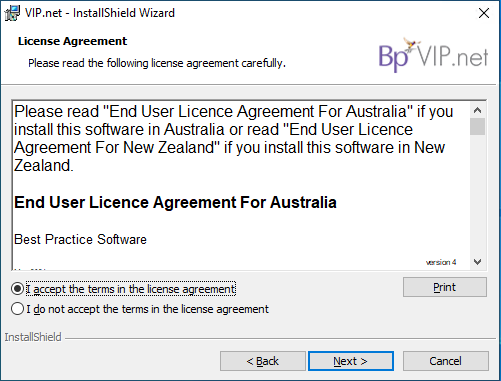
- From the License Agreement screen select the radio button I accept the terms in the license agreement after reading the agreement carefully and accepting the terms and conditions,
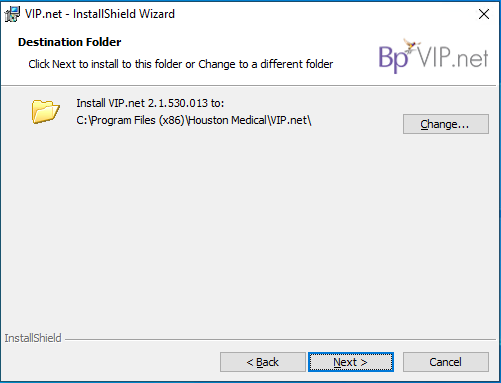
- In the Destination Folder panel, click Change if you need to change the installation folder from the default. Click Next.
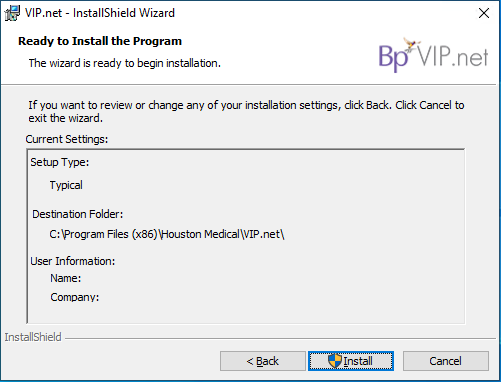
- Click Install to install Bp VIP.net. If your version of Windows uses User Access Control, click Yes to continue.
- The installer will display the Finish panel when installation is complete. Click Finish to close the installer.
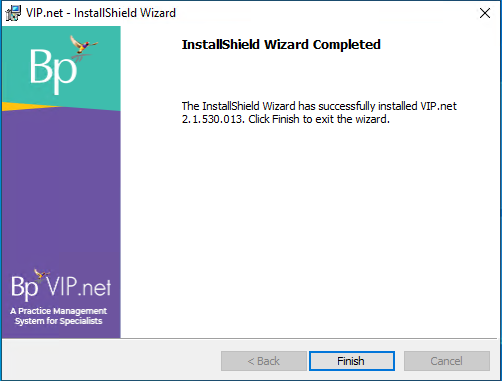
The installer will place a Bp VIP.net icon on the Windows desktop and Apps list for later versions of Windows. Double-click on the Bp VIP.net icon to start the software.
You can now create a new database for a new server installation, or connect to an existing server database if you are installing Bp VIP.net on a workstation.
Install Supporting Applications
The following supporting applications must be installed before the next release of Bp VIP.net for certain features of the program to function without error.
Download and Install WebView2
The Topaz SP1 Revision 3 update includes a silent installer for Webview2. For users updating or installing Bp VIP.net on a terminal server, Best Practice Software recommends installing Webview2 manually.
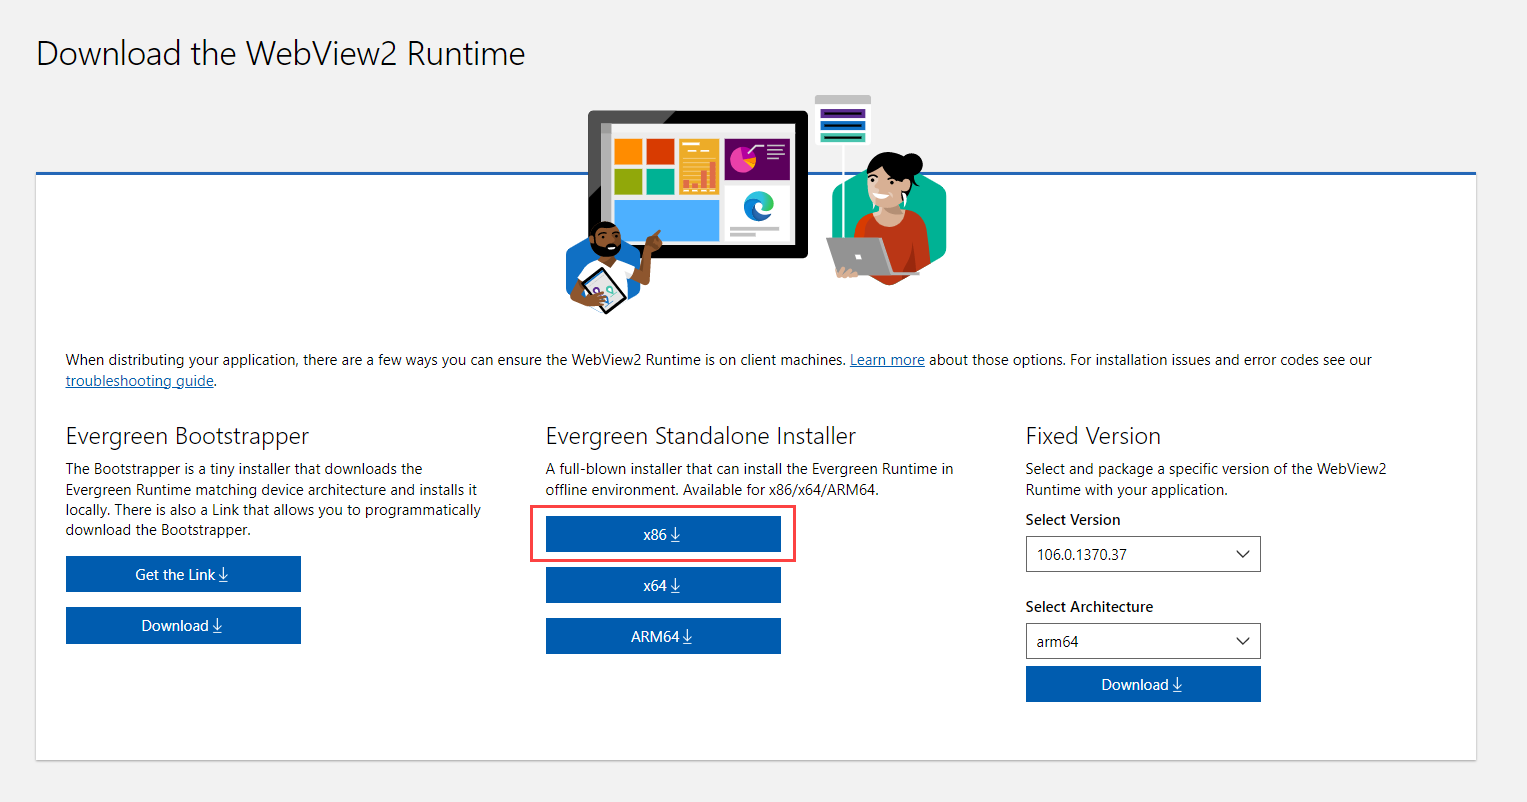
- Download the Evergreen Standalone (x86) WebView2 Installer from the Microsoft Website.
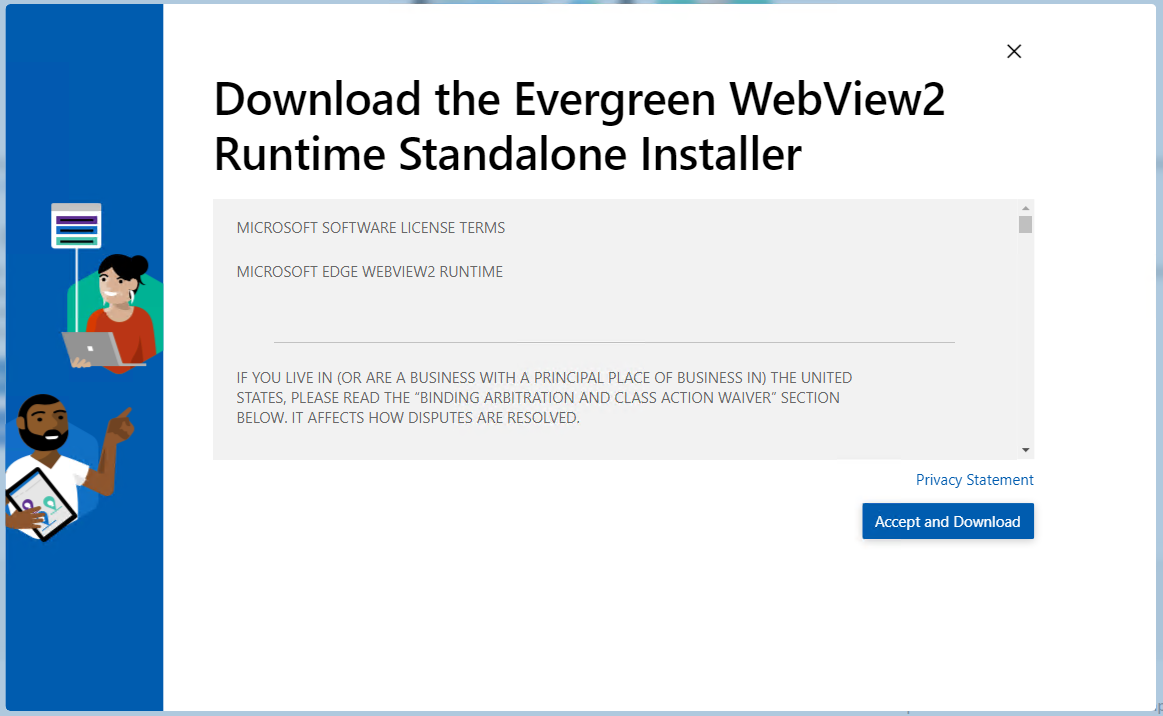
- After selecting the download button, the Privacy Statement screen will appear. Select Accept and Download to continue.
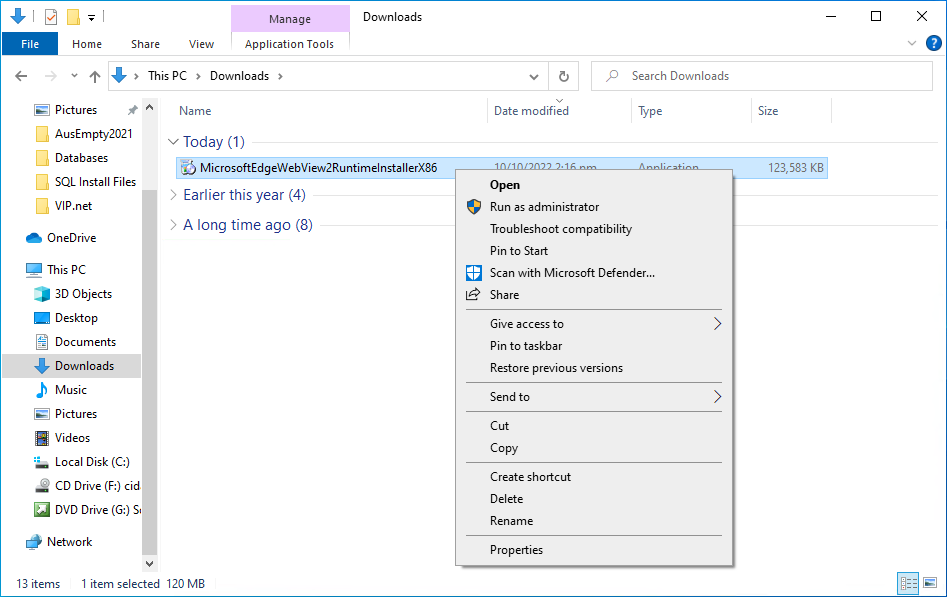
- The Installer file will save to your Downloads folder by default. From here, run the WebView2RuntimeInstallerX86 file as an Administrative user.
- The WebView2 Installer will run and complete. Select Close when the installation is finished.
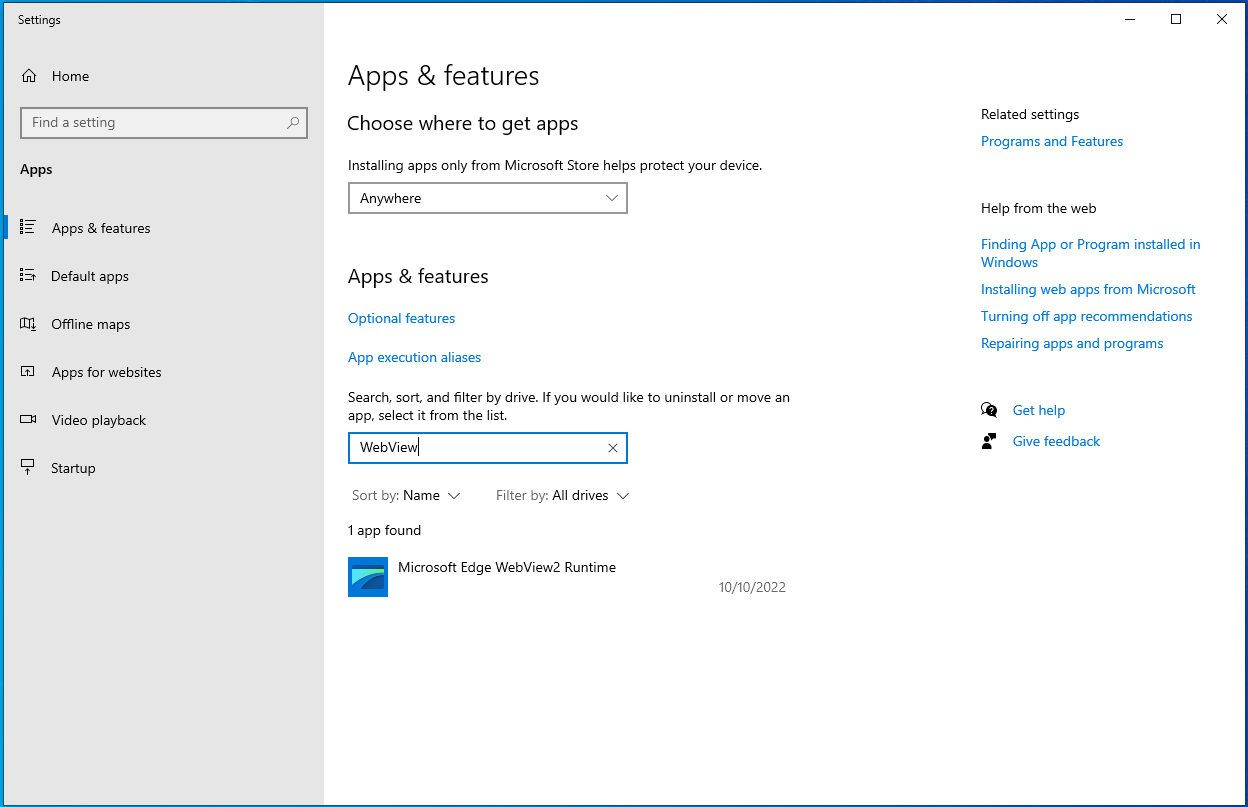
- To confirm that WebView2 has installed correctly, navigate to the Apps & features screen from the Windows start menu, and search for the WebView application.
What do I do next?
Last modified: 18 October 2023