A Bp VIP.net thin client installation has the Bp VIP.netserver installed on a single machine. Upgrading a thin client only requires upgrading the server.
A thick client installation is a distributed network of Bp VIP.net workstations; each workstation has an installation of the Bp VIP.net application, and upgrading requires each workstation to be upgraded. However, you can download the update file to a network location and automate the process of upgrading each workstation, to to ensure that every user uses the same version of Bp VIP.net.
Follow the instructions below in order.
On this page:
Create and share an update folder
The update folder needs to be ‘Shared’ so that all users can access the update file. All thick clients must be able to access the location of the update folder, for example, a shared network drive.
- In the shared location (Bp VIP.net server, or network share), create a folder with a description name. The following example uses a folder called 'Update'.
- Right click on the Update folder and select Properties.
- Select the Sharing tab.
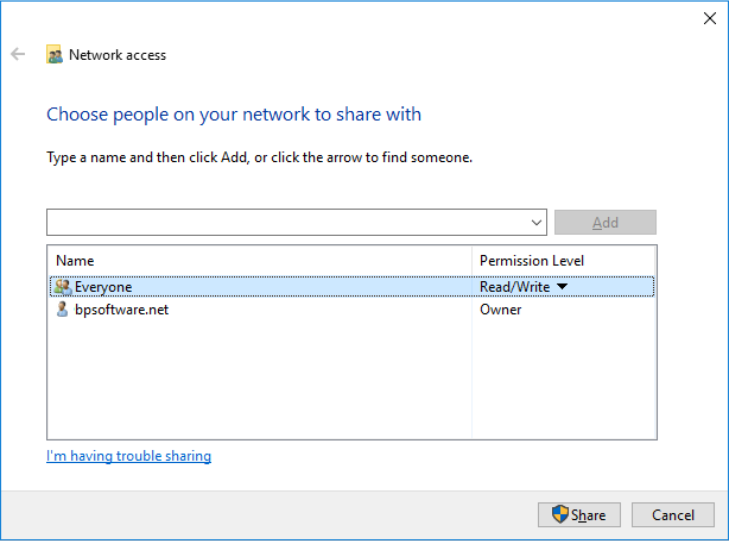
- Click the Share button. The File Sharing window is displayed.
- Type in the word ‘Everyone’ and click the Add button. 'Everyone' will now display in the list view.
- Select the Permission level of Read/Write.
- Click the Share button to save the share.

Add the Update Folder to Bp VIP.net
To ensure Bp VIP.net will acknowledge there is a new version of VIP.net to update to, the location of the update folder needs to be specified in Bp VIP.net.
IMPORTANT A logged-in Bp VIP.net user must have Windows rights to install software locally to run the update automatically. If a user does not have installation rights, each workstation will need to be logged into with an administrator user login in and the update run individually.
- Check the file location of the Update folder.
- Open Windows Explorer and navigate to the Update folder location.
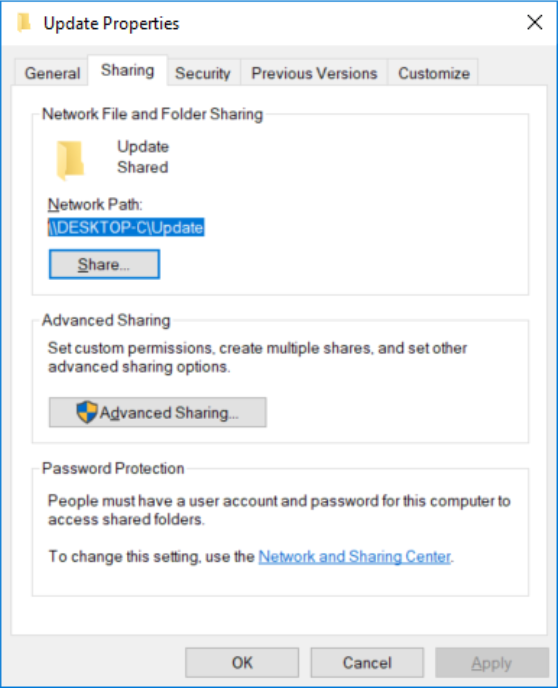
- Right click on the Update folder and select Properties.
- Copy the UNC pathway from the Sharing tab (selected in blue in the above screenshot).
- Log in to any Bp VIP.net workstation.
- Go to Setup > Facility Preferences > General Preferences > Login/Tasks tab.
- In the New version location field, enter the path to download the update file.
- Click OK to save the changes.

To be accessible to all workstations, the path must be in a UNC format:
For example, '\\mypractice2010\vipshare\VIPupgrades\'. Your practice's IT support can assist with entering the correct path, and ensuring the folder is accessible by every workstation on the network.
Download and zip the latest update
- Open a browser at the Best Practice Software Resources page for Bp VIP.net.
- Click on the entry under Program Updates for the latest version, such as 'Software: Bp VIP.net Update - Topaz SP1...'.
- Review the release notes from the supplied link for any activities you have to perform before running the upgrade (such as upgrading your .NET version).
- Click Download to download the .zip install file.
- In a Windows File Explorer, copy the zip file, browse to the location where you want to save the setup.zip upgrade file ( the New version location), and paste the file.
Log in to each workstation
The next time a user logs in to a workstation, Bp VIP.net will detect that an update file is available and prompt the user with a popup: 'This workstation must be upgraded to a new version to continue.' Click OK. Bp VIP.net will install the upgrade from the location of the update file you downloaded.
Related articles
Last modified: 22 April 2022