Your practice must obtain a licence for Microsoft SQL Server and install the database before installing Bp VIP.net. The database is not installed during the Bp VIP.net installation.
What version of Microsoft SQL Server should I install?
The version and edition of MS SQL Server you decide to install will depend on the requirements and size of your practice. Before deciding which version to install, discuss your database requirements with Best Practice Software Support and your practice's IT resource to determine the most suitable version.
Before you begin, read the Bp VIP.net System Requirements and ensure the computer meets the requirements to install Bp VIP.net and has been updated with the latest Microsoft Windows service packs and updates. The System Requirements also contains guidance on checking your operating system and database comply with Microsoft .NET Framework.
.NET Framework 4.8 requirement
Bp VIP.net Topaz SP1 requires Microsoft .NET Framework 4.8 to operate successfully.
Your IT services provider can help determine if you need to install .NET 4.8 on your Bp VIP.net server computer.
Install SQL Server
The instructions in this section describe how to install Microsoft SQL Server 2019. The screens may differ slightly for your version of SQL Server, but the installation process will be similar.
- Insert the SQL Server installation disc, or run the installation executable you have downloaded. The SQL Server Installation Center screen will appear.
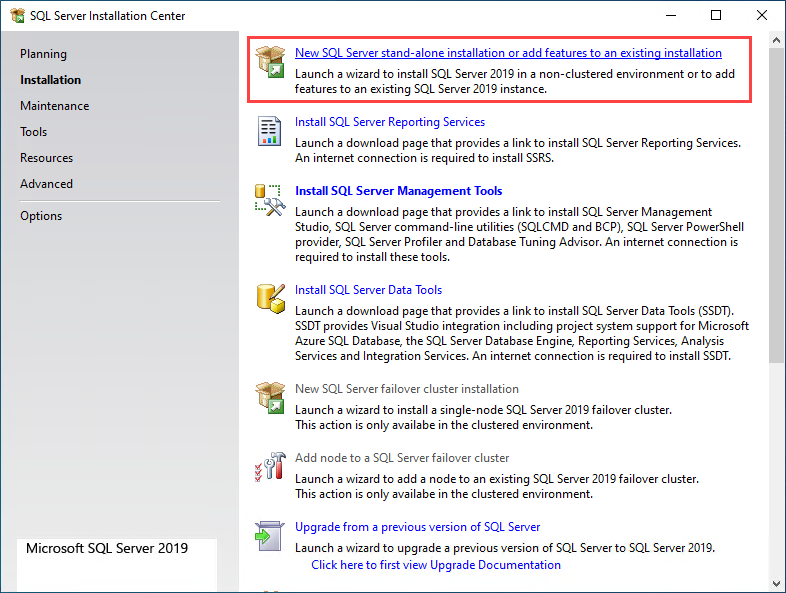
- Select Installation from the left hand side, and click New SQL Server stand-alone installation or add features to an existing installation. The Setup Support Rules screen will appear.
- In the Product Key screen, enter the product key if you have one, or select Specify a free edition and select 'Evaluation' from the drop-down. You will have to supply a product key before the SQL Server trial evaluation period ends. Click Next.
- In the License Terms screen, tick I accept the license terms and click Next.
- In the Microsoft Updates screen, tick Use Microsoft Update to check for updates (recommended) and click Next.
- The Install Setup Files process will begin, Click Next when it is complete.
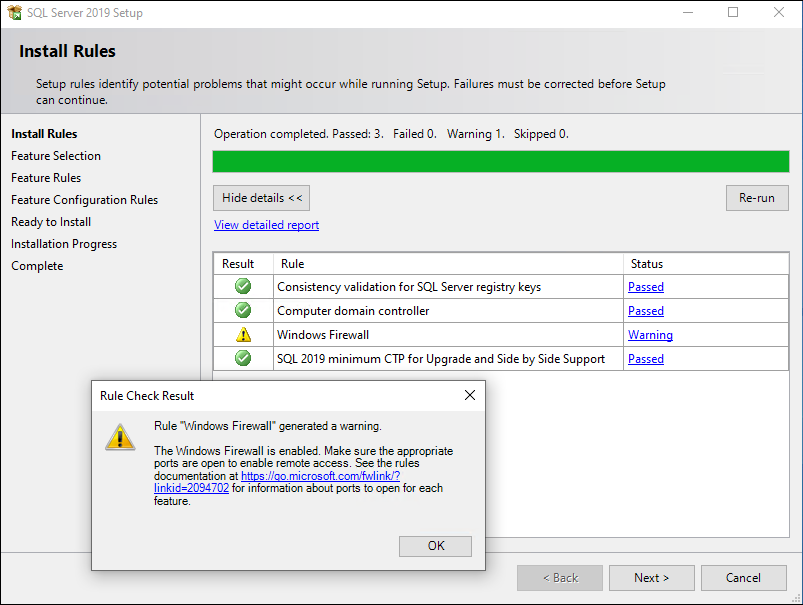
- The Install Rules screen will display the result of the post-installation check. If you receive a 'Windows Firewall' warning as shown in the example, it is safe to continue with the installation. Firewall settings will be updated after the complete installation.
- In the Feature Selection screen, expand the Features list and select as a minimum the following components:
- Database engine services
- SQL Server Replication
- Full Text Search (Full-Text and Semantic Extractions for Search)
- Data Quality Services
- Client Tools Connectivity
- Integration Services
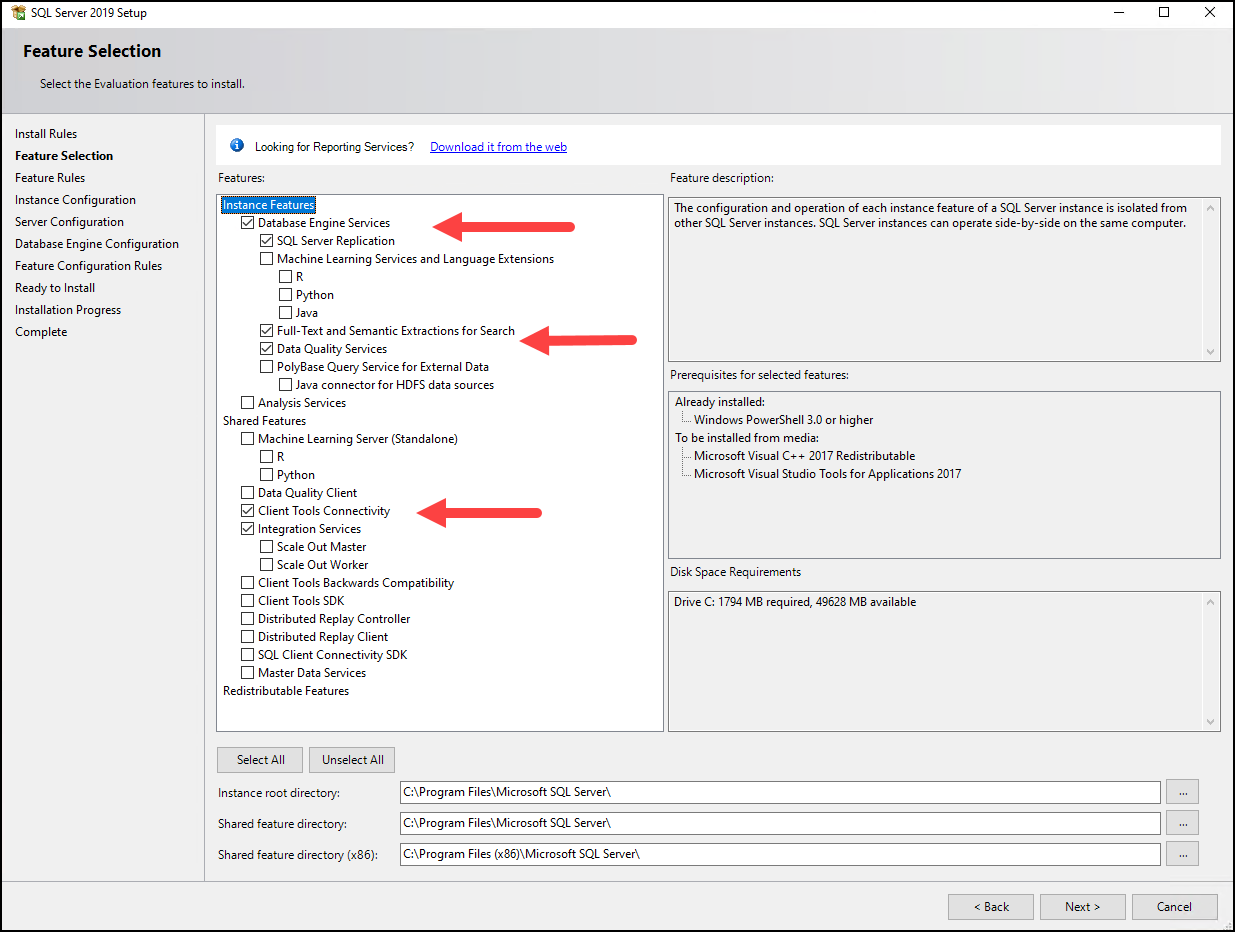
- Do not change the Shared feature default directory, unless you are installing SQL Server to a different path (for example, installing to the server machine's 'D:\' drive).
- Click Next.
- In the Instance Configuration screen, keep 'MSSQLSERVER' as the default InstanceID and click Next.
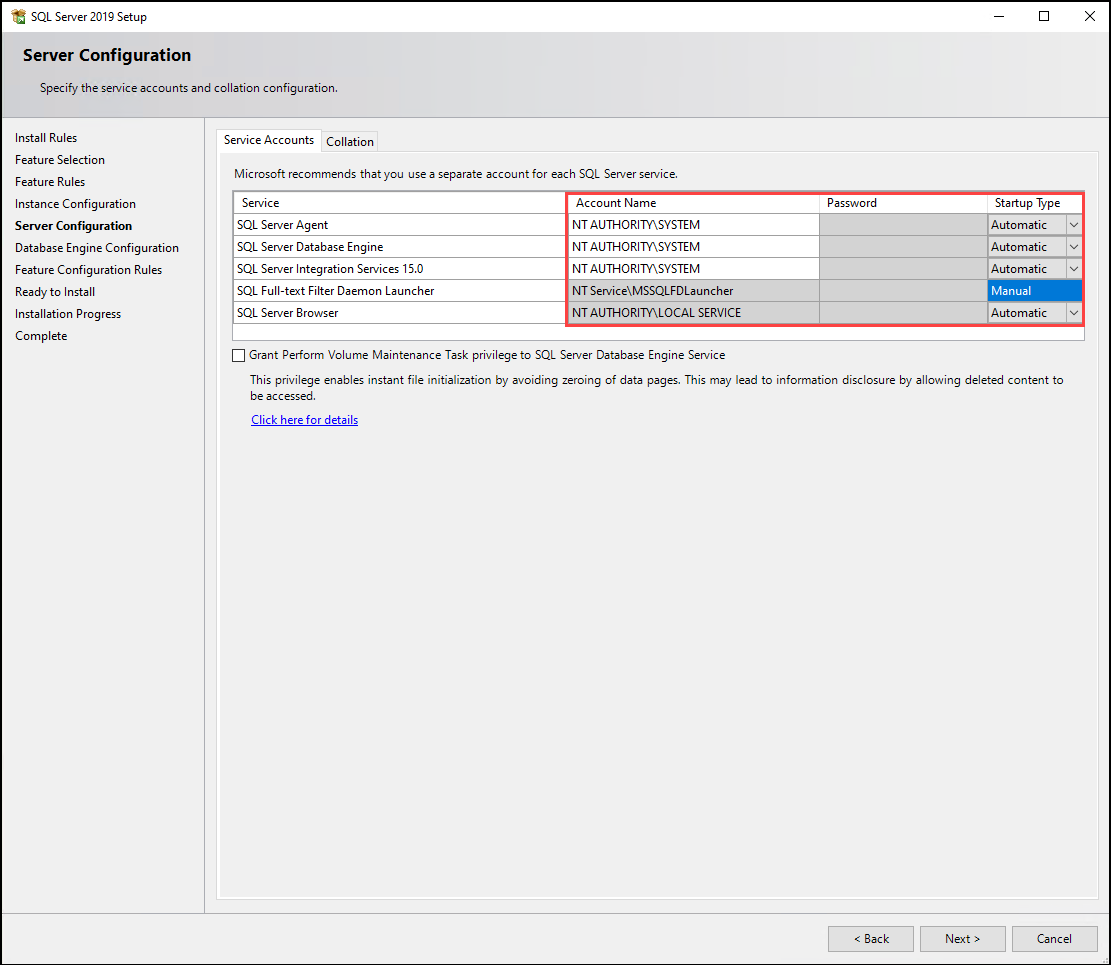
- At the Server Configuration screen, click Use the Same account for all SQL Server Services.
In the popup, click the down-arrow and choose 'NT AUTHORITY\SYSTEM' as the Account Name. Users may need to select the field to type the Account Name in manually.
You do not need to type a password into any of the fields. The Startup Type should be Automatic. Click Next.
- At the Database Engine Configuration screen, click the Add Current User button. The logged-in Windows user will be added to the list of SQL Server administrators.
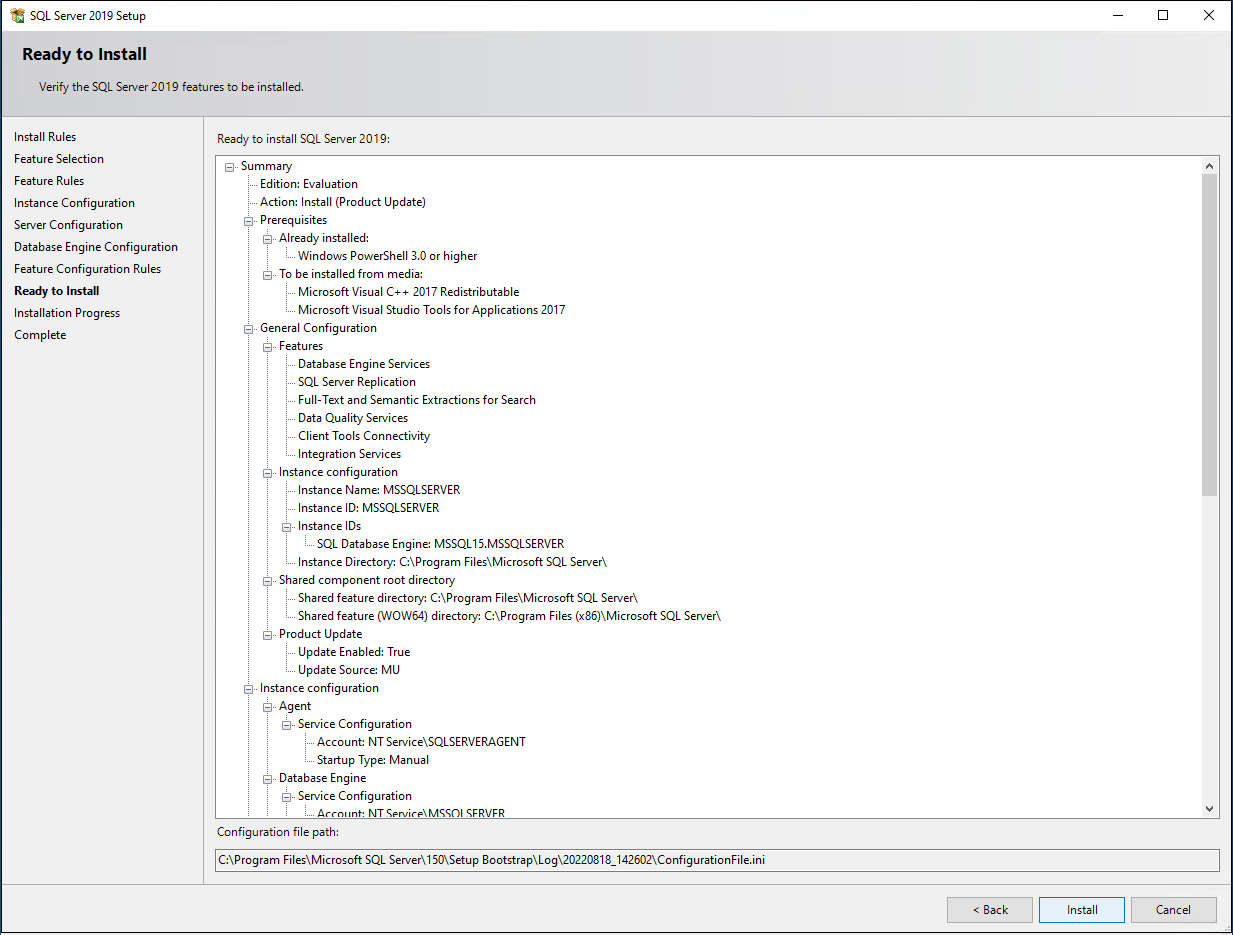
- In the Ready to Install screen, click Install. Installation will begin.
- If the installation was successful, the Complete screen will show a summary of the installation. Click Close.
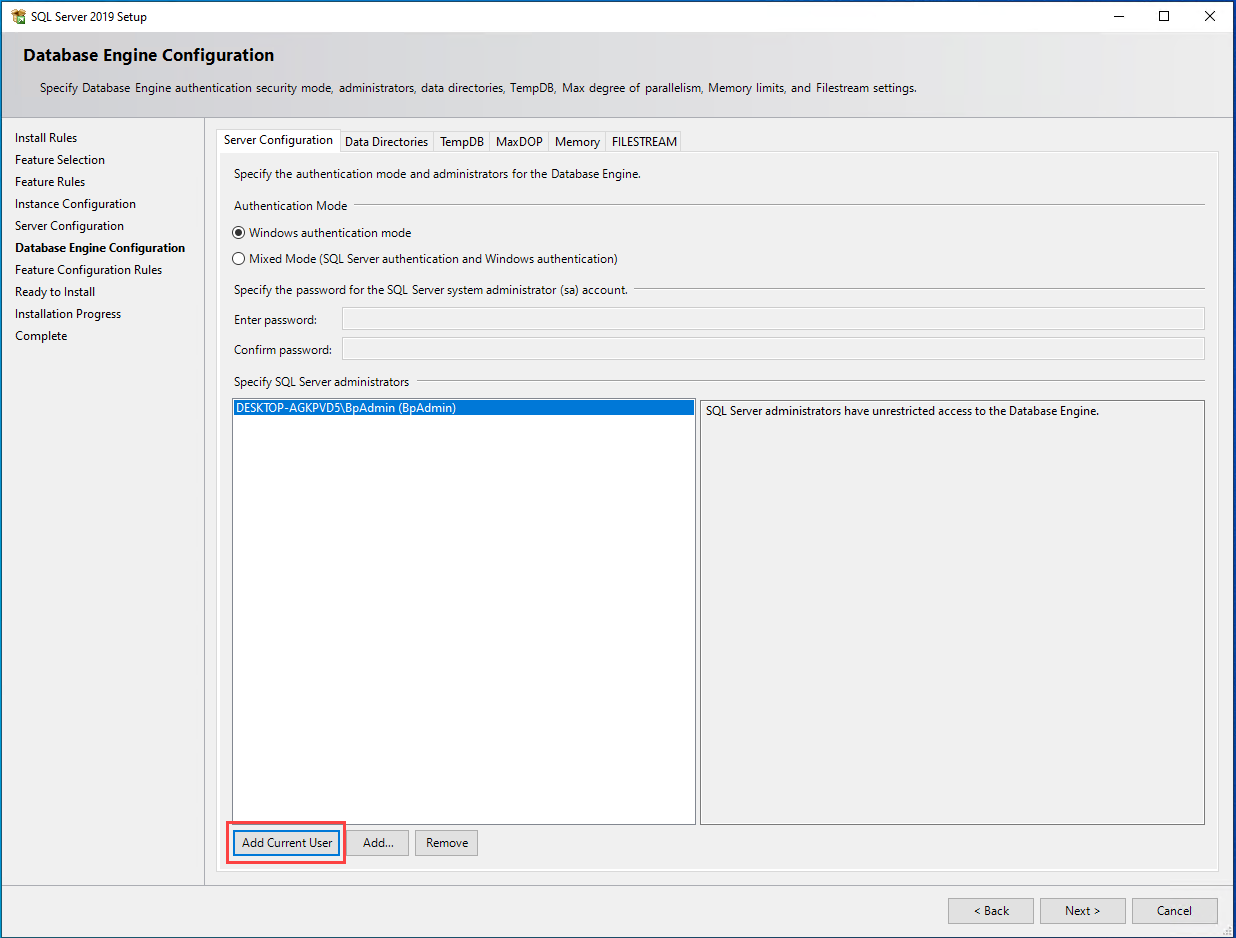
NOTE Usually a single SQL Server administrator for the network or domain is sufficient, but you may wish to add other network users who need rights to modify SQL Server settings. Only add additional administrators if you are familiar with Windows networking and authentication.
What do I do next?
Last modified: 13 September 2022