myPractice has been rebranded Bp Allied, a product of Best Practice Software.
Support is available Monday to Friday, 9am to 5pm AEST Version 4.18 Published 5 December 2019
Email: alliedsupport@bpsoftware.net Click RemoteSupport from within myPractice for assistance Phone: 1300 40 1111 (in Australia) or 0800 40 1111 (in New Zealand)
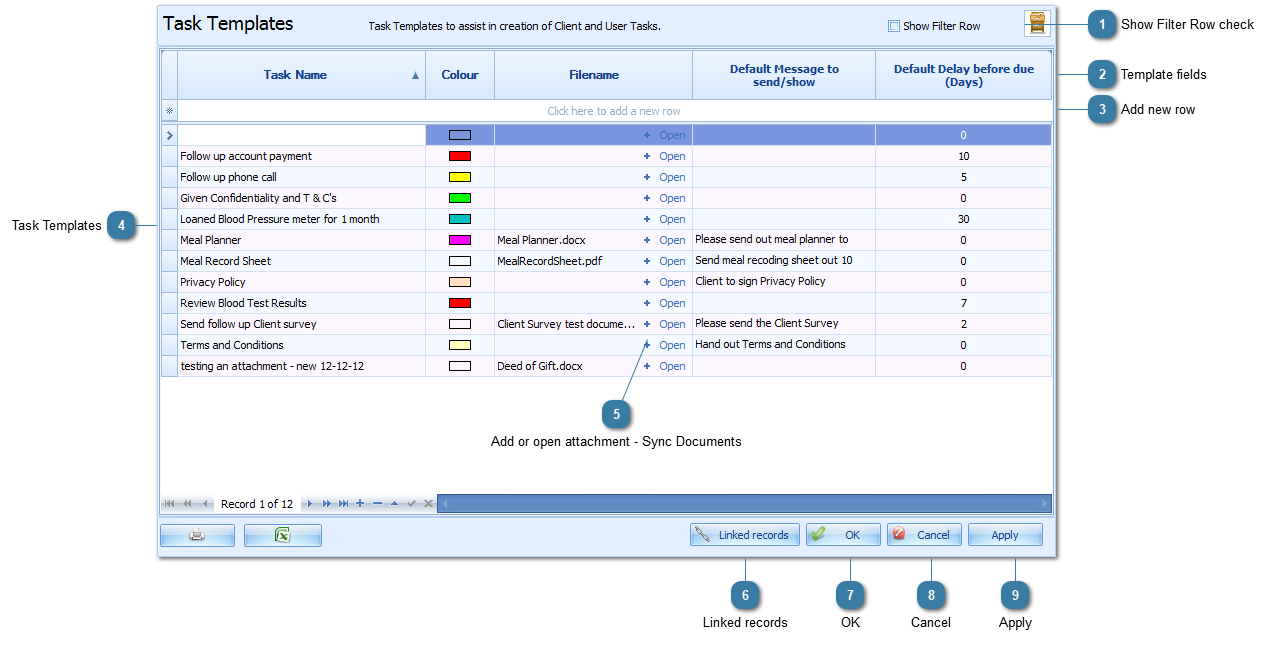
Create a Task Template
Task Templates are a way of creating a standardised task for jobs that happen frequently. This means that they can include standard wording, attachments and due dates delays so that this information does not have to be rewritten each time a task is created. They could be actionable items, like check a client's blood test results prior to an appointment or used to record that specific documentation or equipment has been given to a client. Basic task templates can also be created via the Tasks option accessed through the Appointment right click menu.
Show Filter Row check
Tick this to enable the filter row. This allows the task templates records to be searched. This especially useful if the template list is long.
Colour - assign a colour to the task row. These show up in both the Tasks tab within Client Details and the Tasks Master Report.
Filename - use the + to add an attachment to the template. Click Open to open and review the attachment. See the details below about Syncing documents.
Default Message to send/show - The message to include in the task
Default Delay before due (Days) - This automates the due date that defaults in based on the number of days entered from the date created, e.g. if the Default Delay was set to 7 and today's date is 01/01/2013 then a task based on this created today would have a due date of 08/01/2013.
For all installations with Syncing computers, Sync Network Docs needs to run to make any attachments available to other users. This can either be run manually via the System tab or users will need to wait until the automated Sync Network Docs has run to make the file available. The time that the automated sync run is set in System > Options > Documents.