
This article describes how to create, book, edit, and cancel a group appointment in Bp Omni. Group appointments allow clinics to schedule and manage a single appointment time for multiple participants, such as an exercise class or an information session. All consultations and invoices are managed per participant.
Group appointments can be used by any discipline that runs specific teaching modules, such as Diabetes educators, Midwives, Dietitians, and Physiotherapists.
In this article:
Create a new group appointment type
To create new Appointment types, you must first log in as a user with the Business role of Owner or Practice Manager.
- Select your profile icon in the top-right corner of the menu bar and select Settings. The Users list screen will appear.
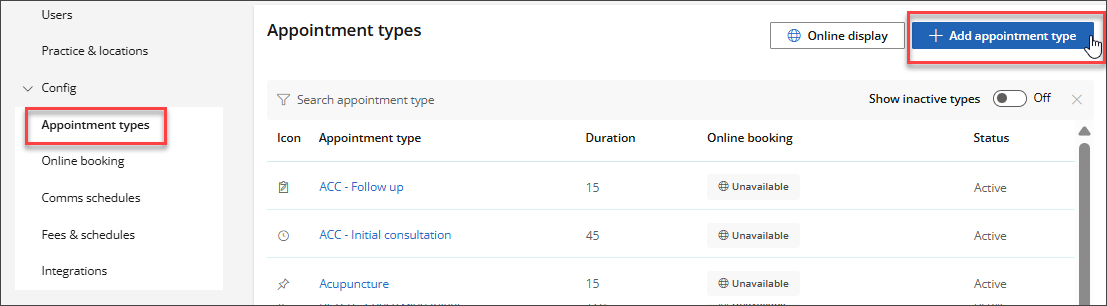
- Select Config > Appointment types. The Appointment Types screen will appear.
- Click + Add appointment type. The New Appointment Type modal will appear.
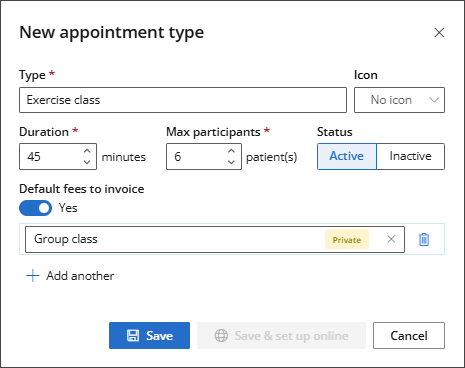
- Add the new appointment type name to the Type field and select an icon from the available options if desired.
- Select a Duration for the appointment type.
- Set the Maximum participants based on the size of the session you'd like to create this appointment for. This number can be modified when booking the appointment.
- Set the appointment type Status to Active or Inactive. Inactive appointment types cannot be selected when creating an appointment.
- If required, toggle Default fees to invoice to Yes and search for a fee to invoice by default for the appointment type.
- Click Save. The new appointment will appear in the Appointment type list.
Booking a group appointment
- Open the new appointment screen via one of the following options:
- select Appointments > New appointment
- click the plus icon in the top right corner of the menu bar and select New appointment
- double-click a timeslot in the appointment book
- click + Add appointment in the top-right corner of the appointment book.
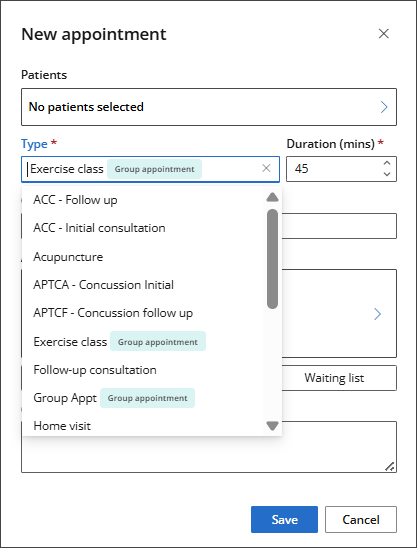
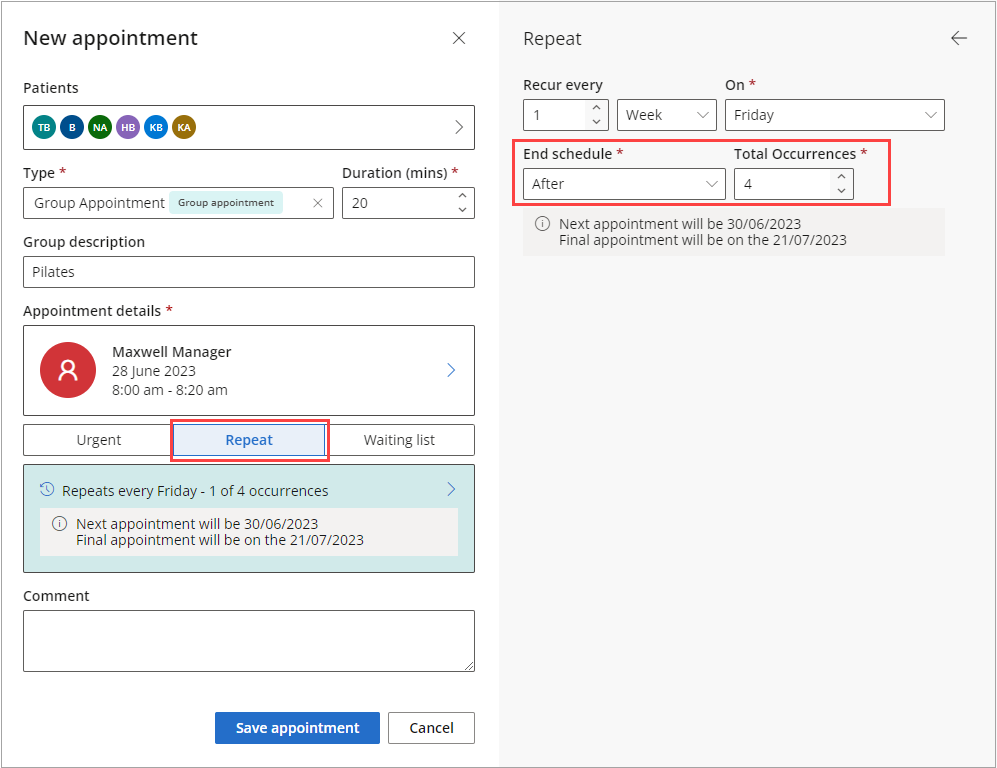
- Select a Group appointment Type.
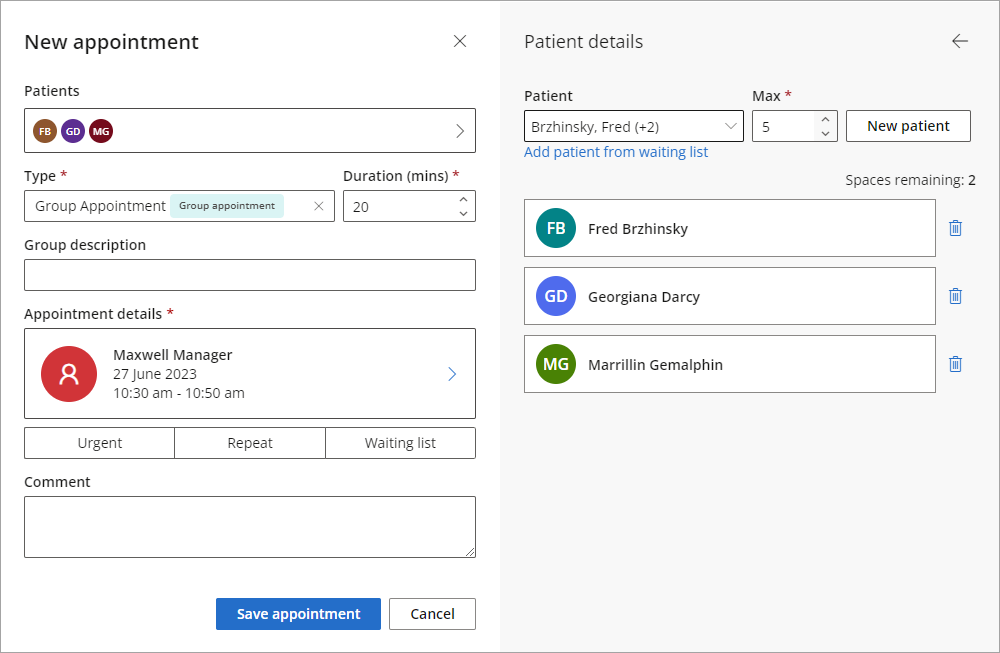
- Add patients to the group appointment. Type the patient or client's name into the Patient or Client field to search for them.
- To add a patient from the waiting list or to remove patients from an appointment, click the trash can icon located next to the patient's name.
- To schedule a Repeat Appointment (e.g., for a recurring Clinical Pilates class), go to Appointment Details and select Repeat. The Set up repeat appointment panel will display on the right-hand side.
- Add a Comment if applicable. The comment will appear when the appointment is clicked in the appointment book.
- Click Save.
If you double-click a timeslot in the appointment book, the timeslot will be blocked from use by others while you create the appointment. Other staff members will be able to see who the timeslot is locked by.

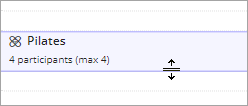
The Group description will display on the appointment in the appointment book along with the number of currently booked participants and the maximum number of participants.
If the patient or client cannot be found in the database, click New patient or New client to enter their details, then click Save.

The maximum number of patients for this appointment can be adjusted, and this change will be reflected in the appointment book.

Specify how often the appointment should repeat, the day on which it should occur, and whether the schedule should end after a specific number of occurrences or on a chosen end date.
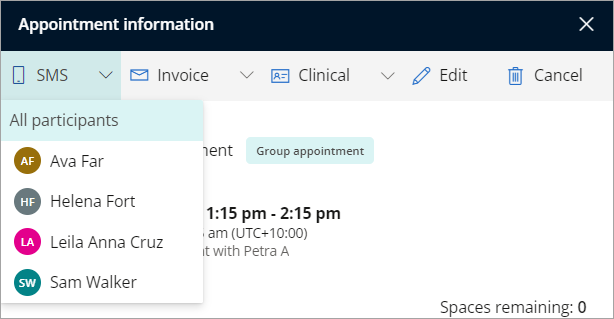
Practices can set up automated Comms Schedules for SMS reminders via Settings, remind participants individually, or choose to send an SMS Reminder in bulk by selecting 'All Participants' after left-clicking on the appointment and selecting 'SMS'.
Find available space in an existing group appointment
To add a patient to an existing group appointment with available space:
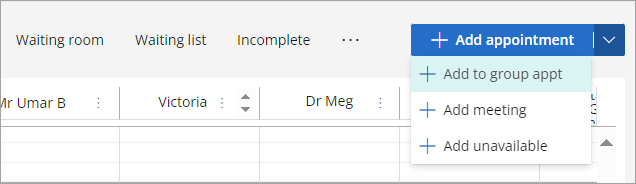
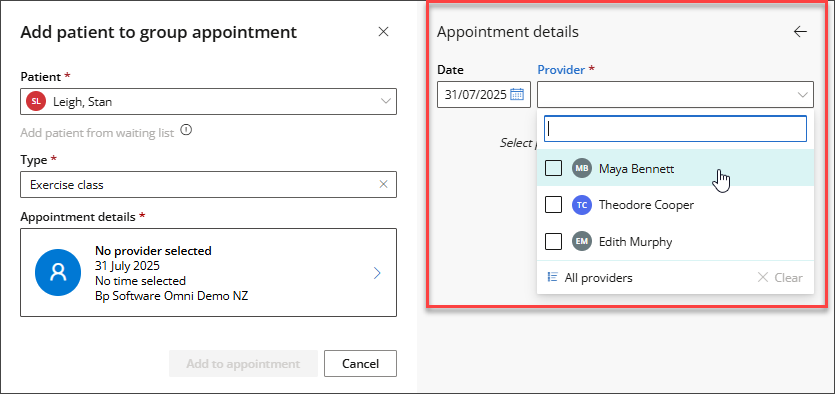
- Click the blue action button at the top-right corner of the appointment book and select Add to group appointment.
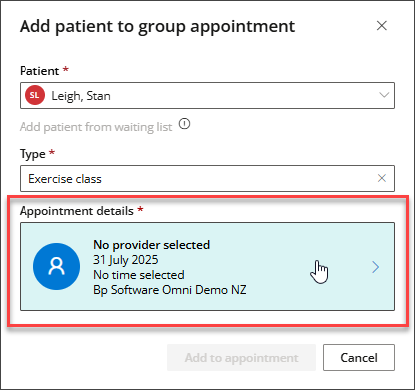
- Search for the patient by name, or click New patient to create a new patient record.
- Select the group appointment Type from the available list.
- Click Appointment Details to open the Appointment Details panel on the right hand side.
- Select the Provider from the dropdown.
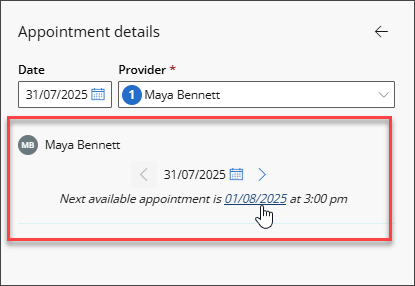
- The provider's Next available appointment will be displayed. Click on the next available appointment Date.
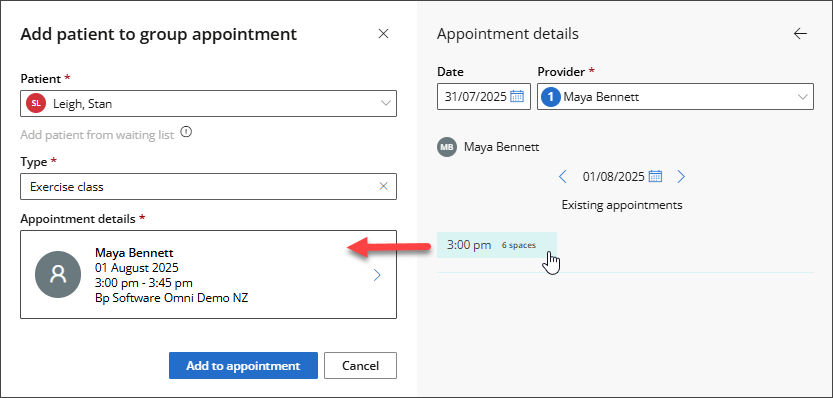
- The appointment time and the number of available spaces in the group appointment will be displayed. Click on the Time to populate the Appointment Details.
- To include the patient in the group appointment, click Add to appointment.
Edit a group appointment
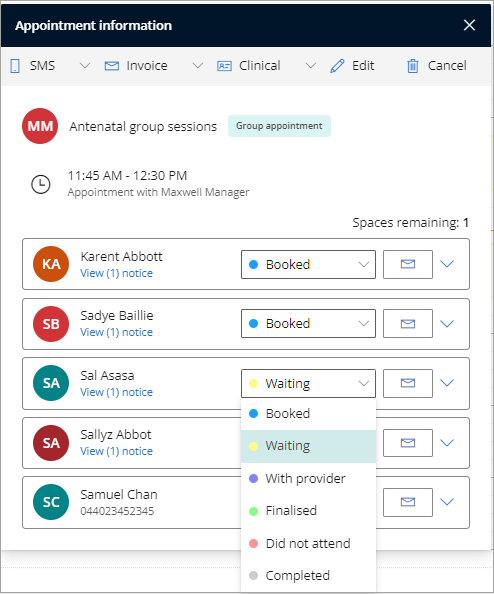
- From the appointment book, right-click the appointment to view the context menu. From this menu you can arrive the group, update the group appointment status, individually set the status of patients, or edit and cancel the appointment.
- Once you have selected Edit, Make any required changes, and click Save appointment.
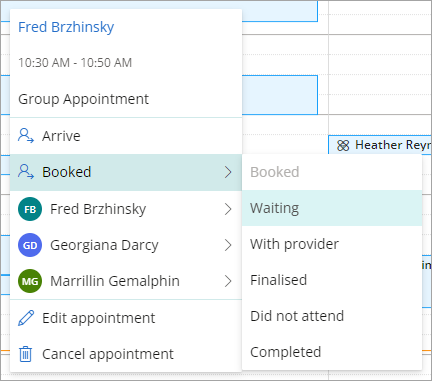
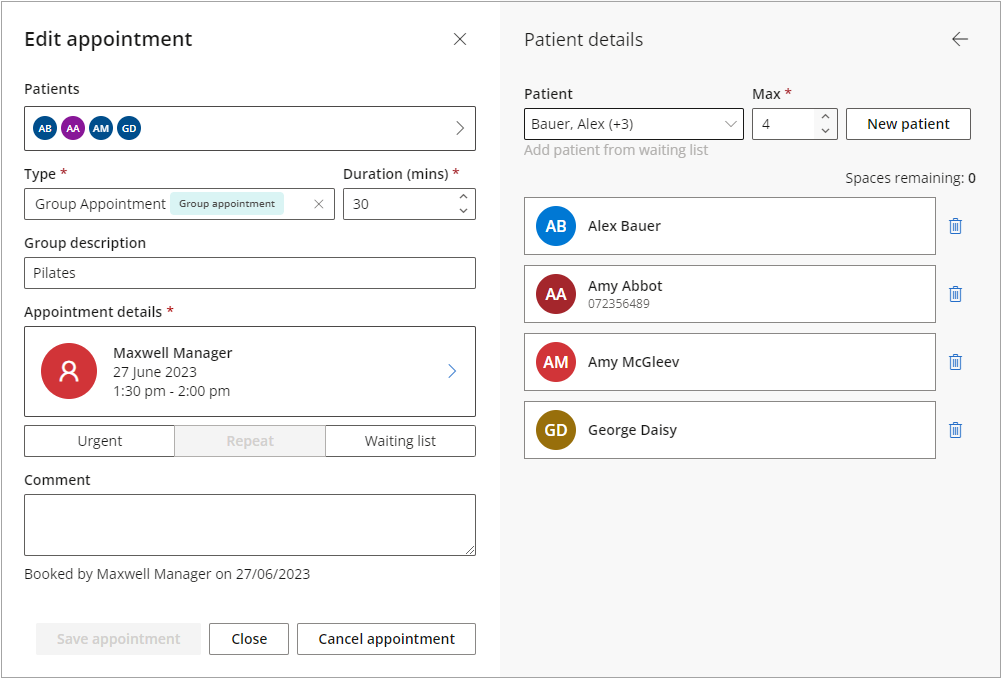
NOTE Individual patients that are part of group appointments can have their appointment status updated and this will be reflected in the appointment book.
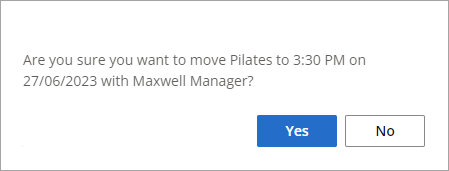
Move an appointment
- Click the appointment and drag it to a new timeslot.
- A notification will appear asking if you are sure that you wish to move the appointment time.
- Click Yes to move the appointment.
Change a group appointment's duration
- Hover over the top or bottom of an appointment until the vertical resize icon appears.
- Click and drag to make the appointment longer or shorter.
- A notification will appear asking if you are sure that you wish to change the appointment's duration.
- Click Yes to change the appointment duration.
Cancel a group appointment
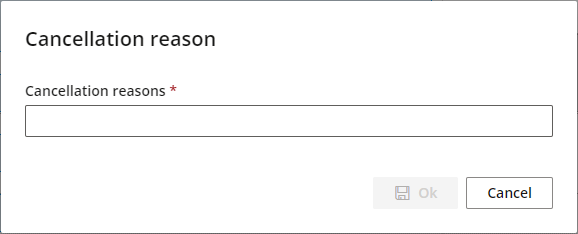
- In the appointment book, right or left-click the appointment you wish to cancel, and click Cancel. The Cancellation reason screen will appear.
- Select a cancellation reason.
- Click Ok to cancel the appointment.
You can add or edit cancellation reasons from the Settings menu. See Set Up the Appointment Book for more information.
Last updated: 31 July 2025.


 AU
AU 