We are excited to announce our new partnership with HICAPS. The HICAPS features are currently being piloted and are hidden until the completion of the pilot phase. Practices will be notified by email when the HICAPS integration is publicly available!
This article describes how to Cancel processed Medicare rebates and Refund EFT payments with HICAPS Integrated EFTPOS in Bp Premier.
IMPORTANT HICAPS Integrated EFTPOS can only be used to refund payments in Bp Premier. Bp Premier does not support the cancellation of Medicare Easyclaim rebates; cancellation must be arranged with Medicare directly. See Cancel processed Medicare rebates for more information.
This section describes how to cancel a Medicare Rebate for a patient for claims submitted to Medicare via Easyclaim or Patient Claiming.
IMPORTANT HICAPS Medicare Easyclaim rebates to the patient are immediate. Adjustments to the Account or Payment cannot be made after the claim is approved. If you reverse a payment, you must consider how any related claim has been transmitted, and you must contact Medicare to arrange cancellation.
Because Medicare Easyclaim claims are immediately rebated to the patient's bank account, you cannot cancel the Medicare rebate directly from Bp Premier. You must contact Medicare to arrange for the cancellation of the rebate to the patient's account. You must provide Medicare with the Easyclaim Transaction ID.
To find the Easyclaim Transaction ID:
- Select Management > Payment Integration Transactions from the main Bp Premier screen. The Payment Integration Transactions screen will appear.
- Select HICAPS from the Payment Integration drop down.
- Select a Transaction Type of ‘Private Easyclaims’.
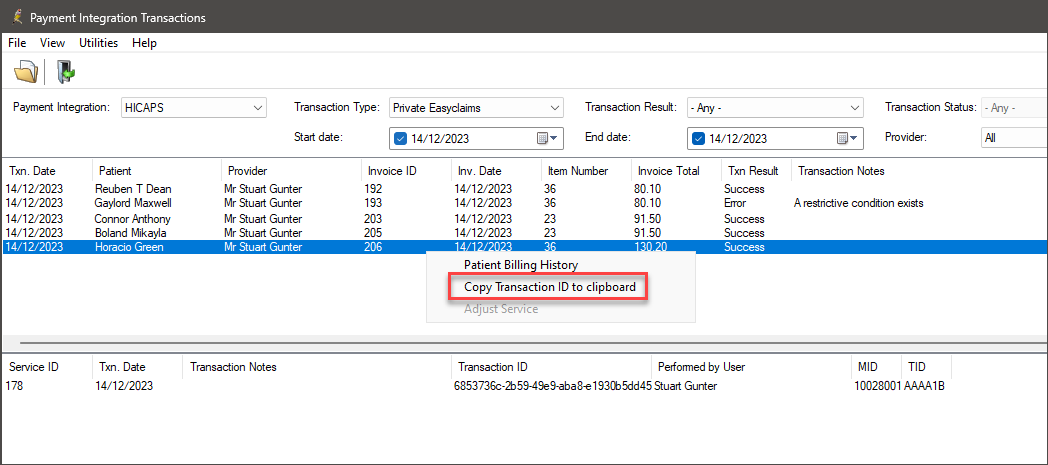
- Find the claim that you need to cancel and identify the Transaction ID.
- Right-click the claim and select Copy Transaction ID to clipboard to copy the transaction ID. Use Ctrl+V to paste the ID elsewhere.
- Select Management > Patient Claiming from the main Bp Premier screen. The Patient claims screen will appear.
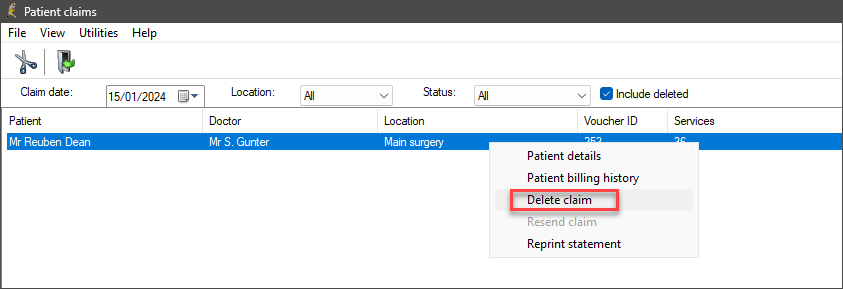
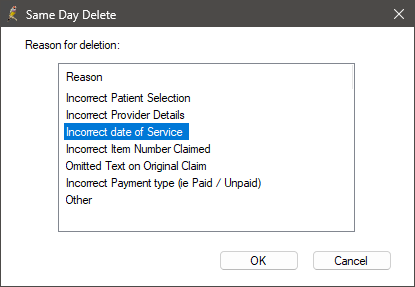
- Highlight the Invoice to be cancelled. Right-click and select Delete claim or select File > Delete claim. The Same Day Delete screen will appear.
- Select a Reason for Delete and click OK.
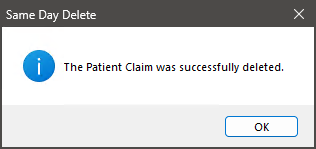
- Bp Premier will send a deletion request to Medicare to cancel the claim. Click OK.
- The claim will be removed from the Patient Claiming screen. You can view the claim by ticking Include deleted.
IMPORTANT Claims sent to Medicare via Patient claiming can only be deleted on the same day the claim is sent.
Because of the speed with which HICAPS processes payments and Medicare rebates, cancelling or refunding HICAPS payments is not straightforward
IMPORTANT Medicare Easyclaim claims are immediately rebated to the patient's bank account, you cannot cancel the Medicare rebate directly from Bp Premier. You must contact Medicare to arrange for the cancellation of the rebate to the patient's account. For further information, see Cancel Medicare Easyclaim Rebates.
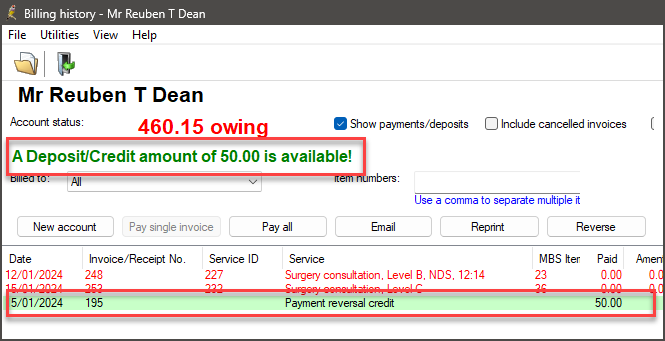
When you reverse a payment, Bp Premier prompts you to create a credit transaction (a payment reversal credit), which is visible from the Patient Billing History and Account Holder History screens. You can then adjust, refund, or reallocate the credit transaction, depending on the original payment error.
To reverse a payment in Bp Premier:
- Select Management > Patient Billing History from the Bp Premier main screen.
- Search for and select the patient from the Billing History screen.
- Tick the Show Payments / Deposits check box at the top of the screen.
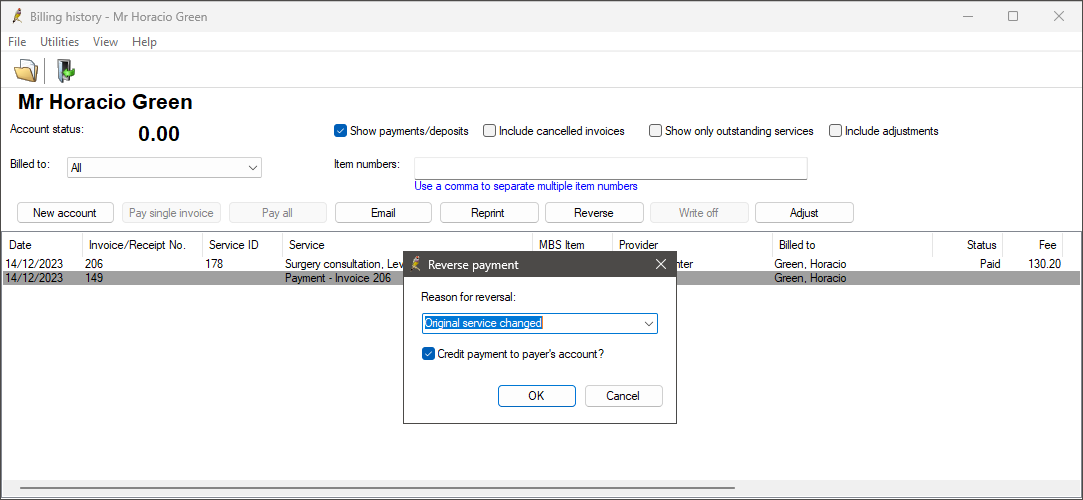
- Select the payment to be reversed and click Reverse. The Reverse payment screen will appear.
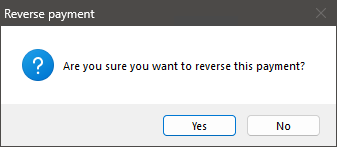
- Click Yes when Bp Premier prompts 'Are you sure you want to reverse this payment?'.
- Enter a Reason for reversal, or select a reason from the drop-down menu.
- Leave the Credit payment to payer's account? check box ticked. This check box creates a Deposit in the patient's account.
- Click OK to return to the Patient Billing History or Account Holder History screen. The credit you just created will appear with green shading.
- Any related invoices will change status to ‘Unpaid’, so that the invoice can be adjusted, cancelled or payment re-entered.

The green writing at the top of the screen ('A Deposit/Credit amount of 50.00 is available!' in the example below) indicates the value of the Deposit / Credit available. This is money that the practice has received from this patient or account holder but has not been allocated to pay an invoice, and is therefore 'owed' to the payer.
The reversed payment will be displayed according to the following conditions:
- If the payment reversed was a normal payment, the description will say 'Payment reversal credit'
- If the original payment was created by a deposit allocation, the description will say 'Deposit reversal credit'
- Both record types could appear if the reversed payment was a combination of a normal payment and deposit allocation
- The credit will appear on the Deposit / Payment Reversal Credit report
- The credit will not appear on the Banking screens, because no additional money has been taken.
If you tick the Include adjustments check box:
- An adjustment transaction will appear for a negative amount
- The negative adjustment transaction will appear on payment and transaction reports to reflect that an adjustment has occurred
- The negative adjustment will not appear on the Banking screens, because no additional money has been taken.
IMPORTANT HICAPS Integrated EFTPOS can only be used to refund payments in Bp Premier. Bp Premier does not support the cancellation of Medicare Easyclaim rebates; cancellation must be arranged with Medicare directly. See Cancel processed Medicare rebates for more information.
To refund a payment in Bp Premier using HICAPS Integrated EFTPOS:
- Select the Deposit in the Patient Billing History. The deposit will appear shaded in light green in the list of transactions for the patient. If the deposit does not appear, tick the Show payments / deposits check box at the top of the screen.
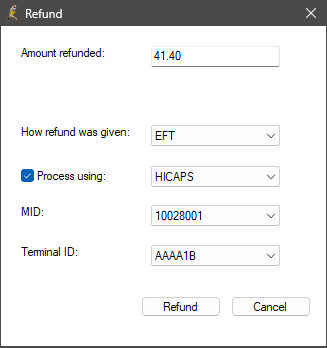
- Click the Refund button and the Refund screen will appear. By default, the screen shows the remaining deposit balance, but this value can be reduced.
- Indicate How the Refund was given, select EFT to refund the payment via HICAPS.
- The Merchant ID (MID) for the Provider associated with the initial payment is populated in the MID field by default. When multiple or no MIDs are specified in Setup > Configuration > Bank Accounts, the following will apply:
- If the Provider associated with the initial payment has more than one MID, the user will see a list of all MIDs for the Provider, which can be updated as needed.
- The practice's MID will be used if the Provider associated with the initial payment is not authenticated with HICAPS in Setup > Configuration > Bank Accounts.
- If the initial payment provider has a default Terminal ID (TID) configured, that terminal will be pre-selected in the Terminal ID (TID) field. Where there are no TIDs specified in Setup > Configuration > Bank Accounts, the following will apply:
- If the default TID of a provider is not specified, the workstation's default TID is used.
- If a default TID is not specified for the workstation, the practice global default TID is used.
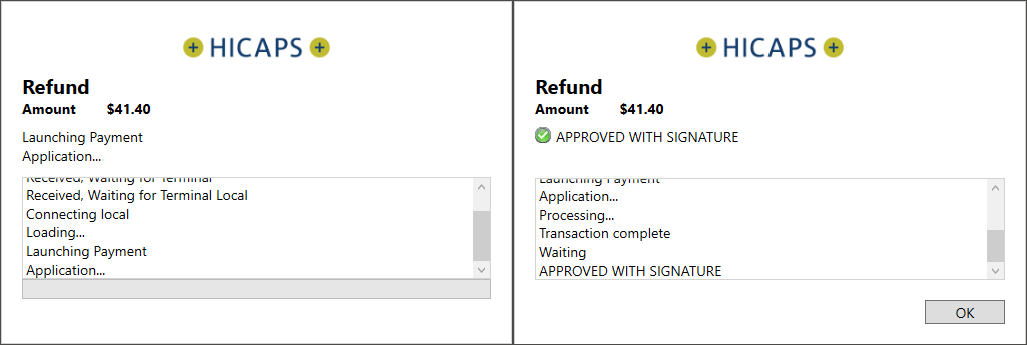
- Click Refund. The Bp Payments Utility will be displayed and the HICAPS terminal will activate.
- The HICAPS terminal will display prompts to guide you through the rest of the refund process:
- The HICAPS terminal will prompt the practice staff to enter a passcode.
- When requested, the patient taps or inserts their card and is asked to enter their PIN.
- The signature screen will appear. Once signed, the practice staff will be prompted to accept the signature and issue a refund.
- A receipt for the practice is printed, and the prompt for the customer's receipt is displayed.
- The HICAPS terminal has completed the refund process.
- Click OK.
- An adjustment will be created in the account holder transaction record and a negative value will appear in the Banking screen that can be taken into account when reconciling.

The Bp Payments Utility will display the following screens to the user.
Information correct at time of publishing (26 February 2024).