Bp VIP.net provides visual cues from the toolbar for incoming pathology results that require attention from internal providers. Visual cues ensure that lab results are not missed, even if the results transmission contained errors.
Detecting incoming abnormal results
The normal Investigations icon shown on the toolbar in the main screen is ![]() . This icon changes based on the presence of incoming results:
. This icon changes based on the presence of incoming results:
- Any imported lab results with a status of 'Acknowledge Sent' or 'Received' will cause the icon’s colours to reverse and appear as
 .
. - If any imported investigation results have abnormal results, the icon will flash.
Click on the ![]() icon to open MyComms and view the provider's incoming results.
icon to open MyComms and view the provider's incoming results.
To reset the icon to the default, change the status of all results to other than 'Acknowledge Sent' or 'Received'. The logged-in user can click the icon to stop it blinking for the duration of their Bp VIP.net session, but if an abnormal result is imported during the session, blinking will not resume unless the user logs out and back in.
Detecting incoming results with file errors
Sometimes incoming results contain errors that stop Bp VIP.net from importing the results. However, the provider must still be made aware that the results import failed. The 'bad lab results' icon ![]() , which appears next to the regular Investigation icon
, which appears next to the regular Investigation icon ![]() , alerts the user to investigations with file errors that can be attended to and reimported.
, alerts the user to investigations with file errors that can be attended to and reimported.
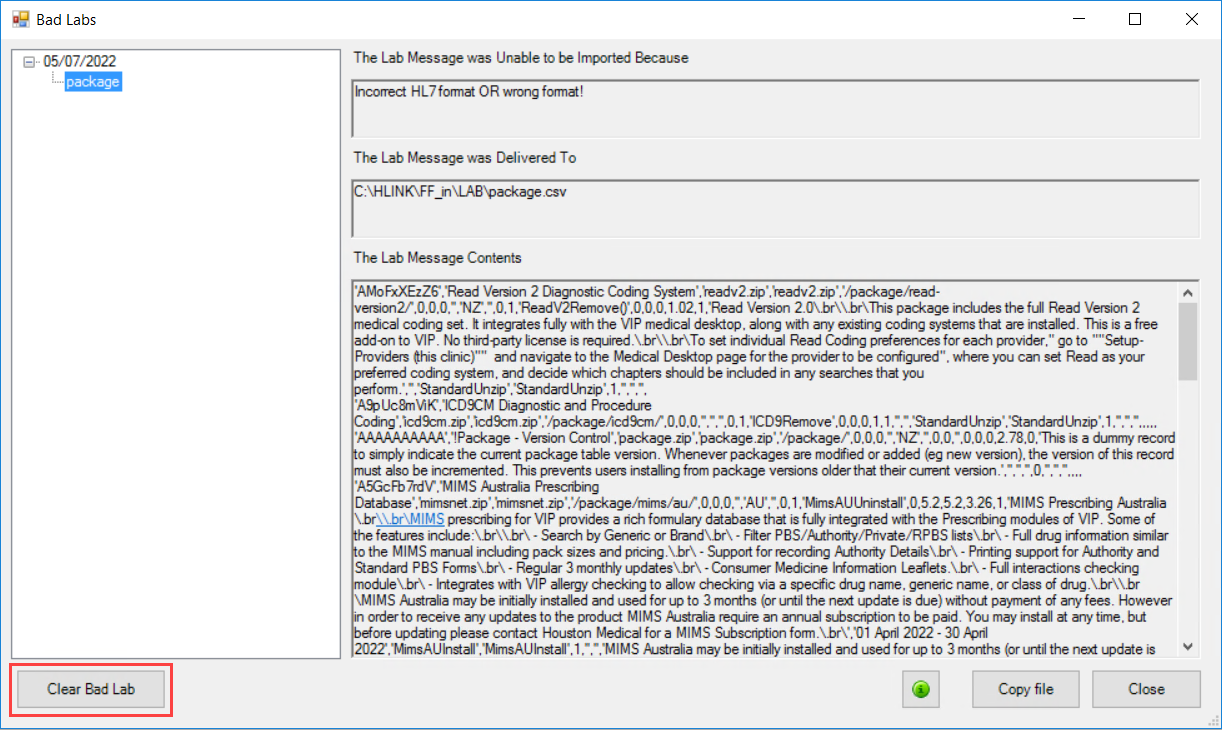
When a user clicks on the bad lab icon, Bp VIP.net shows the user any results files that could not be read due to errors. Click a file to see where the file is located in the file system, and the raw information held in the file (where possible).
Clear bad lab results
When the bad lab results have been reviewed the Clear Bad Lab button from the Bad Labs screen will remove selected lab results.
- With the bad lab result selected, click Clear Bad Lab.
- A confirmation screen will ask the user to enter a three-digit code provided to confirm that the appropriate measures have been taken to ensure the patient's record stays true and correct.
- Select OK or the F12 key to save and return to the Bad Labs screen.

Related Topics
Last modified: 17 November 2022