eRx is an electronic prescription transmission system. You can send eScripts from Bp VIP.net Topaz SP2 using eRx, after installing and configuring the software.
The eRx script exchange is also used for the upload of prescription records to My Health Record and for Real Time Prescription Monitoring from Bp VIP.net.
IMPORTANT The following instructions are provided as a guide and are subject to change. The process of installing eRx for Bp VIP.net is undergoing change as part of the transition to the National Prescription Delivery System framework. This article will be updated with current information as it is provided.
What you’ll need
To install eRx software you will need to contact Best Practice Software to obtain the eRx installation files and the entity IDs of registered prescribers. Users must also have a NASH certificate installed.
|
Requirement |
Provided by |
|---|---|
|
Administrative Microsoft Windows account |
See your IT Administrator for assistance. |
|
NASH PKI certificate file (fac_sign.p12) and password |
Obtained from PRODA. See Install a NASH certificate and Configure Bp VIP.net with the NASH Certificate for more information. |
|
eRx Entity ID |
Given to each individual provider after registering with eRx. The Entity ID is sent to Best Practice Software by eRx. Contact support@bpsoftware.net after your prescribers have been successfully registered with eRx to obtain the entity IDs. |
|
eRx Standard Adapter installer file (eRx.StandardAdapter.Installer_ReleaseProd.msi) |
To receive eRx installation files, contact Best Practice Software to supply the email address of the user installing the software. An email will be sent to this address from eRx containing further instruction on downloading installation files. |
|
eRx Adapter Certificate Updater executable file (eRxAdapterCertUpdater.exe) |
|
|
eRx Data Encryption G1 V2 certificate (V2.pfx) |
NOTE Best Practice Software recommends installing eRx software on the Bp VIP.net terminal server. Workstations must be able to access the eRx installation to send eScripts via eRx.
Add a new provider to eRx
Before you start, you’ll need each doctor’s prescriber number, and your NASH certificate and password.
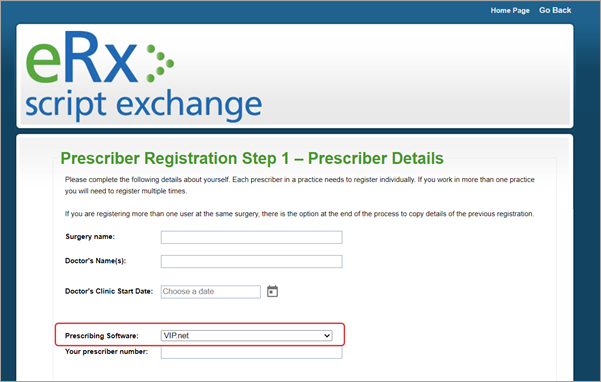
- Go to erx.com.au and click the Medical Practice button.
- Complete the registration form and select ‘VIP.net’ as the Prescribing Software. Copy the form to register multiple providers.
- eRx will forward the Entity IDs to Best Practice Software.
TIP A support agent will forward the Entity IDs to your practice contact email for Best Practice Software, with the subject line ‘eRx New Site/Prescriber Setup.’ Check your spam folder for emails from support@bpsoftware.net with ‘eRx’ in the subject.
On your local desktop, locate:
- eRx Standard Adapter installer file (eRx.StandardAdapter.Installer_ReleaseProd.msi)
- eRx Adapter Certificate Updater executable file (eRxAdapterCertUpdater.exe)
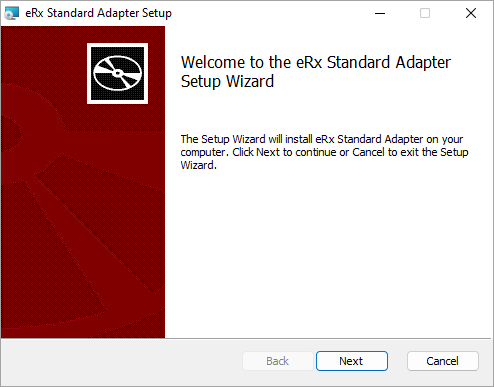
- Right-click and run the Adapter Service Installer as an Administrative user. The eRx Adapter Setup Wizard will open.
- Click Next to begin the Wizard Installation.
- Click Yes to allow this app to make changes to your device.
- The eRx Configuration window will open. Select the Prescriber radio button in Step 1.
- Click the Select certificates from the Windows Certificate Store radio button in Step 2.
- Select Install a new certificate. The Certificate Import screen will open.
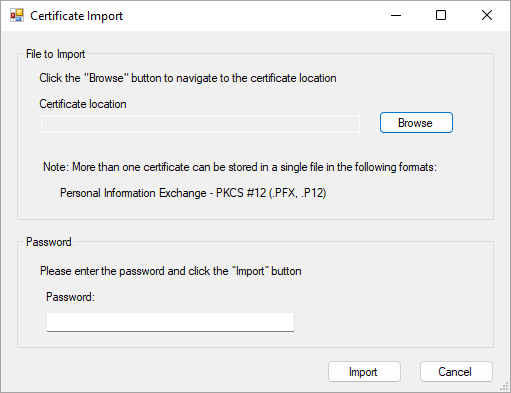
- Click Browse and locate the NASH PKI fac_sign.p12 certificate file.
- Enter the certificate password and click Import.
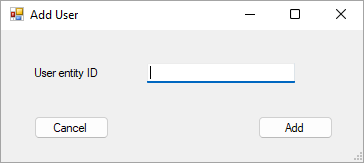
- From the eRx Configuration screen, select the Add button in Step 4 to add a new prescriber.
- Enter the prescriber's eRx entity ID.
- Click Add to create a new record.
- Repeat steps 9-11 for all prescriber entity IDs.
- Click Next when all configuration settings have been completed.
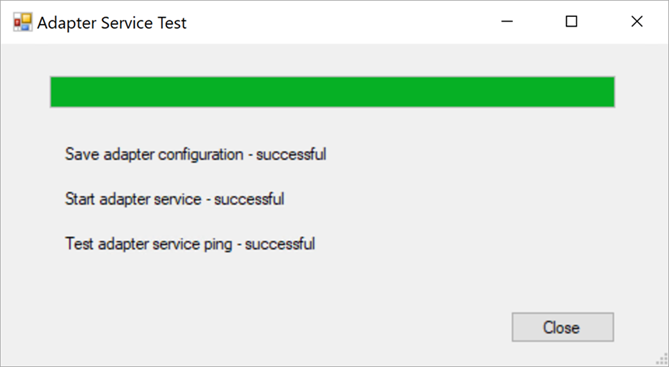
- The Adapter Service Test window will open and run through adapter tests. Wait for a success message for:
- Save adapter configuration.
- Start adapter service.
- Test adapter service ping.
- Locate the eRxAdapterCertUpdater.exe file on your desktop and right-click to run as an Administrator.
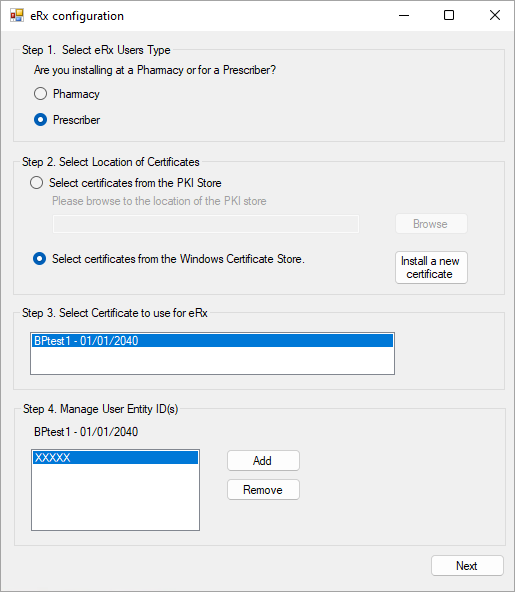
IMPORTANT Under Step 3. Select Certificate to use for eRx, the eRx Data Encryption G1 certificate will be highlighted by default. This indicates that the encryption certificate has been installed correctly. If the certificate is not there, an issue with the installation has occurred.
From your local desktop, search for Manage computer certificates found in the Control Panel.
Select Trusted People > Certificates.
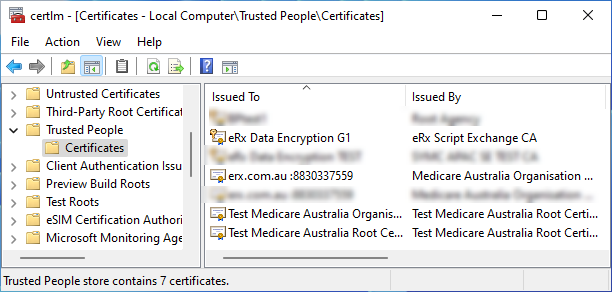
This folder should contain:
- eRx Data Encryption G1 V2 certificate (V2.pfx)
- eRx Public certificate (erx.com.au)
- NASH PKI certificate file (fac_sign.p12)
- On your local desktop, search for Windows Services, also accessible from the Control Panel.
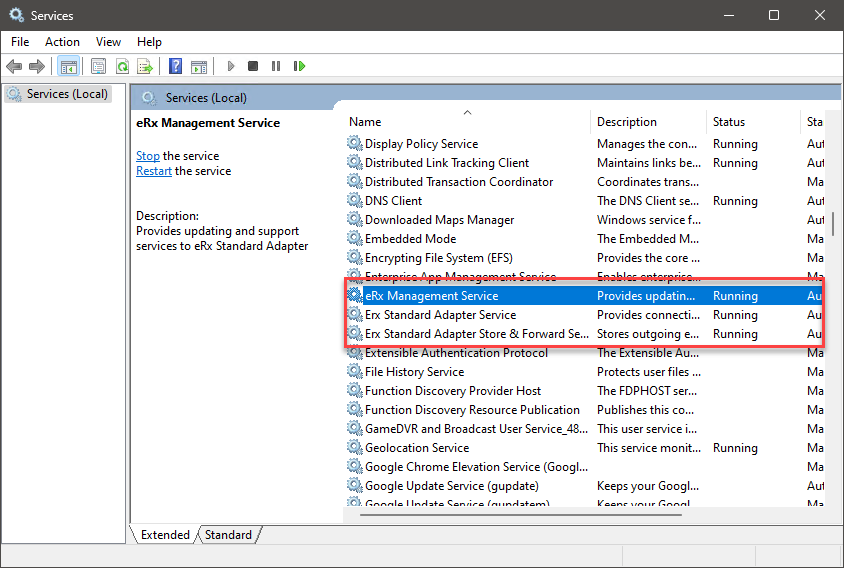
- Scroll down to eRx Management Service, eRx Standard Adapter Service and eRx Standard Adapter Store & Forward Service.
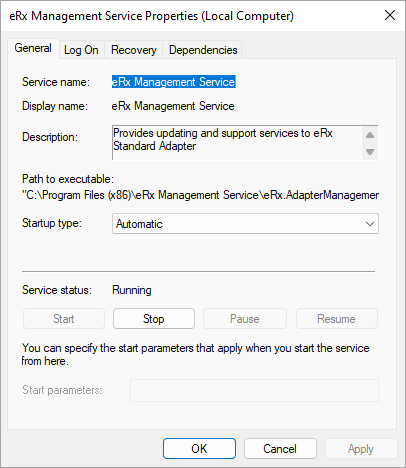
- Double-click on the eRx Management Service. Set the Startup type to Automatic.
- If the Service status is 'Running', click Stop and then click the Start button. Otherwise, click the Start button.
- Repeat steps 3-4 for the Erx Standard Adapter Service and the Erx Standard Adapter Store & Forward Service.
- Check that all services have a status of 'Running'.
- Close the Services screen.
What do I do next?
Last modified: 10 April 2024