To redirect fees and balances of fees to an insurer (for example, after an excess has been paid), you must set up the insurer as an organisation. You can then assign a unique invoice template to the insurer, and set batching and redirection defaults.
IMPORTANT Bp VIP.net allows you change the Role of an organisation at any time. However, once you have performed batching or redirection on an insurer, changing the role will create inconsistencies in Bp VIP.net's financials. If you have wrongly assigned a role, tick Deactivate Organisation and recreate the organisation with the correct role.
- Press F2 to open the Search screen.
- Type in a descriptive name for the organisation in the Search text field. Tick New Organisation. The Organisation Details screen will open at the Details tab with the name you just typed in the Name field, ready to be completed.
- Select a Role of 'Insurer'.
- Enter the Payer Name or use the Get Health Fund Information function to populate the field.
- Enter an identifiable short Code for the insurer. The code is used in Bp VIP.net screens such as Setup > Charging.
- Tick Allow debts to be redirected.
- Complete the contact information and statement defaults in the Details tab as for any organisation.
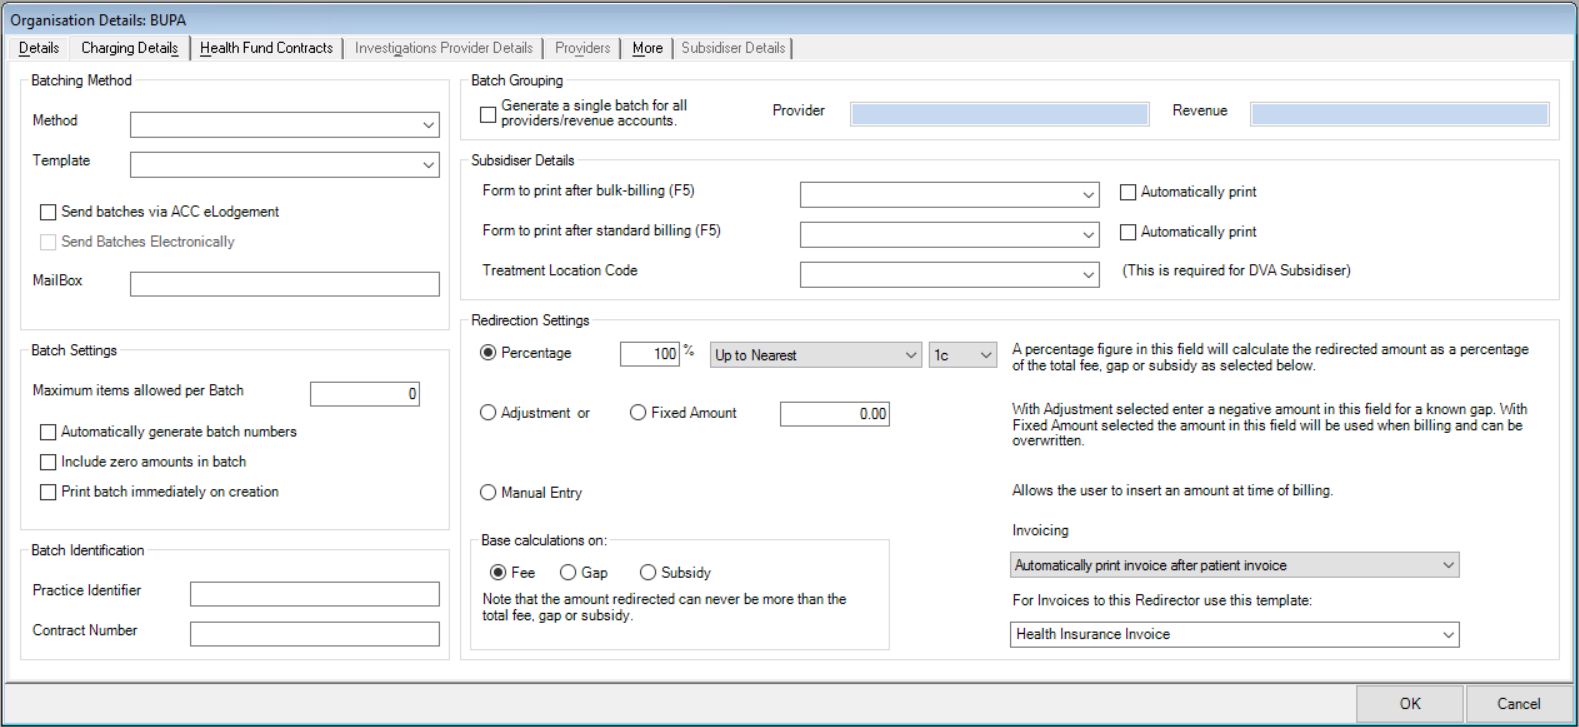
- Select the Charging Details tab.
- Leave the Batching Method field blank. Select the invoice Template to use if invoices for this insurer are batched.
- Leave the Batch Settings, Batch Identification, Batch Grouping, and Subsidiser Details fields blank.
- In the Redirection Settings section, select Percentage, set to 100%, and round up to nearest 1c.
- Select Base calculations on Fee.
- Invoicing is normally set to 'Automatically print invoice after patient invoice', but this setting is practice-dependent.
- Select the invoice to use when printing from the F5 or F8 screens from the For invoices to this Redirector use this template field.
- Click OK.

Setting the redirection percentage to 100% here allows operators to make changes to the redirection amount on individual invoices. If the insurer applies the same percentage rebate to all claims made (80% coverage for all client claims, for example), then you can enter the percentage instead of 100% here.
You now redirect to this insurer from the Consultation (F5) screen.
Updating the Payer Name
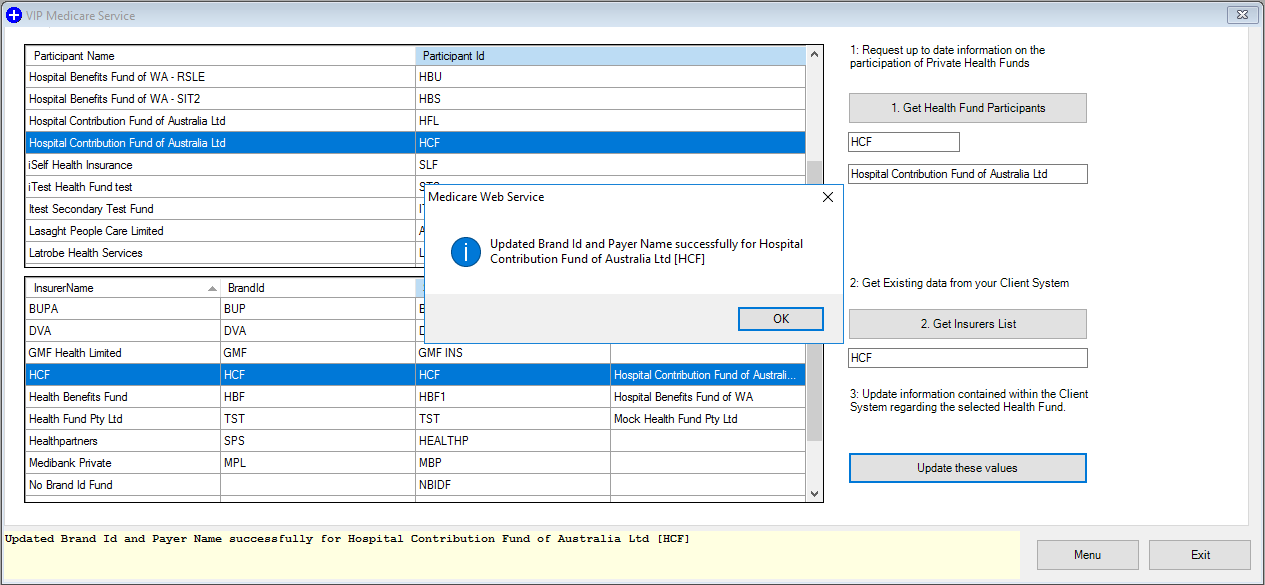
- Click on the Medicare button from the main menu.
- Click on the 1. Get Health Fund Information button.
- In the VIP Medicare Services screen, click on the 1. Get Health Fund Participants and the 2. Get Insurers List buttons.
- Match the two records and click the Update these values button to copy over the BrandID (Participant Id) and Payer Name.
- When the Update notification is displayed, select OK and Exit.

Related topics
Last modified: 11 August 2022