This article explains how to set up cataract surgery auditing for practices who have registered with Index Health. After importing custom user-defined forms and templates for recording surgery information, the data is submitted to Index Health, analysed, and a report returned to your practice on vision statistics post-surgery.
Only ophthalmologists who have registered with Health Index need to follow these instructions. For more information, contact Health Index to register your practice.
Health Index cataract auditing setup requires:
- Import the following UDFs:
- Pre-Operative Co-Morbidities
- Biometry
- Lens Surgery Operation Report
- Post-Operative Events
- Print Surgery Report.
- Import the Lens Surgery Report Letter template.
- Add link buttons to your main Medical Desktop UDF for each of the imported UDFs.
Importing UDFs from Live Update
- From the Bp VIP.net main menu, select Setup > User-Defined Forms.
- Click Import.
- Click Import from Best Practice Library.
- Click Next.
- In following screen:
- Select ‘\Ophthalmology’ and click OK
- Select ‘\Health Index Cat Audit’ and click OK
- Tick ‘Select All’ box and click OK.
- Click OK.
- Click Close.
- Click Close.
Health Index Cataract Audit UDFs have now been imported into Bp VIP.net.
Import the Lens Surgery Report letter template
This template is used to print out your Lens Surgery Operation report data.
- Select Setup > Letter Templates.
- Click Import.
- Click Import from Best Practice Library.
- Click Next.
- In following screen, select
- ‘\All Specialties’ and click OK
- ‘\Ophthalmology’ and click OK
- ‘\Health Index cat Audit’ and click OK
- ‘lens surgery report’ and click OK.
- Click OK.
- Click Close.
- Click Close.
Your Health Index ‘Lens Surgery Report’ letter template has now been imported into Bp VIP.net.
To print the report to a chosen printer and not the default default printer, go to Setup > Letter Templates and select ‘Lens Surgery Report’.
For more information on changing a template's default printer, seeCreate letter and auto templates, scroll to the section entitled Save and set template options, and read the details about Print To.
Attach Lens Surgery Report Template to UDF for printing
- Select Setup > User-Defined Forms.
- Select Print Surgery Report and click Modify.
- Select the green square All mandatory fields have….
- Right click on square and select Modify (Enter).
- Select ‘Lens Surgery Report’ in Template drop down and press OK.
- Press F12 key to save UDF Form Designer window.
- Press Close in User-Defined Forms screen.
Add link buttons to your Medical Desktop
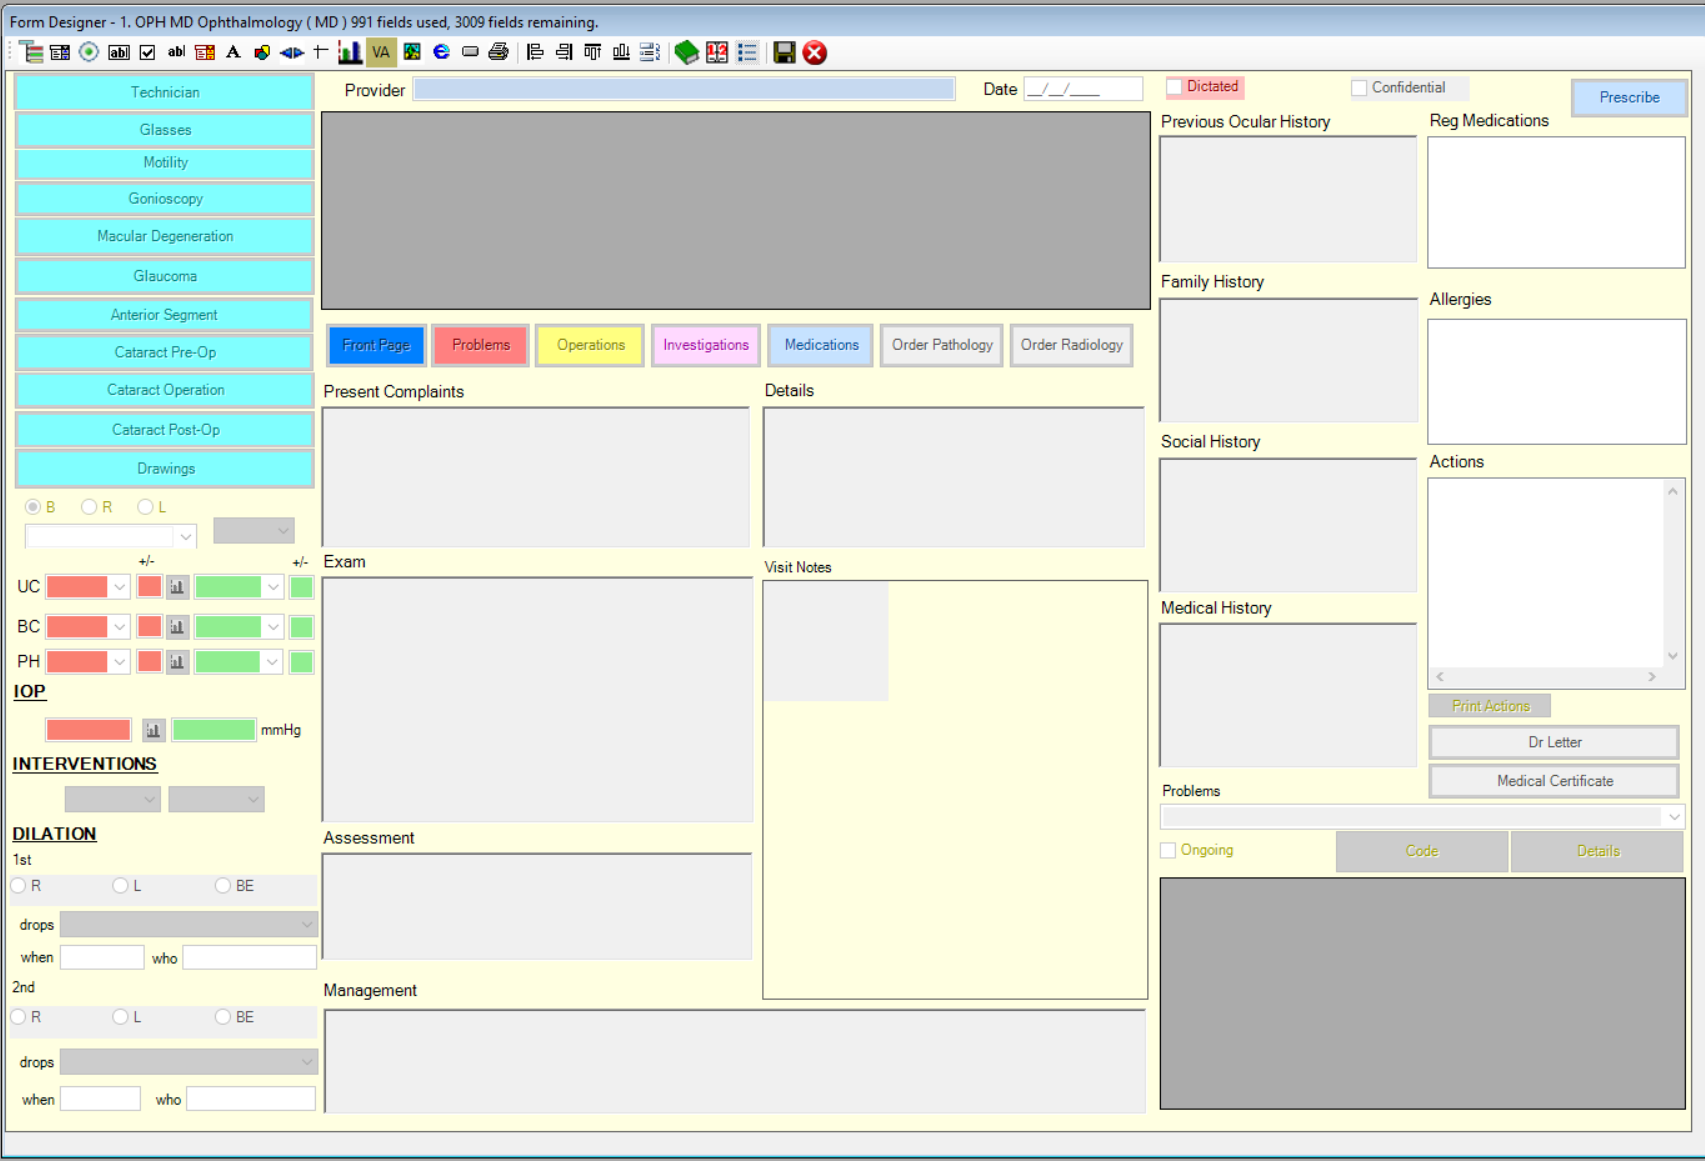
Because Bp VIP.net’s Medical Desktop UDFs are customisable, no two are the same for Ophthalmology. This section uses a standard Ophthalmology Medical Desktop UDF as an example. Your Medical Desktop may appear different.
When adding the link buttons to the new cataract auditing UDFs, you will have to find sufficient space to fit four new buttons onto your medical desktop UDF.
See the below articles for further information:
- From the main screen, select Setup > User-Defined Forms.
- Click the Type column heading to sort the list of UDFs into type order, which brings the Medical Desktop UDFs to the top of the User-Defined Forms screen.
- Select the top one. In most cases the name should be ‘1. OPH MD Ophthalmology...’ or similar. The Type will be ‘Medical Desktop’
- Click Modify. The Form Designer screen will appear.

Make room to fit four link buttons
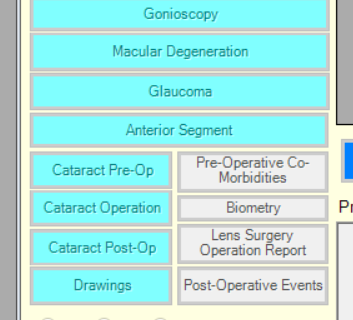
In this example, four existing link buttons are made smaller so that four new link buttons can fit. If your ophthalmology UDF already has room for an extra four link buttons, go to step 4.
- Hold down your Ctrl button on your keyboard
- Select each of the four buttons with a single mouse click. They will now appear with a red border indicating that they have been selected.
- Hold down your Shift key and the press your Left Arrow (<) until the buttons are half the size as they were previously.
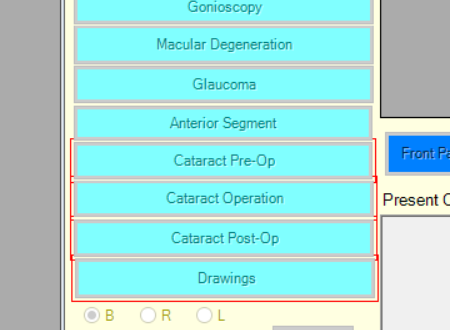
- Select the Add a link to another User-Defined form button.
- In the Modify Link screen, select the first of the four UDFs you just imported in the Link to drop down.
- Type a matching name in the Caption field or copy and paste from Link to field.
- Click OK.
- Drag the new button into place and left click your mouse to drop it.
- Use the arrow keys on your keyboard for finer adjustment of position.
- Hold down the Shift key and use the down arrow and right arrow to adjust the button size.
- Repeat the above steps 4 to 11 to create buttons for the imported UDFs:
- Pre-Operative Co-Morbidities
- Biometry
- Lens Surgery Operation Report
- Post-Operative Events.
-
Press F12 or the save icon to save the Medical Desktop UDF.

Create the link buttons

How to use the Health Index User-Defined Forms
Because of the variety of customisation possible in the Medical Desktop, general advice on the usage of this UDF for practices is not practical in the Knowledge Base. For guidance on using this UDF specific to your practice, please contact BpTraining at training@bpsoftware.net to organise training sessions on the use of Bp VIP.net’s Medical Desktop.
IMPORTANT Remember to always click New Note in the Medical Desktop when creating a new medical note for the day.
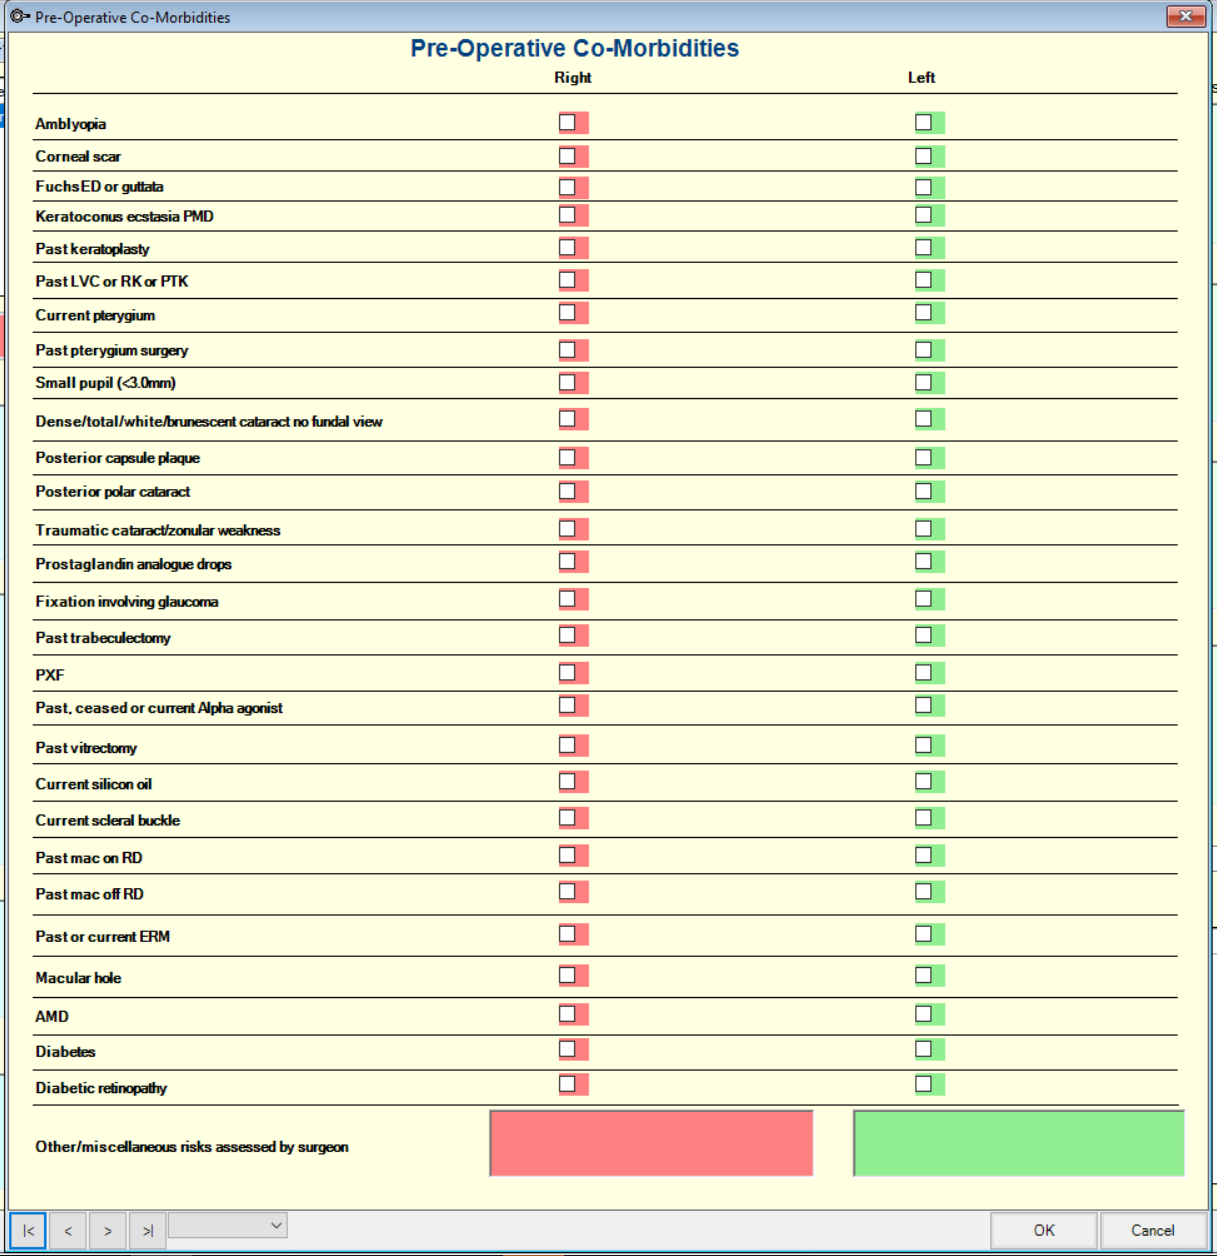
Pre-Operative Co-Morbidities
- Create a new note and press the Pre-Operative Co-Morbidities link button on your Medical Desktop.
- Tick the corresponding morbidities for each eye if they are present, or leave unticked if they are not. There are two free text fields at the bottom where you may type other risks.
- Click OK on completion.
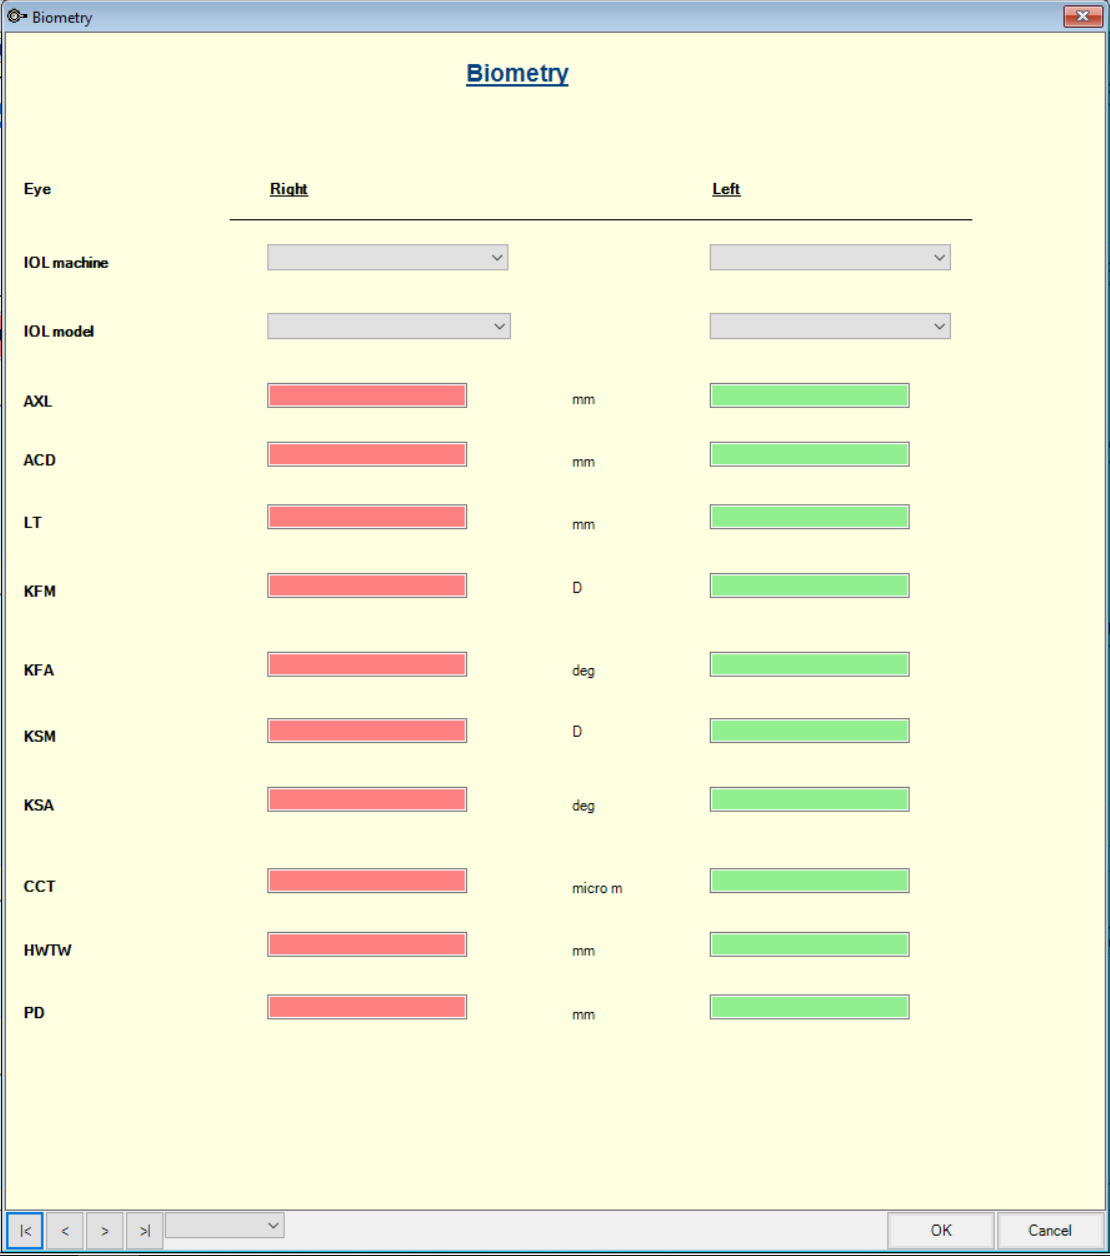
Biometry
- Create a new note and press the Biometry link button on your Medical Desktop.
- For each eye, enter the IOL machine and model, and fill out the biometry values in their corresponding fields.
- Click OK on completion.
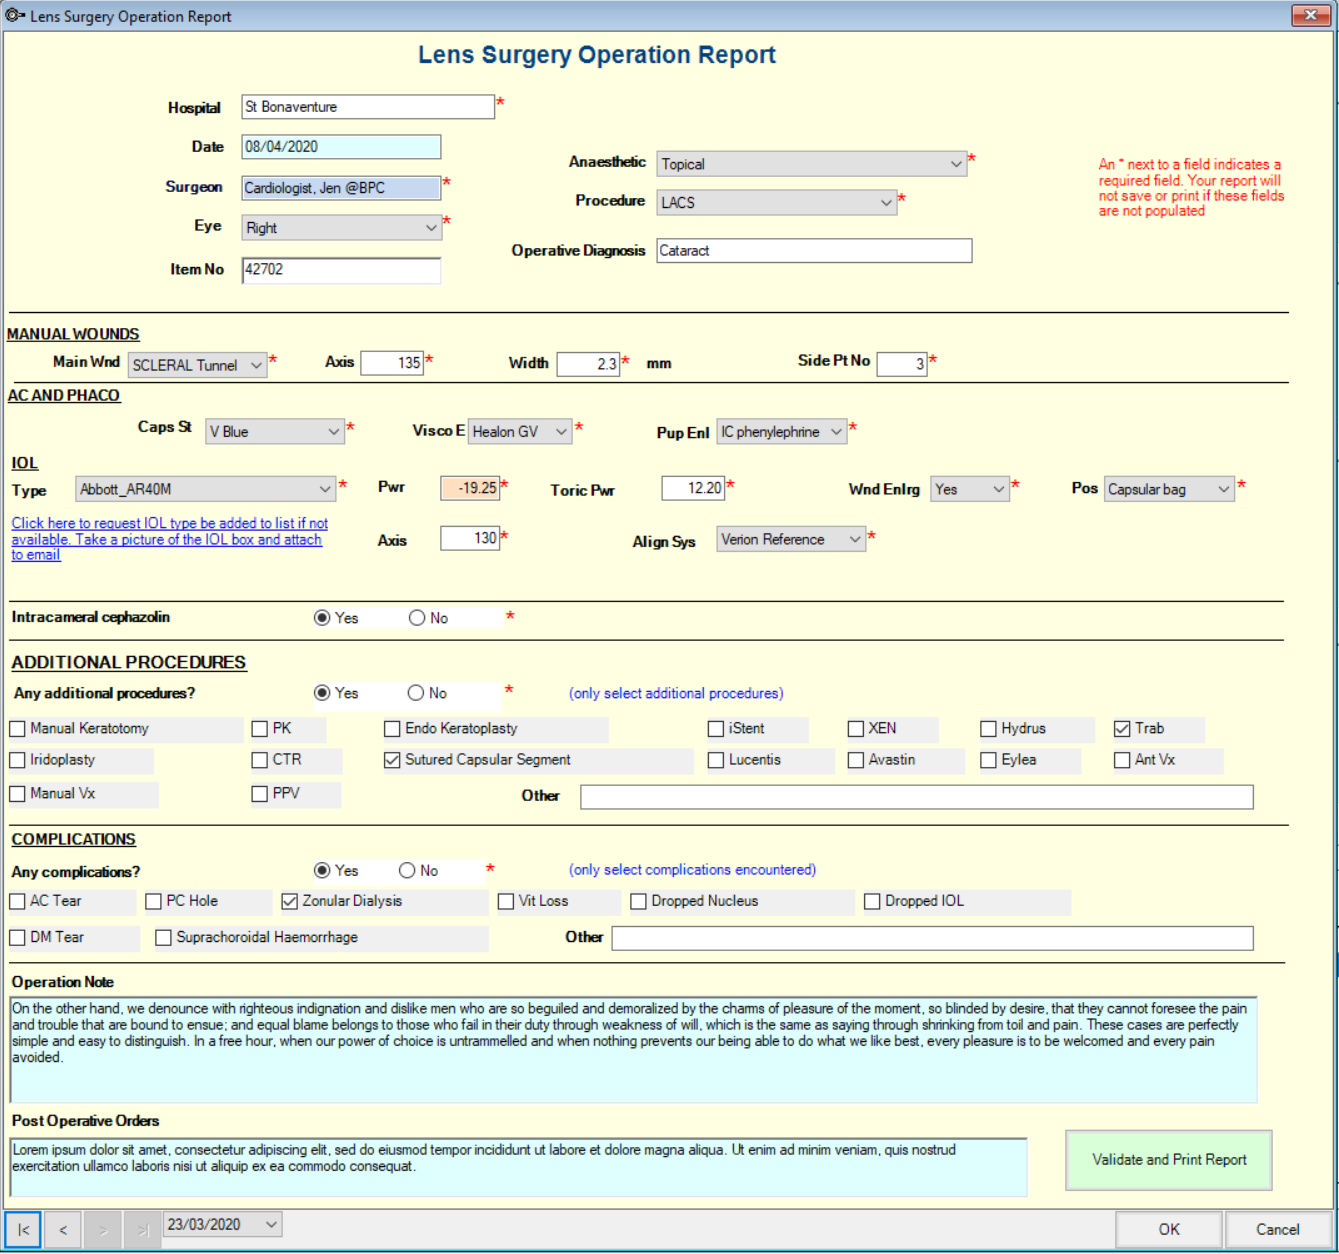
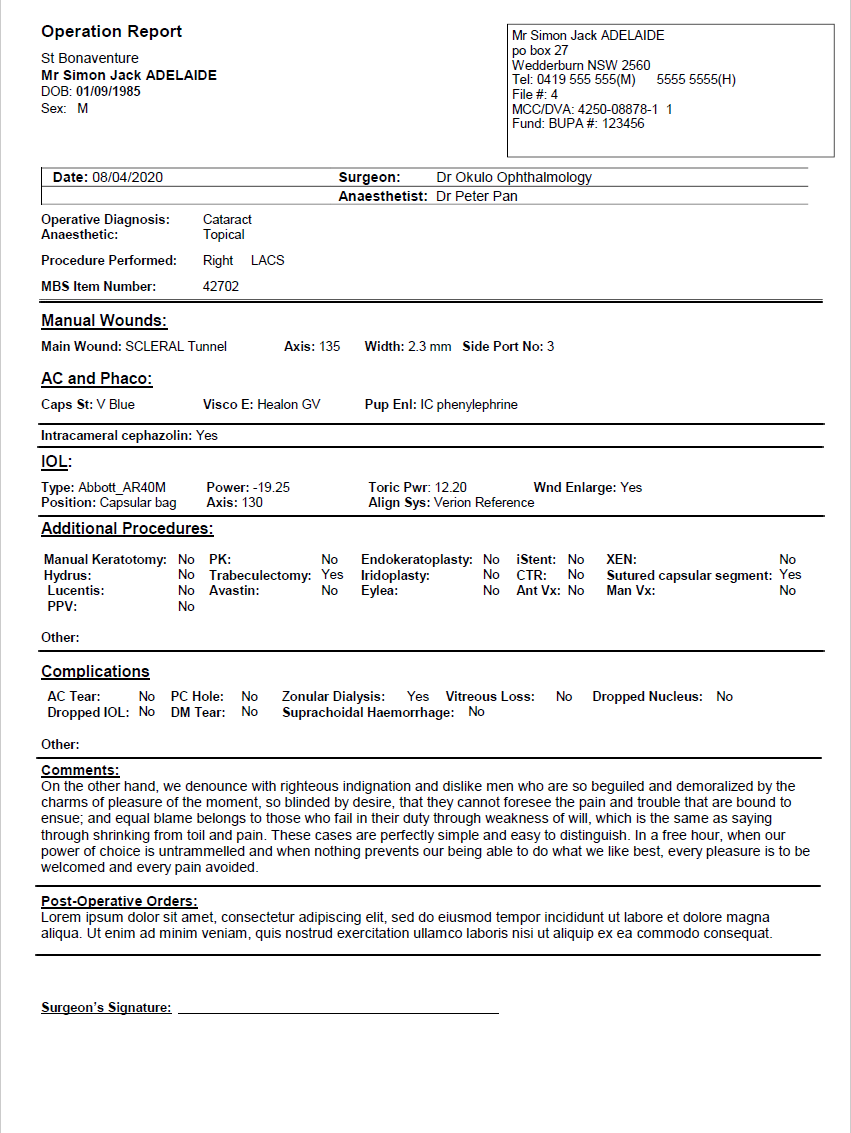
Lens Surgery Operation report
- Create a new note and press the Lens Surgery Operation Report link button on your Medical Desktop.
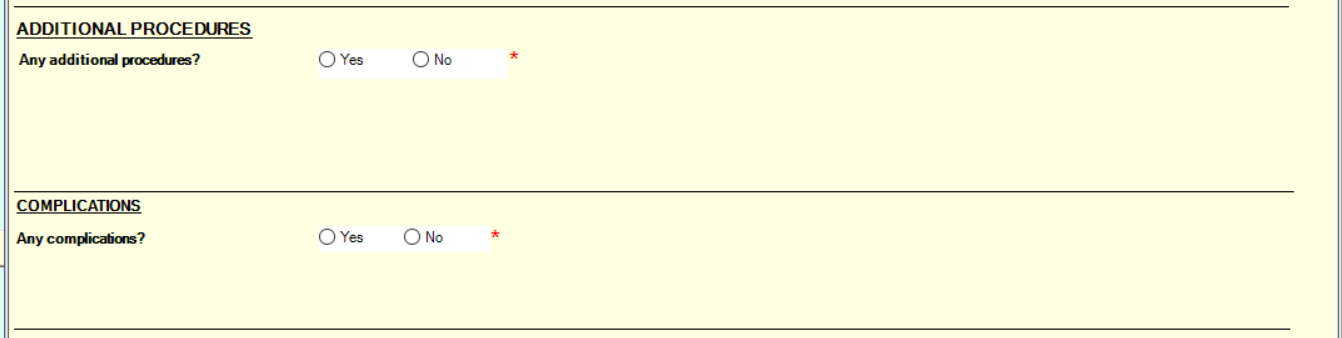
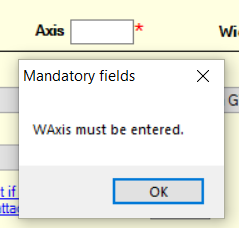
- Many fields in the Lens Surgery Report are mandatory and identified with an asterisk (*). Bp VIP.net will not let you print or complete data entry until all mandatory fields have been populated.
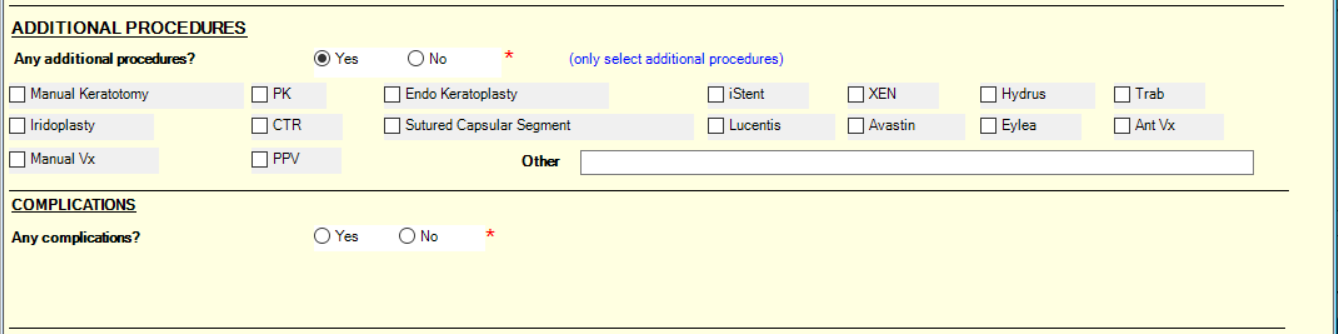
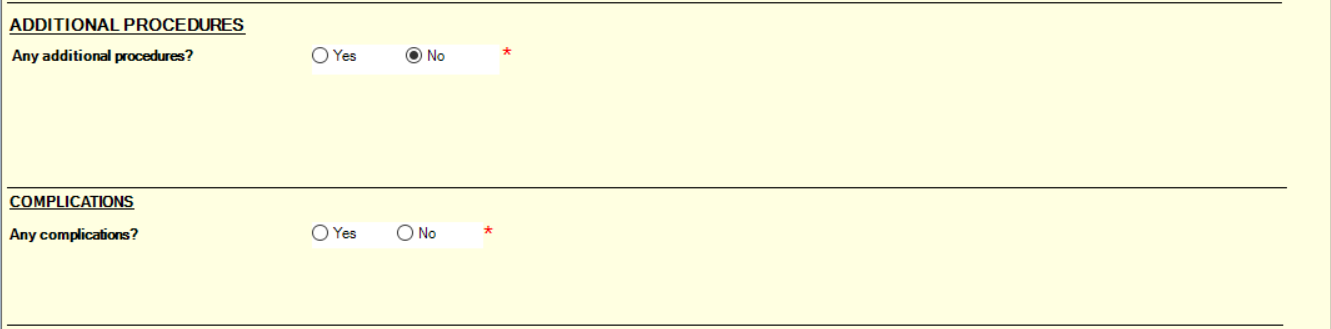
- The ADDITIONAL PROCEDURES and COMPLICATIONS sections will only show their corresponding options when Yes is selected. Select No if there are no additional procedures required or no complications were encountered. Data entry will not be completed or printed until you choose either Yes or No.
After you have completed the form
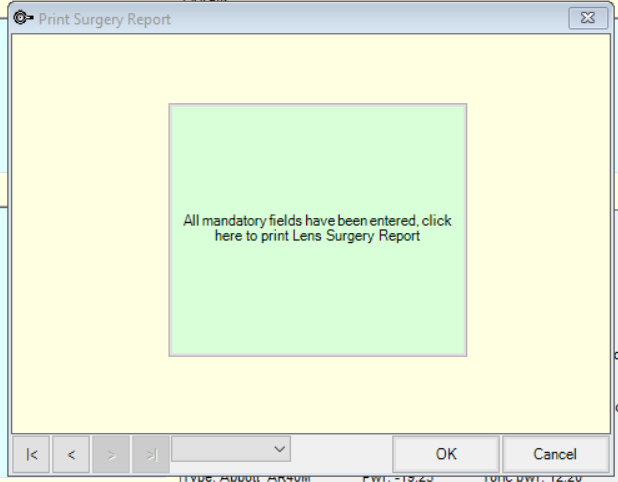
- Save the form by clicking OK, or print the report using the Validate and Print Report button. The system will check that all mandatory fields have been populated and alert if otherwise.
- Click the All mandatory fields have been entered, click here to print Lens Surgery report button. The Lens surgery report letter template you just imported will open.
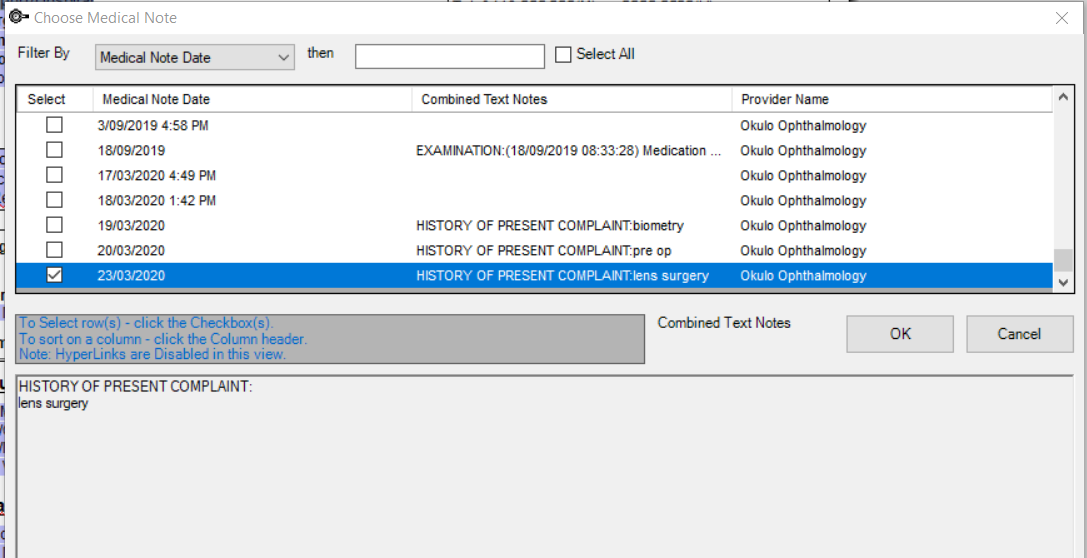
- Select the Medical Note required and click OK.
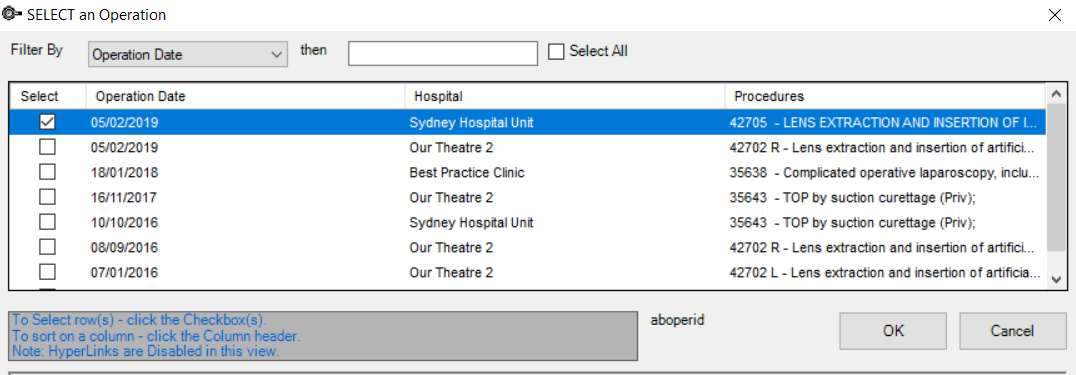
- Next, a Select an Operation screen will appear, asking you to select the patient’s lens surgery operation that has been entered into the system. The operation's associated anaesthetist will populate the Anaesthetist field in the report. This will always highlight to the latest surgery booked for the patient. Select the operation and click OK.
- Click OK to close the Print Surgery Report screen.
If you have chosen to print the report using the Validate and Print Report button and all mandatory fields have been validated, the Print Surgery Report screen will appear.
Printing the Lens Surgery Report
The template pulls information from the UDF Lens Surgery Operation Report. When the template is initiated, a Choose medical Note screen will appear asking you to choose the medical note where the Lens Surgery Operation Report data was entered. By default, the system will highlight the last medical note which, generally, will be the medical note that you have just entered.
The exception is if you are re-printing the report after new medical notes have since been created.
Your Lens Surgery Report will now be printed to your default printer or the printer that the template was chosen to print to. The report will also be saved as an outgoing correspondence (F4) for the patient.
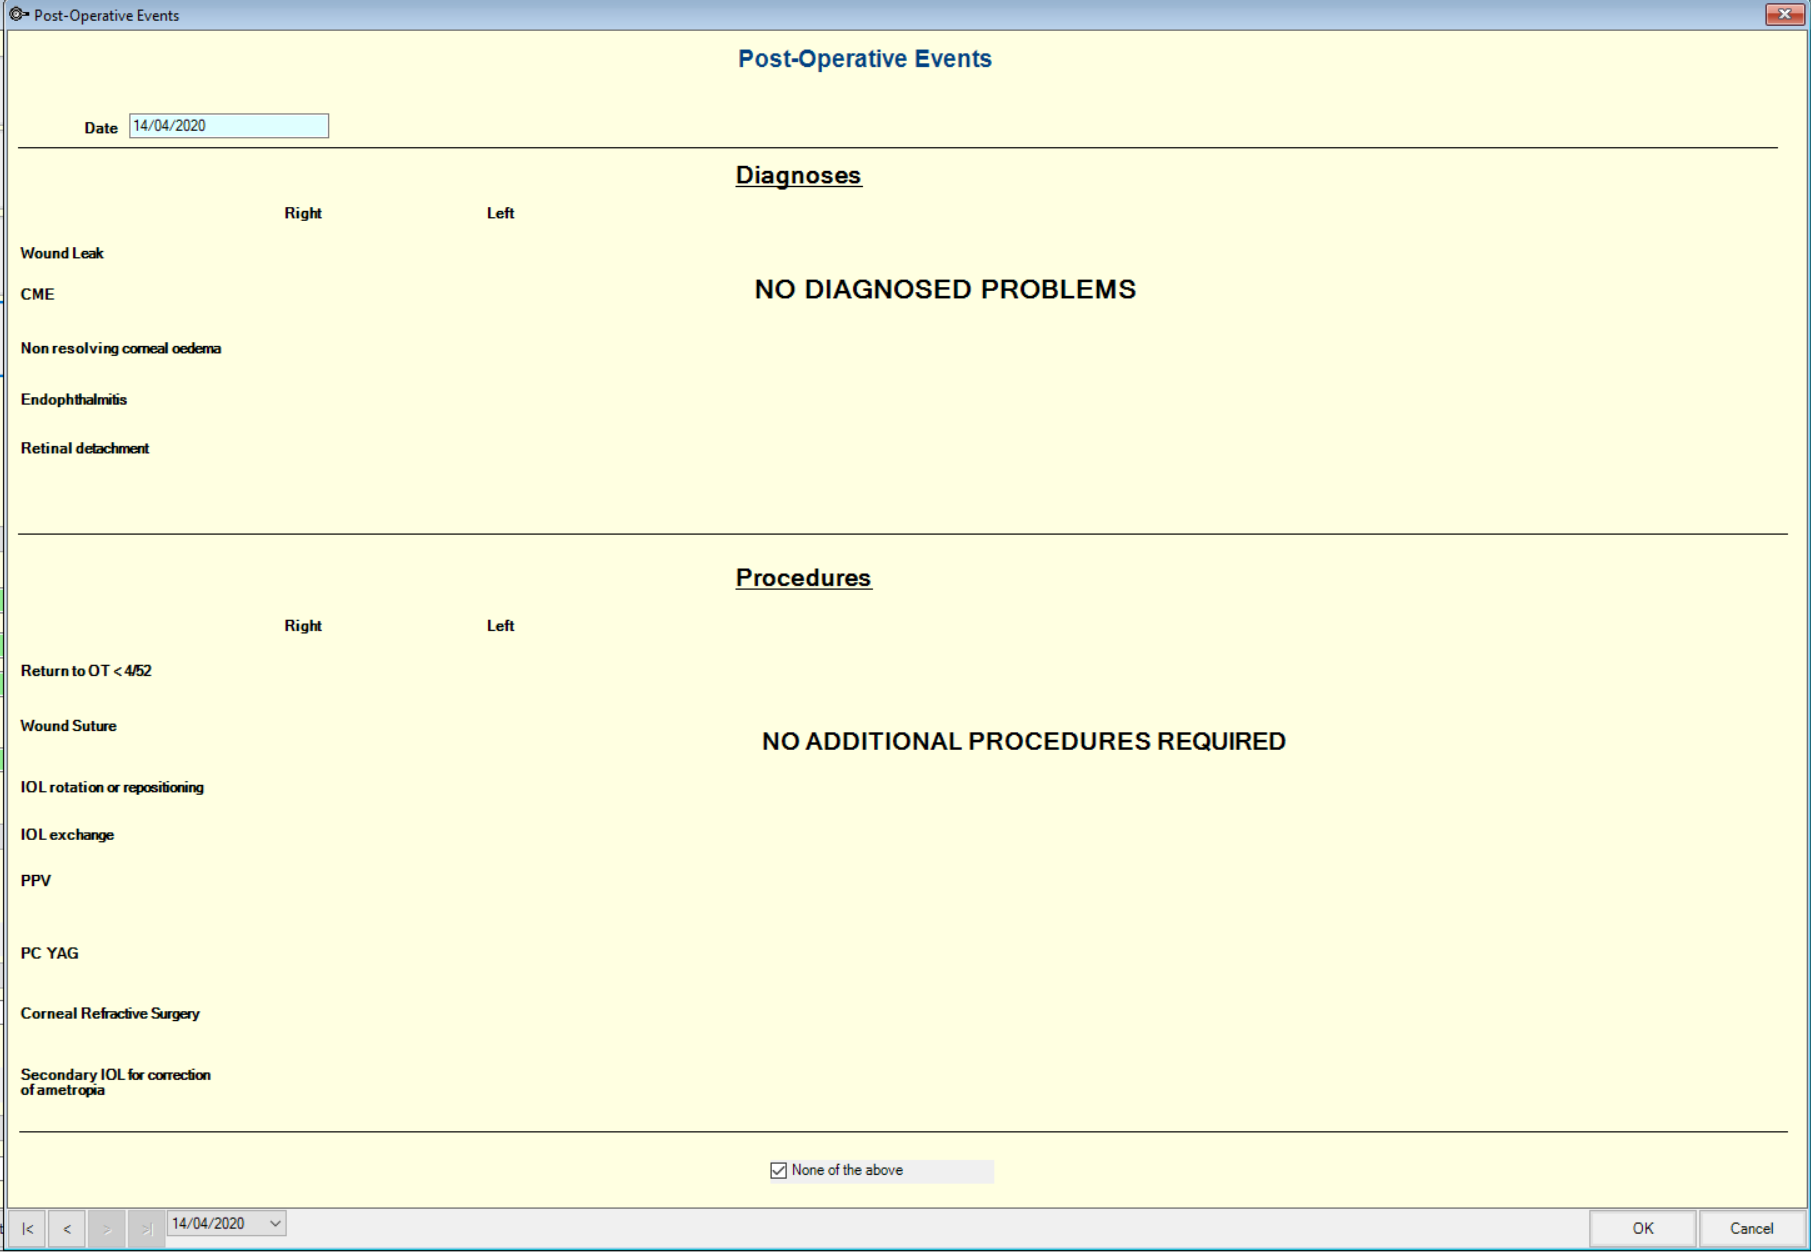
Post-Operative Events
- Create a new note and press the Post-Operative Events link button on your Medical Desktop.
- Diagnoses
- Procedures
- If there are no diagnoses or procedures to report post-operatively, tick the None of the above option at the bottom of the screen.
- If there are diagnoses or procedures, select the corresponding tick box option for the eye and diagnosis/procedure combination. Note that there are free-text fields to enter other relevant information.
- If Retinal detachment is chosen as a diagnosis, a date field will appear to enter the date of retinal detachment.
- If PPV is chosen as a procedure, a date field will appear to enter the date pf the PPV procedure.
- Click OK on completion.
- As always, once a Medical Note has been completed, click Save\Close to save the note and exit the Medical Desktop to prepare for your next patient.
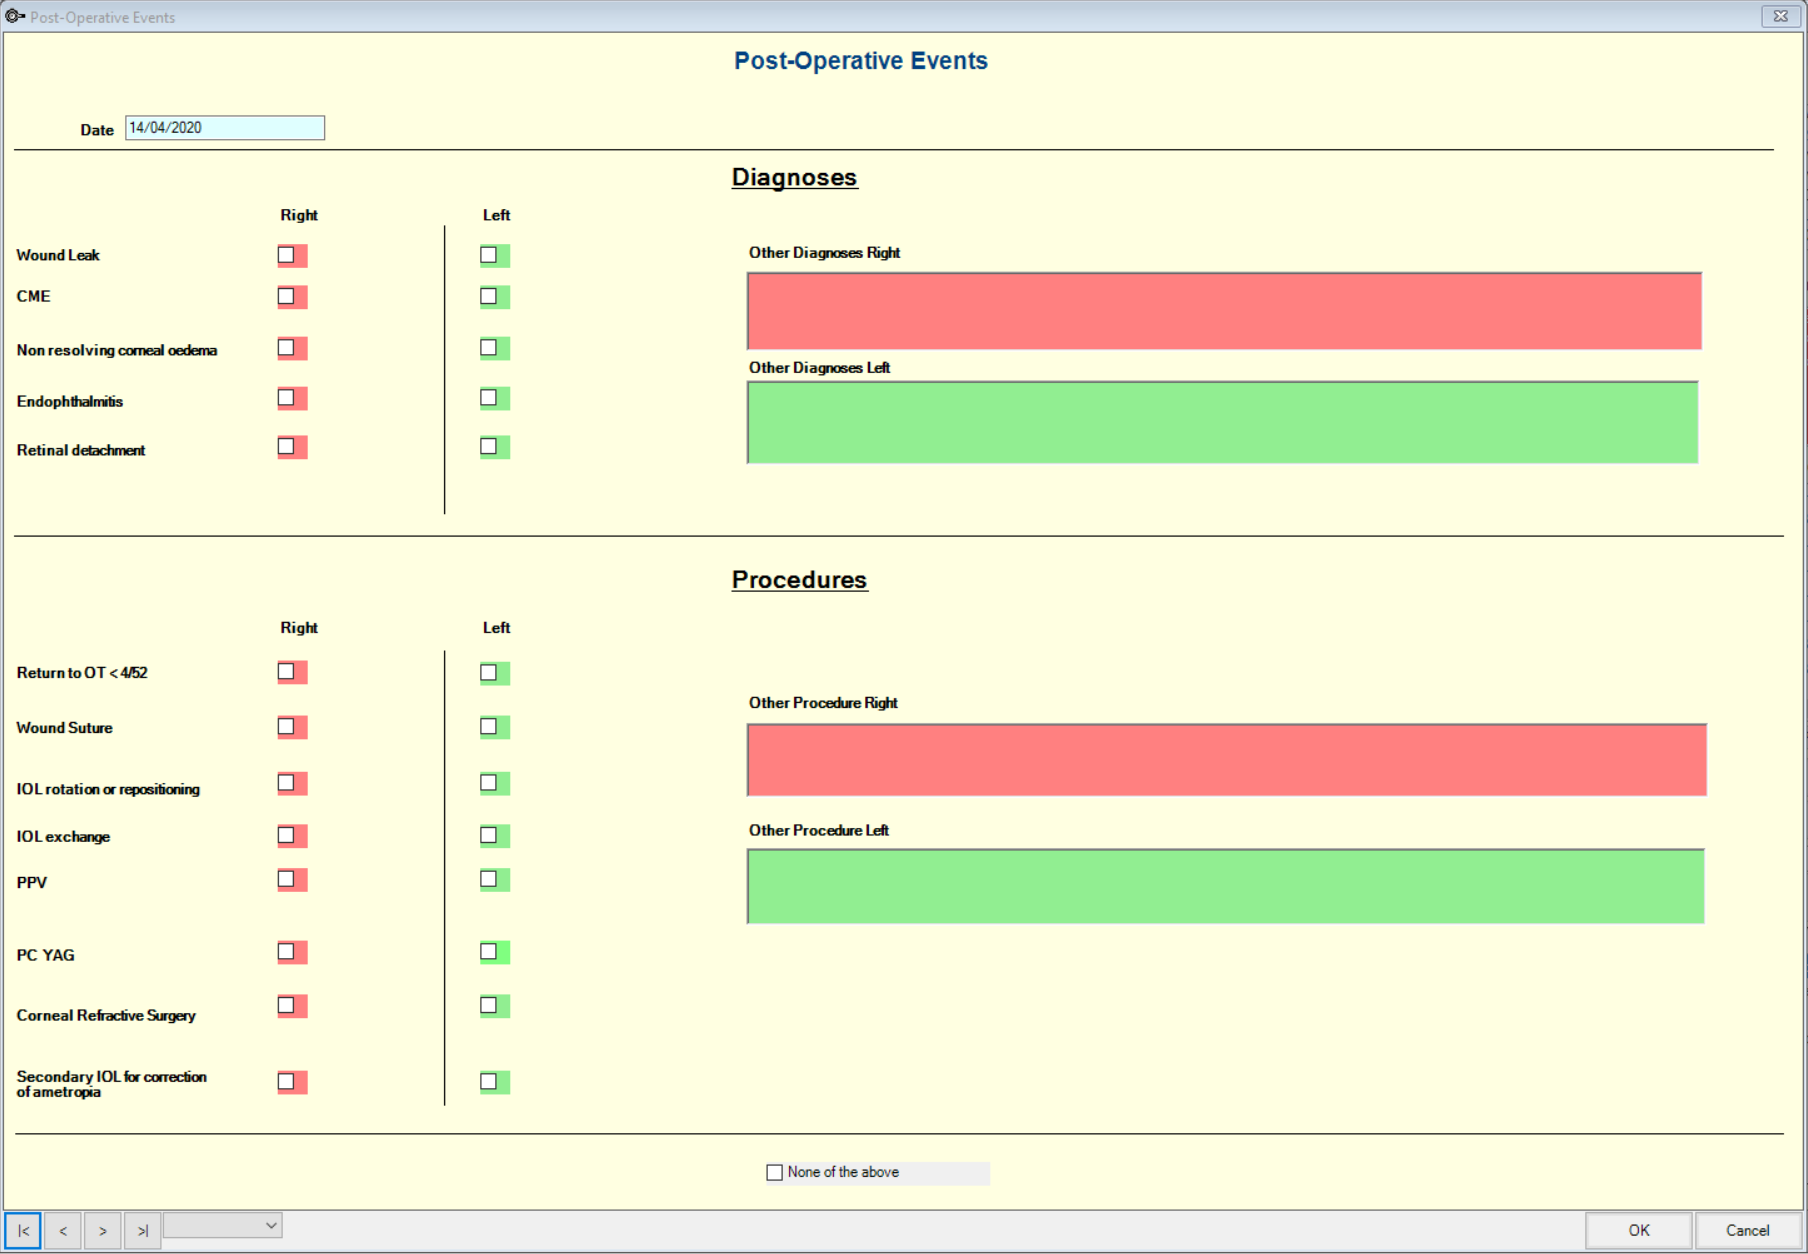
The Post-Operative Events UDF has two sections:

This will then blank the screen off and not allow you to enter any more information unless the option is again un-ticked.
Cataract surgery report submission is complete.