You can record a patient’s vaccinations status in Patient Details (F3), by adding new fields to the Patient Details User-defined Form (UDF). A patient's vaccination status can also then be added to letters, autotemplates, and autotext. Recording the vaccination status in Patient Details instead of the Patient Record allows all staff to be able to view and update a patient's status.
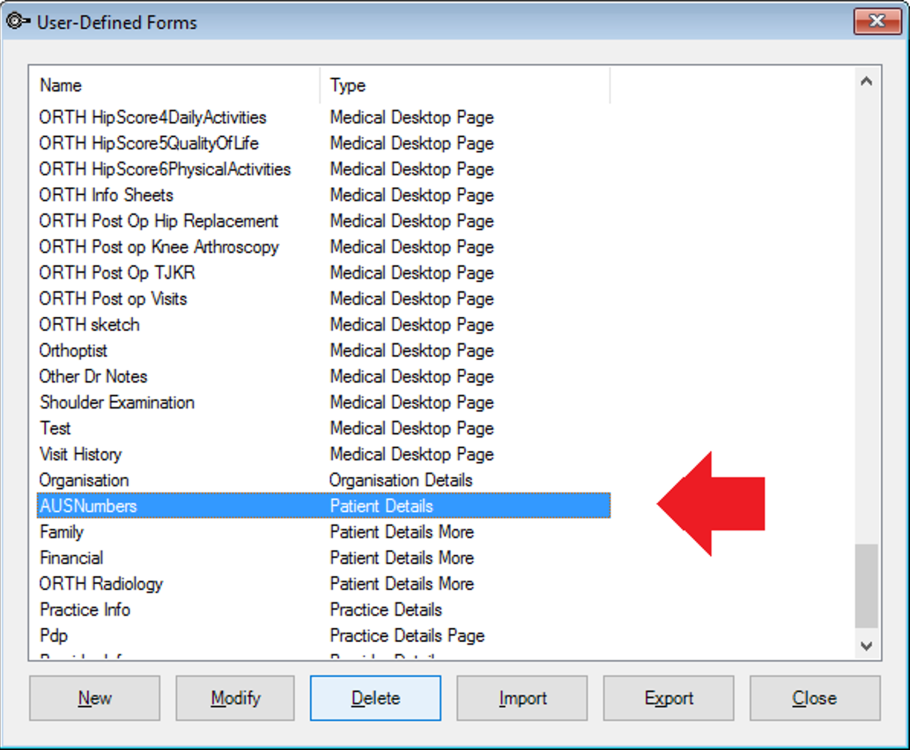
- Select Setup > User-Defined Forms and select the Patient Details UDF - ‘AUSNumbers’ for Australia or ‘NZNumbers’ for New Zealand.
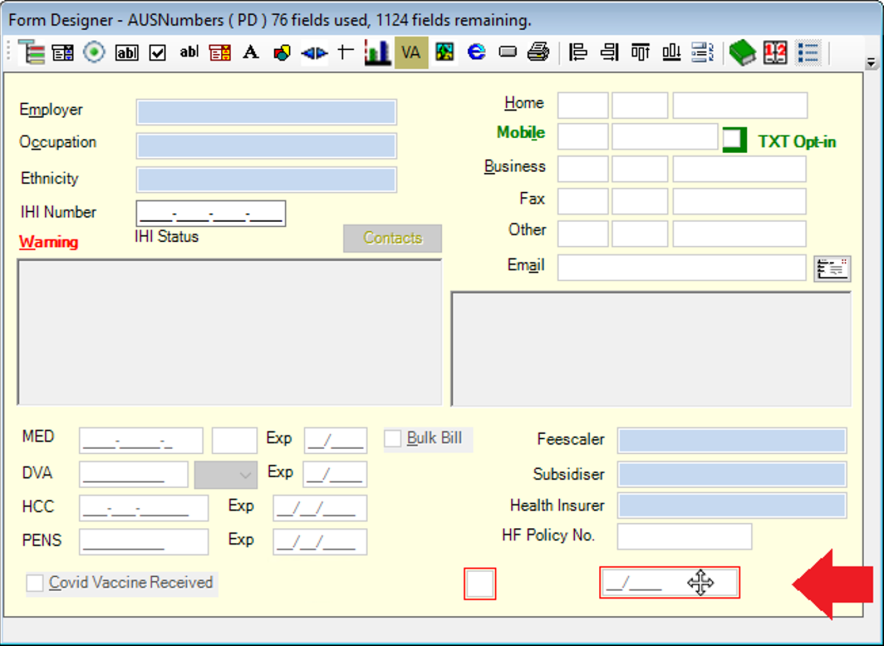
- Click Modify. The Form Designer screen is displayed.
- In this example, the COVID vaccination information will consist of three components:
- A text box – records the date of final vaccination. Could also be used to record the number of vaccinations.
- A checkbox – records if the patient has been vaccinated.
- A label - Descriptive label for the text box and checkbox.
- Select the Add a text box icon (a).
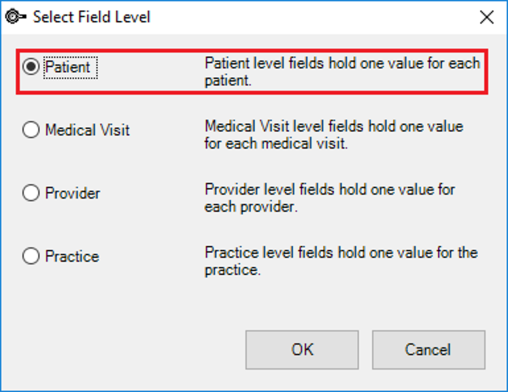
- Select ‘Patient’ in Select Field Level. The Patient Level holds the value entered in the field until it is changed.
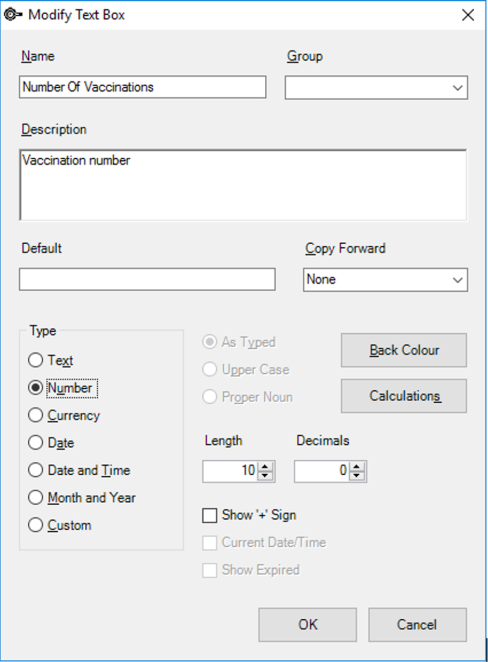
- Click OK. The Modify Text Box window is displayed.
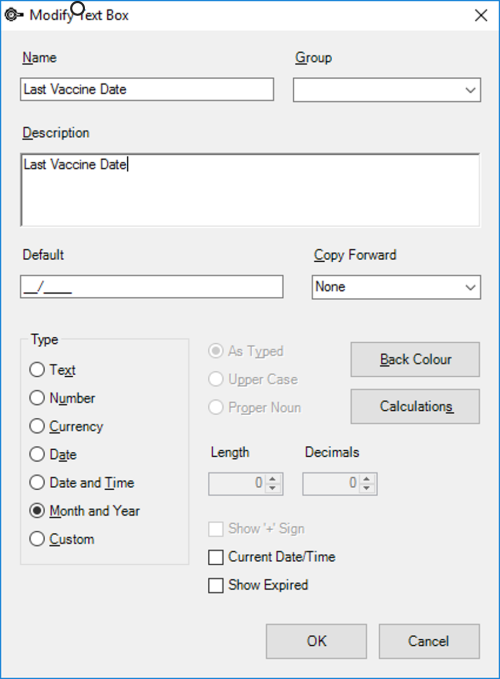
- Add a Name for the field.
- Enter a Description to populate a Tip box when hovering over the field in the Patient Details screen.
- Select the Type: selecting 'Date' uses the DD/MM/YYYY format; selecting 'Month and Year' uses the format MM/YYYY.
- Click OK.
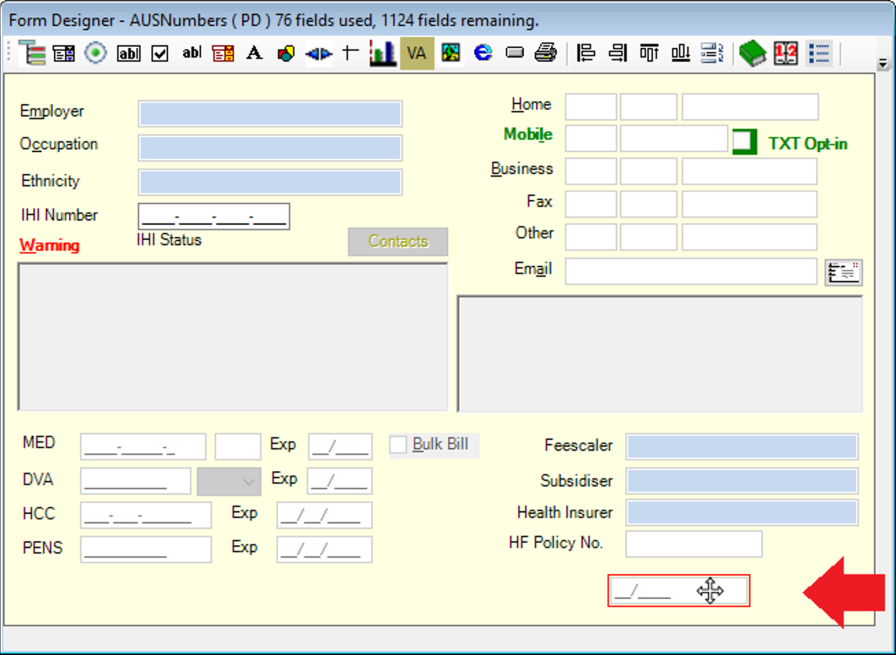
- The field will be created and can be placed in the available space on the UDF screen.
- Select the 'Add a Checkbox' icon (b).
- Select ‘Patient’ in Select Field Level and click Ok.
- Position the new checkbox next to the date field you just added.
- Select the 'Add a label' icon (c).
- Position the label next to the two fields you just added.
- Save the UDF and exit UDF designer.
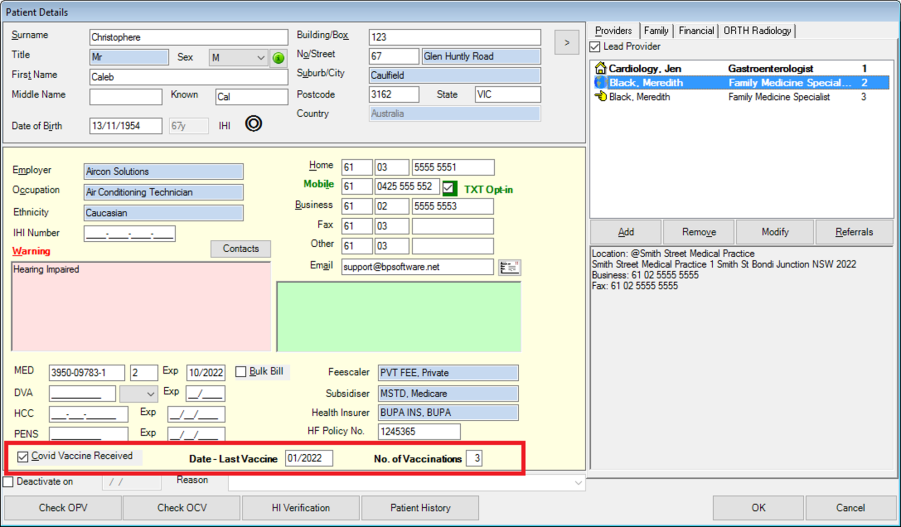
- View the Patient Details screen to see how the new fields look in the actual screen. If necessary, reopen the UDF and adjust the positioning of the new fields.

NOTE If you are using a custom UDF for the 'Numbers' panel for your region, edit the custom UDF you use instead.


The example below shows a Patient Details screen with a COVID vaccination status field for recording this information at the bottom of the UDF.

Using custom udf fields in autotexts and templates
You can record a patient’s vaccinations status in the Patient Details (F3), by adding new fields to the UDF. A patients vaccination status can then be added to letters, autotemplates and autotext.
- Select Setup > User-Defined Forms and select the Patient Details UDF - ‘AUSNumbers’ for Australia or ‘NZNumbers’ for New Zealand.
- Click Modify.
- Add a text box – used to record the date of final vaccination. Could also be used to record number of vaccinations.
- Add a checkbox – used to record if the patient has been vaccinated.
- Add a label - Add labels to checkboxes and text boxes.
- Select Add a text box.
- Select ‘Patient’ in the Select Field Level. The Patient Level holds the value entered in the field until it is changed.
- Click OK.
- Add a Name for the field.
- Enter a Description to populate a Tip box when hovering over the field in the Patient Details screen.
- Enter the Type. Selecting date will require the DD/MM/YYYY format to be entered. Selecting Month and Year will require MM/YYYY to be entered.
- Click OK.
- Select the Add a Checkbox.
- Select ‘Patient’ in the Select Field Level.
- Enter a Name.
- Enter a label.
- Add a Description.
- Click OK and place field on the UDF.
- Select Add a text box.
- Select ‘Patient’ in the Select Field Level.
- In the Modify Text Box window: enter a Name, Description and the Type of Number.
- Click OK and place field on the UDF and adjust the size of the box to suit.
- Select Add a label.
- Create labels for the Number of Vaccines Received and the Last Vaccine Date fields.
- Click OK and place labels on the UDF.
- Adjust size of fields to fit and tab order ensure the correct order of the fields.
- Click OK to save the UDF.
The Form Designer screen is displayed.
The functions required to add the fields are:

The Modify Text Box window is displayed.
The field will be created and can be placed in the chosen space on the UDF screen.
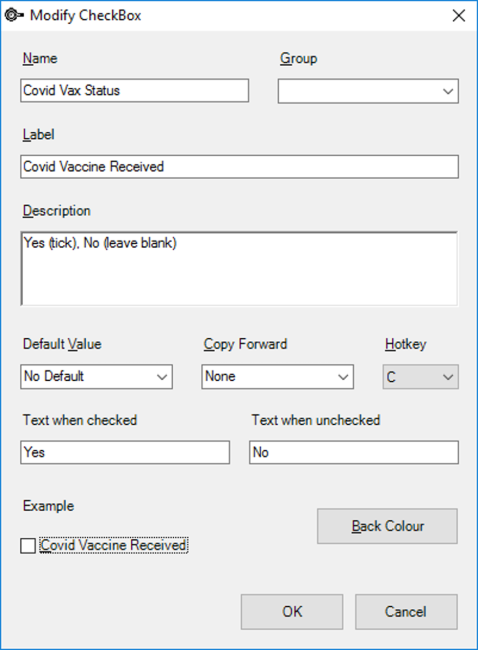
NOTE The ‘Text when checked/unchecked’ boxes indicate the value that will be printed when the checkbox field is added to letter templates, auto templates and autotext.

For more information on understanding User-Defined Forms see Create a UDF article.
Using custom udf fields in autotexts and templates
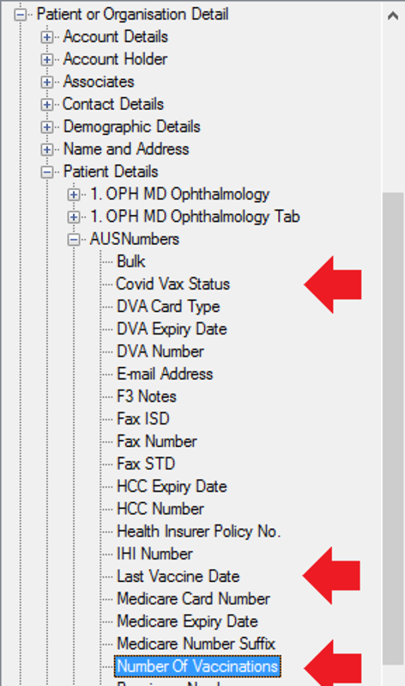
To find the custom UDF fields to add to templates and autotexts, select Patient or Organisation Detail > Patient Details > AUSNumbers (or NZNumbers).
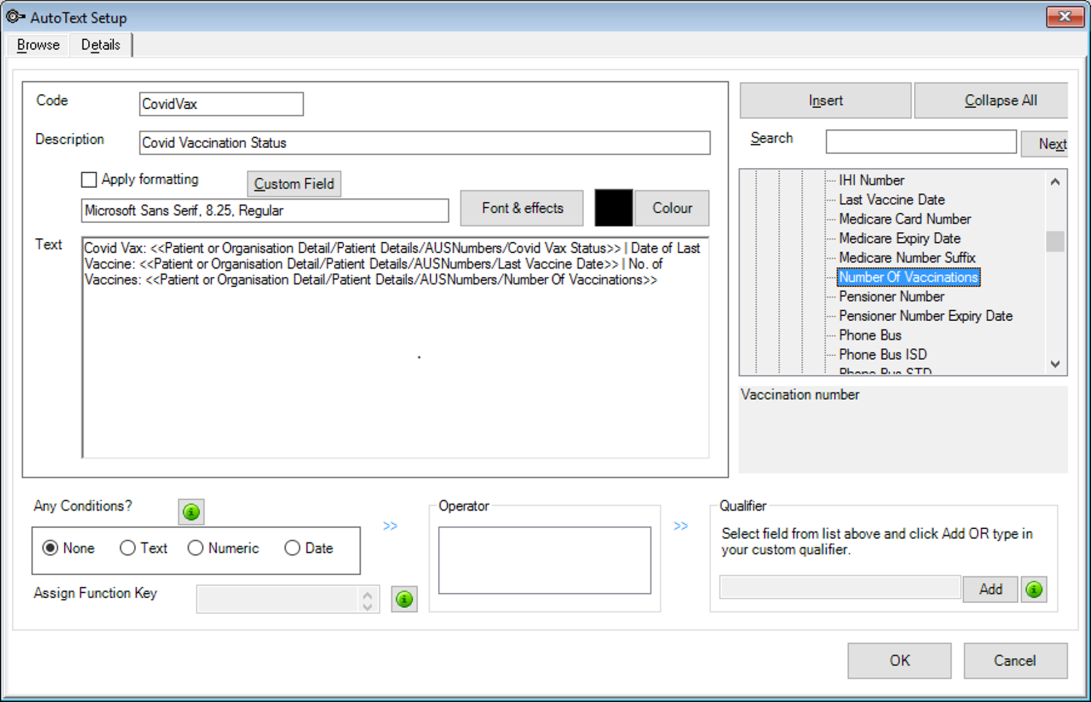
Create a Covid Status autotext for the appointment book
- Select Setup > Autotext > New,
- Click Insert to add the Vaccination custom fields into the autotext.
- Click OK to save the Autotext.
To add it to the Appointment book Notes column:
- Select Setup > Appointment Book > Page-Owners and click Modify.
- Select the column you wish COVID status to display and click the Add button and select the CovidVax autotext.
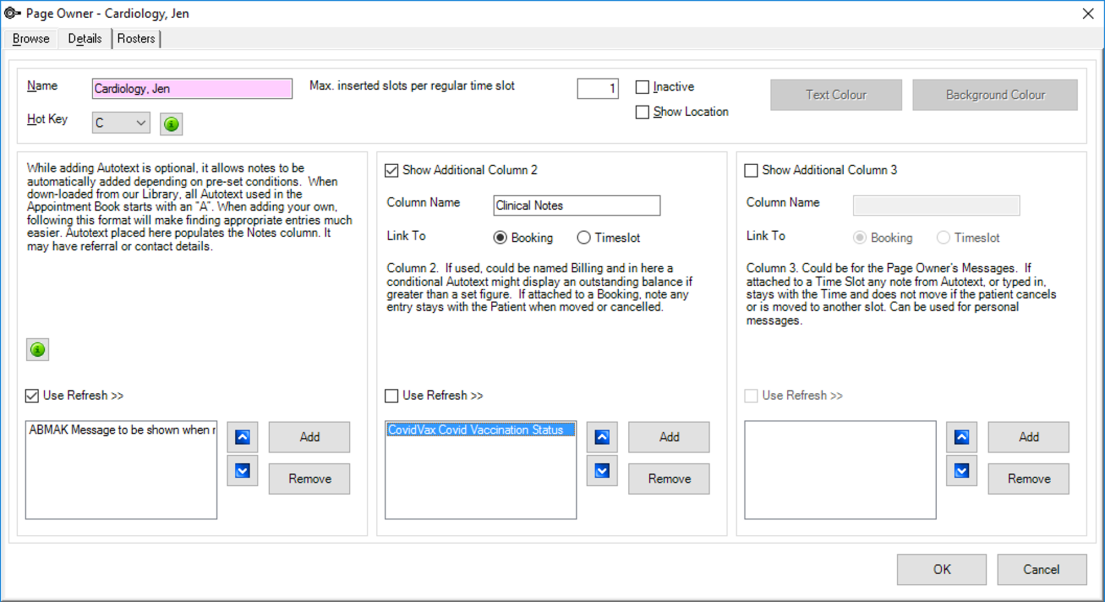
When booking a patient, the Covid Vaccination Status will populate into the Appointment book column.

For more information on autotext in VIP.net see ‘Create an Autotext’.
Related topics
Last modified: 01 February 2022