The client record captures a client's demographic information. Not all of the fields described in this reference are available in all module layouts.
The only fields that are mandatory to save a Client record are First Name and Last Name. All other fields are optional. However, if an address is entered, for example, some address fields are required to make that entry valid. These fields are denoted with an *.
On this page:
Add contact details
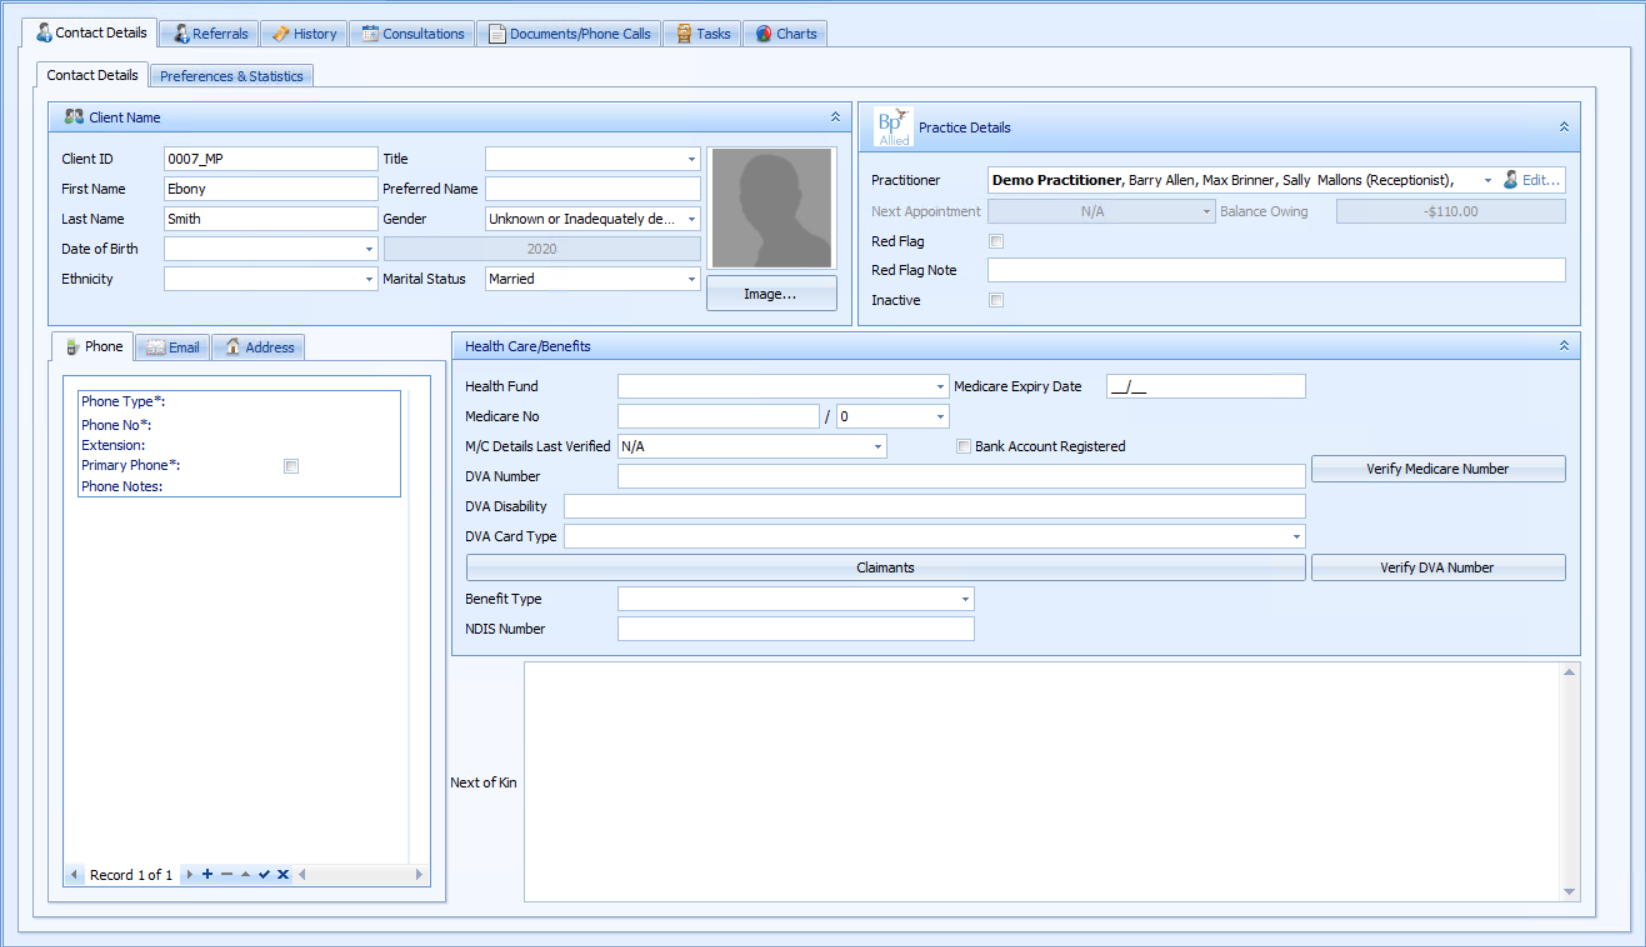
The Contact Details tab records address and phone contact details, and Medicare, DVA, and Health Fund numbers.
|
Field |
Description |
|---|---|
|
Client Name |
The Client ID is automatically assigned when a new Client is created.
A Client can be given a Title if required. The list of Titles available in the drop down list can be edited or added to via System > Data Maintenance > Titles. A Client's First Name and Last Name are the only required client demographic details. Capture of all other details are dependent on individual business process. A Preferred Name can also be added. This name could then be used in letters created from within Bp Allied. If this is going to be used then it would need to be entered for all Clients so that the letters using the field will merge correctly for all clients. |
|
Date of Birth |
Select the Date of Birth of the client. Click in the field OR Click on the drop down and select a date to edit. |
|
Gender |
Select the Gender of the client. There are now four gender options available that conform with Medicare requirements. The two additional options are:
|
|
Ethnicity |
Select the Ethnicity of the client. This field will also show in Reports and can be edited under System > Data Maintenance > Ethnicity. |
|
Marital Status |
Select the Marital Status of the client. |
|
Phone |
Use the Arrow keys
This is particularly important if using SMS reminders. SMS messages are only sent to Mobile Phone numbers. If there are two Mobile Numbers then the SMS is sent to the Primary Mobile phone number. Fields with an * indicate mandatory fields when a phone number is entered. |
|
|
|
|
Address |
|
|
Client Photo |
An image of the client can be saved here.
|
|
Practitioner |
Displays the Access that each User/Practitioner has for this Client. For details on editing this please review the sections on Client Access Permissions and Manually editing permissions for a Client. |
|
Inactive |
A tickbox that can be used to indicate whether a client is no longer an active client. When an inactive client is displayed in the Find Client search it has a pink background. |
|
Next of Kin |
Enter Next of Kin details here. |
|
Healthfund Details |
Health Fund and Health Fund Number can be used to store health Fund details for a client. See the details below for setting up a Client for HealthPoint Claiming. Additional Benefits or Funds can be added to the list from System > Data Maintenance > Health Fund. |
|
Benefit Type |
Enter in Benefit Type by using the drop down lists. Additional Benefits or Funds can be added to the list from System > Data Maintenance > Benefit Type. |
|
NDIS Number |
Enter NDIS Number here. This is used in the NDIS report. Click Save to save all the client details entered. The ATAPS layout will show some additional information including SLK, Generate SLK and the ATAPS Client checkbox. |
 to end the Edit or
 Add Client Medicare Details
Medicare and health fund details are found in Contact Details > Client Details > Health Care/Benefits on the right side of the window.

- Enter in the Medicare No by clicking and entering into the field.
- Select the Medicare No suffix from the drop down.
- Enter in the Medicare Expiry Date as MM/YY, e.g. 03/15.
- Enter in the M/C Details Last Verified date by using the drop down list or clicking into the field and typing in the date.
- Click Verify Medicare Number to check that the number is valid. This is required if running Medicare Online Claiming from within Bp Allied.
Bank A/c registered with Medicare is an informational only box to indicate that the Client has their details registered and therefore any rebates resulting from running Medicare Online Claiming on their behalf will be directly input into their bank account.
Claimants
Children and Minors who do not have their own Medicare card with the bank account registered against it MUST have the Claimant details filled in for the claim to be paid.
See Manage Claims for Children (and Minors) for the following information:
- Adding the Claimants button to the Client Record.
- Creating a Claimant in the Client Record.
See the Claim Screen - Claimant Details for the following information:
- Adding a Claimant during the processing of a Claim.
- Details on warnings when processing a Child or Minors claim.
Add the Client's DVA Details
![]()
Enter DVA Number details here.
Verify DVA number is used to validate the DVA number. This is used if DVA claims are processed via the Medicare Online Claiming option within Bp Allied.
See Manage DVA White Card Claims for the following information:
- Adding the Card Type and DVA Disability fields to the Client Record.
- Information on managing White Cards.
See the Claim Screen - DVA Details for details on warnings when processing a DVA White Card Claim.
Add Payment, Consultation, and Communication Preferences
Complete the fields in the Preferences and Statistics tab to set up payment preferences, whether the client can receive SMS reminders, and view appointment statistics.
|
Field |
Description |
|---|---|
|
Payment & Billing |
Use the drop-down arrow to select the Client's preferred payment method. This is used as the default payment method when an invoice and subsequent payment record is created. Use the drop-down list to select the relevant Third Party Biller for the client. If the Third party is not in the selection list, they need to be added into System > Data Maintenance > Third Party Billers. Bill to field has been updated to include a Refresh button (as below) that will reload the list of Third Party Billers displayed if they are updated in Data Maintenance. A clients Preferred Consultation Type can be selected so that when appointments are created this Consultation Type default in. |
|
Reminders |
Use these tick boxes to indicate whether a client would like a phone, email or SMS reminder. Ticking these from within the client details mean that when an appointment is created the reminder option is automatically ticked and the appropriate icon is displayed in the Appointment Book. The check boxes can be managed in bulk using the Client Bulk Edit function. |
|
Privacy & Mailing Options |
First tickbox can be used to indicate that a Privacy form has been signed by the client. Second tickbox can be used to indicate that a client is on the Mailing List.
These check boxes can be managed in bulk using the Client Bulk Edit function. |
|
Referred by Client |
If the Client has been referred by another Client, the referring Clients name can be entered into here. This field may also be found in the Referral tab in some standard layouts. |
|
Occupation Details |
Select an Occupation from the drop-down. Additional Occupations can be added to the list from System > Data Maintenance > Occupations. Enter addition information into the Occupations Details. |
|
First Appointment |
When the Client had their appointment entered into Bp Allied, irrespective of practitioner. |
|
Last Appointment |
The most recent appointment created in Bp Allied. |
|
Appointment Qty |
The total number of appointments the Client has entered into Bp Allied. |
|
Appointments Booked this Year |
Shows total appointments for the current calendar year including cancelled. |
|
Appointments Attended this Year |
Shows total appointments attended for the current calendar year. |
|
Cancelled Qty |
The total number of cancelled appointments. |
|
Client Creation Details |
These fields display who initially created the Client and when, as well as when the latest update was and by whom, for auditing purposes. Additional auditing information can be found using the Audit Log. |
|
Segments |
This is planned to be a part of Broadcast SMS options. |
Other client information tabs
![]()
- The Referrals Tab displays information on a client's referrals.
- The Personal History tab includes details on the Client's history. The actual fields and information contained in this section will depend on the module of Bp Allied installed.
- The Consultations tab includes details on a Client's individual appointments. The actual fields and information contained in this section will depend on the module of Bp Allied installed.
- The Documents/Phone Calls tab accesses any documents or emails saved against the client record. It can also be used to record details of a phone conversation.
- The Tasks shows the list of Client related tasks.
- The Charts tab is only available in some modules and is used to display numeric information collected on a Client, for example: Weight.
- The Bodychart tab is only available in some modules and allows a body or foot image to be annotated.
- The Preferences & Statistics Tab includes preferences that can be set for a Client. For example:
- Reminders
- Preferred billing and consultation information
- Occupation
- Referred by another client
- Appointment Statistics
Red-flag a client
A check box and text field can be used to indicate an issue or red flag related to a client.
The Red Flag fields are found in Clients > Contact Details tab > Client Details tab > Practice Details section:

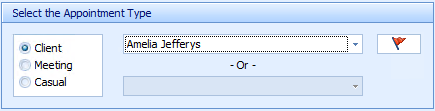
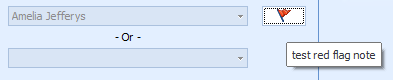
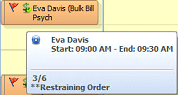
When creating an appointment for a Client with a Red Flag, a red flag icon will display next to their name. Hovering over the flag will display the associated note.

If the setting Show Icons in Appointment Book option is turned on in Options > Appointment Book, then the red flag icon will display in the appointment.
If the setting Show Appointment Notes in Appointment Book option is turned on in Options > Appointment Book, then the Red Flag note will display in the appointment and when hovering over the appointment. In this case, the note is prefixed by ** (two asterisks).
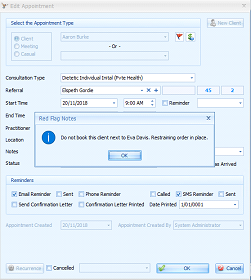
If the Show Red Flag Notes popup is selected in User Administration > User Details, the Red Flag notes will display as a pop-up when clicking OK on the Appointment.
Without this option, Reg Flag notes still display on hovering over an appointment (prefixed with **), and over the Red Flag icon on the Appointment.
Green-Flag a client
A check box and text field can be used to indicate the vaccination status of patient. The Green Flag field must be added to the Contact Details form from Customisation Mode. See Customisation Mode for instructions on how to access Customisation mode and edit screens.

The Green Flag will display when creating a new appointment, and in the appointment details seen in the Appointment Book once booked.


Last updated: 10 May 2023


 AU
AU 