Use the Provider Inbox to allocate and action returned investigation results.
What do I use the Provider Inbox for?
Each provider has their own Inbox linked to their login. The Inbox is used to:
- check investigation reports that have been downloaded from a pathology or radiology laboratory
- action the result
- save the results to the patient’s file.
To access the Inbox, select View > Inbox from the main menu or press F3. The tree view on the left of the screen displays results by patient name. Click on the + sign to open all results for a patient. Select a result to see the details in the middle section.
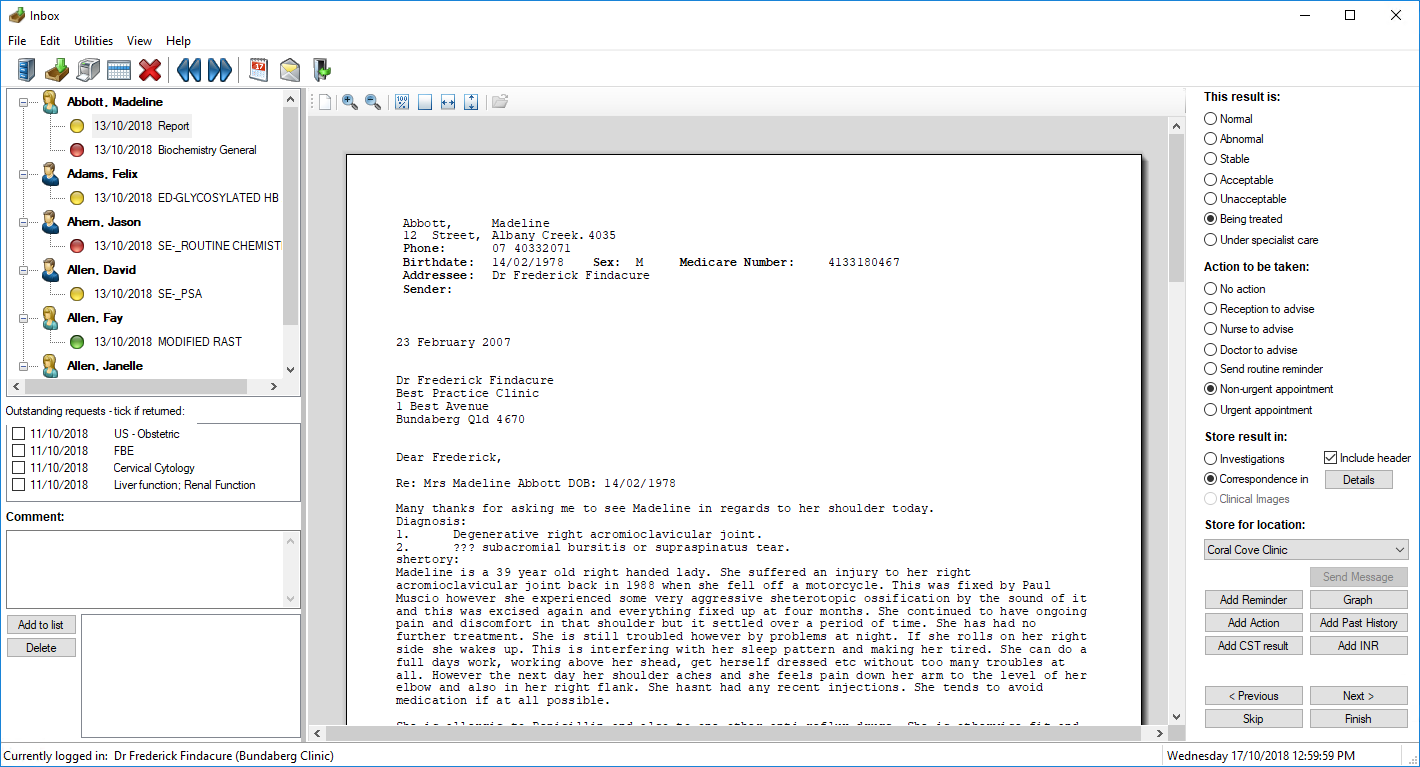
At the 'Inbox' stage, the report has not yet been added to any patient record. You must action the investigation result from this screen to save the result to the correct location in the patient record and move the report to the Followup Inbox. See Managing Pathology and Radiology Results for more information.
From the Inbox, you can also:
- Move a report to a different doctor
- View another doctor's results
- View a graph from atomised results that include the patient's existing observation data
- Insert details into the patient record, such as adding a smear result or INR data
- View a patient's related appointments
- Create Bp Premier Reminders and Actions to assist following up a result
- Mark outstanding requests as returned.
- Send an SMS message to a patient regarding their results.
Which results does the Inbox show?
The Inbox shows results that meet all of the following:
- The result has not been actioned
- The result has been assigned to a doctor
- The result has been allocated to a patient (default behaviour).
This includes results from the following sources:
- imported automatically by Bp Service
- imported and scanned in from the Bulk Document Import utility
Results from Bp Service
When results are imported automatically via Bp Service, the result file is read and Bp Premier attempts to match the result to a patient record by name and DOB. Sometimes, a match cannot be found. In this case, the result must be manually allocated from the Incoming Reports screen.
By default, the Inbox will not show results have not yet been allocated to a patient. You can change this behaviour by turning off the Don't allow unallocated reports into Inbox option in Setup > Configuration > Results Import. If this setting is not ticked, unallocated reports will appear in a provider's Inbox. See Set up results importing for more information.
Results from Bulk Document Import
From the Bulk Document Import utility, you can scan in documents and assign them to a doctor, but you are not required to assign scanned documents to a patient. BDI documents that were not allocated to a patient during scanning must be allocated to a patient from the Incoming Reports screen before the document will appear in the provider's Inbox.
Action investigation results from the Inbox
- Select View > Inbox from the main menu or press F3.
- Select the result you want to action from the list on the left.
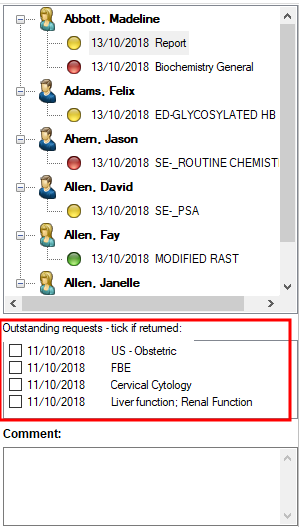
- If the result is for an request that has not been marked as returned, tick the corresponding request in the Outstanding requests - tick if returned list.
- Enter a Comment and click Add to list to add any comments about a result. For example, a comment might contain relevant information for another provider tasked with following up the result.
- Action the request by selecting from the following radio button sections from the right:
- This result is — Clinical evaluation of result.
- Action to be taken — Followup action. All actions except for ‘No action’ will add the result to the Followup Inbox for later actioning by the practice.
- Store result in — Where in the patient’s record to store the result.
- Include header — Tick to store the report header with the result.
- Store for Location — Practice location to store result for.
- Click a button to perform additional actions for the selected result and patient:
- Click Finish to complete actioning the result and close the screen, or Next to move on to the next result. The result will be saved in the patient’s file and will be visible on the Clinical > Followup Inbox screen (unless 'No action' is to be taken). If you click Skip, the next inbox item will be displayed without saving changes.
Button | Description |
|---|---|
Details | Supplies additional details about the result to save to the patient record. |
Send message | Sends an SMS message to the patient about actioned results. |
Add Reminder | Opens the Reminders screen to view or create reminders for the patient. |
Add Past History | Insert a past history item into the patient's record. |
Add INR | Opens the patient's INR Manager to record INR management details. |
Graph | View and graph atomised results. See View a graph from a result for more information. |
Add Action | Create an Action for the patient. |
Add CST Result | Record a cervical screen result t in the patient's record. See Cervical screening for more information. |
To delete a report, select Edit > Delete from the menu. Bp Premier will prompt for confirmation.
View a graph from a result
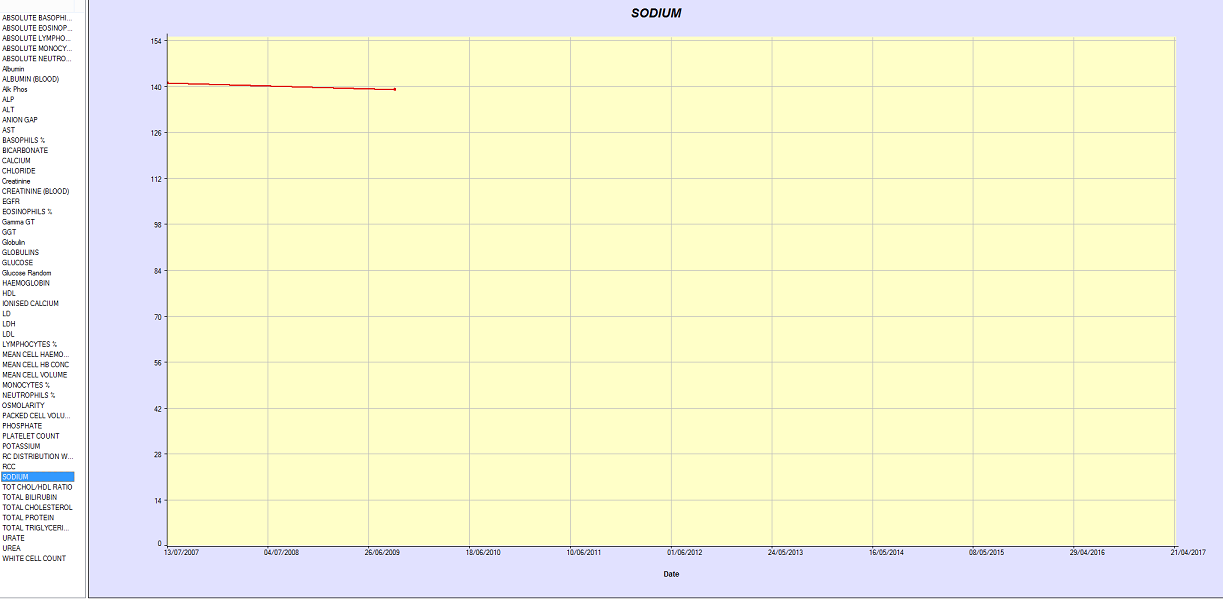
Bp Premier can provide graphs of incoming results of atomised data. If the patient has existing atomised observation data recorded, the graph will include that data, and any other results data of that type also in the inbox.
This allows providers to view historical trends without needing to open the patient record, and provides more information to determine if a patient recall is required.
- From the Inbox, select the result you want to graph from the list of incoming reports on the left.
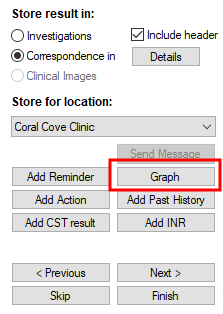
- Click Graph from the set of buttons at the bottom of the Inbox. This button will be enabled if Bp Premier can calculate atomisable data from the results.
- The Atomised result values screen will appear.
- Select View > Graph from the menu or click the Graph icon. The graph of results will appear.
- Select a property to view from the left hand side to view the graph for that property. Close the screen to exit the graph.
View another doctor's Inbox
Providers can view each other's Inbox screens for results that have not been marked confidential. For example, a provider who goes on leave may ask another provider to review their Inbox to ensure urgent issues are addressed.
- Select File > Change Inbox from the menu, or click the Change Inbox icon. The Select doctor screen will appear. This screen only lists providers who have results allocated to them.
- Select a provider and click Select.
- The Inbox will load the outstanding results for the new provider.
Move a report to another doctor
- Select Edit > Move report. The Select doctor screen will appear.
- Select the provider to move the report to and click Select. The unactioned result will be moved to the selected provider's Inbox.
Book a recall appointment
- Select File > Patient appointments or click the Patient appointments icon. The Patient appointments screen will appear, showing future appointments for the patient.
- Tick Include past appointments to view historical appointments.
- Click New to create a Recall (or ‘review’) appointment for the patient.
Send a Bp Comms message to a patient
You can send a 'clinical communication' message by SMS or BHA to a patient about their results from the provider inbox. You must action a result before you can send a message about the result.
Before patients can receive clinical communications:
- The practice must enable clinical communications in Setup > Configuration > Bp Comms
- The patient must consent to receive clinical communications and enrol in SMS in their demographics > Bp Comms Consent.
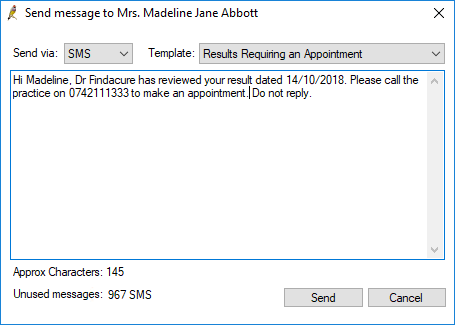
- From the Inbox, click Send Message from the bottom right, or click the envelope icon in the toolbar
 . The Send message window will appear.
 - Choose to either send via SMS or App.
- Change the clinical communication Template to use from the default if you need to.
- Edit the message text and click Send.
NOTE Sending a message from the Inbox does not mark the result as contacted.
The message will be sent via the chosen communication method. A clinical communication contact note will also be created against the patient.

