

Moving your installation of Bp Premier from one server machine to another requires planning. You may need to involve your practice's IT support.
These instructions assume that you are working in a conventional server environment, and not a terminal server.
Some tasks require you to open a separate knowledge base topic. Right-click a link and select Open in new tab, or click with the middle mouse button to open knowledge base topics in a new browser tab.
Follow the instructions in each section in order.
Prepare for migration
Obtain the Bp Premier installation media
Check the website www.bpsoftware.net for the latest version of Best Practice. Download the .ISO program upgrade file from the Downloads page.
Best Practice Software recommend upgrading to the latest version of the software. However, if you are using an older version of the software, you can use that version's installation DVD to install Bp Premier on the new server.
To check the version of Bp Premier in use at the practice, log into Bp Premier and select Help > About.
Obtain the latest drug update
Download the latest drug update from the Best Practice Software website:
- Open the Best Practice Software website www.bpsoftware.net in a browser.
- Select Resources > Bp Premier Downloads from the menu.
- Under the Data Updates section, click the Data Update type for the month you need to install. The row will expand to show the update details.
- Click Download to download the .exe file to the default Downloads folder, or right-click the Download button and select Save link as... or Save target as... to download the file to a known location.
In most cases, the latest comprehensive drug update will be sufficient. However, if you are using an older version of Bp Premier, this will depend upon which version of the Best Practice installation DVD you have. If you are unsure which drug database to download, contact Best Practice Support or email support@bpsoftware.net.
Record link information
- Open Bp Premier and select Setup > Configuration from the main screen.
- Select the Links tab and save a screen capture or make a note of all entries.

Record results import information
- Open Bp Premier and select Setup > Configuration from the main screen.
- Select the Results Import tab and save a screen capture or make a note of all settings.

Record messaging providers
- Open Bp Premier and select Setup > Configuration.
- Select the Messaging tab.
- Double click on each messaging provider listed and make a screen capture or make a note of all the entries.

Record scanning information
This step does not apply if your practice does not use a document scanner.
- From the main screen of Bp Premier, open a patient record.
- Select Patient Visit > Correspondence In, and click Scan. The Scan document screen will appear.
- Make a note of the default settings (such as the DPI setting).
Record Medicare Online information
- From the main Bp Premier screen, select Setup > Configuration > Online Claiming.
- Record all settings on this screen, such as Location name, Location code, A5 vouchers, and Path to certificate store.
- Click Check Certificate Expiry record certificate details.
- Browse to the folder C:\ProgramData\BPOnline\ on the existing server. Take a copy of the file HIC.psi. This is the certificate store file and will need to be copied to this folder on the new server.
eRx Script exchange
- Browse to the folder C:\Program Files\Best Practice Software\BPS and run eRx Setup.exe.
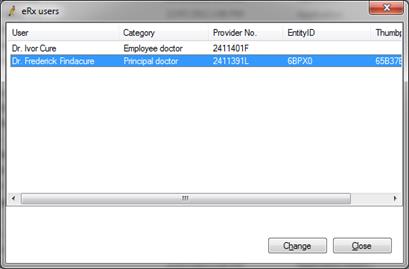
- Click Setup users.
- If there are any users listed with Entity IDs, the site uses eRx Script Exchange.
- Browse to the folder C:\Program Files\Best Practice Software\BPS\eRx and take a copy of the file Erx.ScriptExchangeAdapter.StandardAdapter.exe.Config.
- Copy this file and store in a known folder. You will need to copy the eRx configuration file to the new server after installation and run the file eRx Setup.exe.
Preparation for moving the server is now complete.
Install Bp Premier on new server
- Log all users out of the current server.
- Perform a backup of the data using BP Backup.
- Install Bp Premier on the new server.
- Restore the backup made in step 2 to the new server.
- Stop the SQL Server database instance on the old server. Consult the SQL Server documentation or your database administrator for instructions on stopping the database.
IMPORTANT Best Practice Software recommend stopping your old database and keeping it inactive until you are satisfied that the new live server is functioning without any problems. You can then uninstall Bp Premier and SQL Server from the old server.
If your old database remains running and connected to the network, workstations that have not been updated may make updates to the old database instead of the new database.
Update registry to point to server
After moving a Bp Premier server, you must edit the Windows registry on each workstation to connect to the new server. You will need the Bp Premier server's IP address or hostname. You can run 'ipconfig' to identify a machine's IP address, or 'hostname' to obtain a machine's hostname.
Obtain server hostname or IP address
- Log in to Windows on the Bp Premier server.
- From the Windows Desktop, go to Start > Apps > Windows System > Command Prompt.
- Type 'hostname' at the prompt and press enter. The command prompt will return the computer's hostname on the next line.
- If you need the IP address, type 'ipconfig' at the prompt and press Enter.
- The IP address will be listed under the active ethernet card's IPv4 Address. In the following example, the IP address is '192.168.1.10'.

Update workstation registry
IMPORTANT Updating the Windows Registry incorrectly has risks. Update only the entries indicated in the instructions. Record initial values on entries that you change, in case an entry needs to be restored.
- Log in to Windows on a Bp Premier workstation.
- Open the Windows command prompt.
- Type in ‘regedit’ and press Enter. The Registry Editor will open.
- Scroll down to the following folder:
- On 32-bit operating systems, scroll to HKEY_LOCAL_MACHINE > Software > Best Practice Software
- On 64-bit operating systems, scroll to HKEY_LOCAL_MACHINE > Software > Wow6432Node > Best Practice Software.
- Scroll to Best Practice Software > Best Practice > Database.
- You will see an entry for Server on the right hand side. Double-click this and an Edit String dialog box will appear.
- Type in the hostname or IP address for the Bp Premier server into the Value data field.
- Click OK.
- Locate the registry folder HKEY_LOCAL_MACHINE > Software > ODBC > ODBC.INI. If this folder contains any sub-folder starting with BPS, delete these keys.
- Log in to Bp Premier on the workstation.
- Modify a test patient's record on the workstation with a minor change and save the changes.
- Log in to the Bp Premier server and view the patient's record you just modified. If the change is visible, the workstation has successfully connected to the new server.
- Occasionally, this setting will not work the first time. If the workstation cannot connect to the Bp Premier server, repeat steps 4—8 to update the registry and test the connection to the server again.


Repeat steps 1—12 for each Bp Premier workstation.
Finalise installation
Finalising the server move involves setting up configuration for your practice's workflows and clinical integrations on the newly moved server.
Update drug database
Install all drug database updates that are required to bring the installation to the latest version. Browse to the Best Practice Software web site www.bpsoftware.net to obtain the latest drug data update.
Start BP Service
To start BP Service, go to Control Panel > Services in Windows, locate 'Bp Service', right-click and select Restart or Start Service. Your IT support can assist with starting Windows services.
Create any required directories
If you needed to create specific Windows folders up on your previous Bp Premier server, such as export and import folders for results importing, you will need to create the same directories on the new server. If you are also reinstalling other software such as PracSoft Pathology Download software, you must point these applications to the new folders on the new server.
Backup schedule
- From the Bp Premier main screen, select Setup > Configuration.
- Select the Bp Service tab.
- Check the Use Bp Service for running automated backups check box.
- Click the Configure Automated Backup button.
- Set up your backup schedule for the migrated database.
- Tick the box Delete old backups in same folder if you don't want to keep old backup files.
- Click Save.
Results import
Install any result download software required by your pathology or imaging labs, just as if you were installing Bp Premier for the first time. See Title for more information.
- From the Bp Premier main screen, select Setup > Configuration.
- Select the Results Import tab.
- Use the settings saved in Record results import information to reconfigure results import.
- Bp Premier will recognise that you have previously set up results import on a different computer and alert the user.
- Click Yes. All links to old results import will be deactivated, and the new server configuration will be used for all future results import.
- Click Save to save your configuration.

Messaging Providers
Obtain and install any messaging software from your secure messaging software vendor, just as if you were installing Bp Premier for the first time. See Set up a messaging provider for more information.
- If you obtained the utility to clear out old messaging provider paths from the Best Practice database, run the utility on the new server.
- From the Bp Premier main screen, select Setup > Configuration.
- Select the Messaging tab.
- Use the settings saved in Record messaging providers to reconfigure messaging providers.
Email (Optional)
- From the Bp Premier main screen, select Setup > Configuration.
- Select the Email tab.
- Reconfigure your email settings. Confirm with your IT support whether email settings remain the same for your new Bp Premier server.
Scanning
- If your practice scans documents from the Bp Premier server, you must install the scanner software on the new server machine.
- Perform a test scan from Best Practice: open a Patient visit, select Correspondence In, and click Scan.
- Use the settings saved in Record scanning information to reconfigure your scanner. Scan a test document in to confirm the scanner works correctly.
Medicare Online
On the new server:
- Close Bp Premier.
- Copy the HIC.psi file you copied in Record Medicare Online information to the folder C:\ProgramData\BPOnline\.
- Change the permissions of the file HIC.psi so that all users on the network have full access to the file.
- Share the folder C:\ProgramData\BPOnline\ on the network so that all users have full access to this folder.
- Open Best Practice and select Setup > Configuration > Online Claiming.
- Check that the settings are exactly as you recorded in Record Medicare Online information and click Save.
- Select View > Patients. Select a patient and open their record. Click the Medicare/DVA Eligibility check button. If Bp Premier connects to Medicare, configuration is correct.
On each workstation that uses Bp Premier Management:
- Open Bp Premier and select Setup > Configuration > Online Claiming.
- Ensure that the field Path to certificate store is a UNC path that points to the shared folder \BPOnline\ on the new server, for example, '\\newservername\BPOnline' . If the field does not contain a UNC path to this folder, enter the correct path and click Save.
- Select View > Patients from the Bp Premier main screen. Select a patient and open their record. Click the Medicare/DVA Eligibility check button. If Bp Premier connects to Medicare, configuration is correct.
eRx script exchange
See Set up eRx Script Exchange for more information.
New server configuration is now complete.
Uninstall Bp Premier from old server
After all workstations have been redirected to the new server, and you have tested that:
- updates from workstations are visible from the new server
- the new server connects to Medicare
- results import is working
- messaging services are working
you can uninstall your old version of Bp Premier and reconnect the machine to the network.

