
Get Started
Set up
Clinical
Patient Comms
Management
Tools & Utilities
Title
Bp Premier Conversion Tool
The Bp Premier Conversion Tool merges one Bp Premier database into another. You may want to merge Bp Premier databases for various reasons including consolidating two or more practices. When merging, one database is generally kept as the live database, and one database is shut down after the merge.
What data will be merged?
All data in the source database that is not related to system configuration is included in the merge process. Examples of system configuration items that are not merged include pathology import and backup paths. The process allows you to select which patients, users and contacts to transfer from the source database; all are selected by default.
Before you begin
When using the Bp Premier Conversion Tool to merge Bp Premier databases, you require two databases: the Source and the Target. The Source database will be merged into your Target database. The merged data is then backed up and restored into your live environment. The Source database is generally shut down and no longer used.
You require a machine to restore your Target database on and a separate machine to restore your Source database on. The database merge is performed on the Target machine.
Set up Your Source Database Machine
- Back up Bp Premier to obtain a backup of your Source database.
- Nominate a machine on your network to restore your Source database to. Ensure that this machine meets the System Requirements. This machine can not have a version of Bp Premier installed on it currently.
- Install the same version of Bp Premier on to your nominated Source machine that is used in your live environment.
- Restore your Source database backup to your nominated machine.
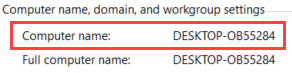
- Make a note of the computer name that you restored your Source database to:
- Open Windows Explorer and Right click on This PC or My Computer. Choose Properties.
The System window appears.

- Find the Computer name and note it down.
- Open Windows Explorer and Right click on This PC or My Computer. Choose Properties.
The System window appears.
Configuration Checking Before the Merge
Most configuration in the source database (for example, appointment types and custom fees) is copied as part of the Bp Premier Database Merge unless it is an exact field-for-field match with configuration in the target database. It is therefore essential to check for similar configuration during the trial merge that may duplicate in the final, combined database. This configuration should either be changed to exactly match that of the target database (which prevents it being copied) or deleted after the merge process but before the new database goes live.
Set up Your Target Database Machine
- Back up Bp Premier to obtain a backup of your Target database.
- Nominate a machine on your network to restore your Target database to. Ensure that this machine meets the Bp Premier System Requirements. This machine can not have a version of Bp Premier installed on it currently.
- Install the same version of Bp Premier on to your nominated Target machine that is used in your live environment.
- Download the correct version of Bp Premier from the downloads page under the Program Updates section.
- Install as a Server installation.
- Restore your Target database backup to your nominated machine.
You can now install the Bp Premier Conversion Tool on your Target machine.
Install the Bp Premier Conversion Tool
Install the Bp Premier conversion utility on your
- Download the conversion utility installation here. Best Practice recommends using Google Chrome when installing this utility.
- Double-click the downloaded file. The Application Install screen appears.

- Click Install. The conversion utility is downloaded and installed.

- The Bp Premier Conversion Tool splash screen appears. An icon named Bp Premier Conversion Tool is also present on your desktop.

You can now perform the database merge.
Merge Bp Premier databases
Perform the database merge on your Target machine.
- Reboot your
- Double-click the Bp Premier Conversion Tool icon on your desktop. If there are updates to the conversion tool, they are downloaded and installed automatically.
- On the Bp Premier Conversion Tool screen, click the Open Bp Conversion Wizard button, the Bp Premier Conversion Wizard appears.
- Enter the following on the Welcome screen.
Field
Description
Source
Bp Premier
Source Server Name
The machine where you restored your Source database to. Enter '\BPSINSTANCE' after the machine name. For example DESKTOP-0B55284\BPSInstance.
Load Data Into
Bp Premier
Target Server Name
(local)\BPSINSTANCE
Conversion Type
Select Replace if you are converting into a blank copy of Bp Premier. If you are converting into an existing database or configuring your copy of Bp Premier before the conversion, you will need to restore a pre-conversion backup before running the tool and select Append.
Field
Description
Source
Zedmed
Clinplus File Path
The path to the clinplus.fdb file copied from your Zedmed database server to your conversion machine.
Load Data Into
The path to the Superplus.fdb file copied from your Zedmed database server to your conversion machine.
Documents Directory
The path to the Zedmed documents directory that was copied to your conversion machine. This directory is typically called Blobs.
Target Server Name
(local)\BPSINSTANCE
Conversion Type
Select Replace if you are converting into a blank copy of Bp Premier. If you are converting into an existing database or configuring your copy of Bp Premier before the conversion, you will need to restore a pre-conversion backup before running the tool and select Append.
The Staging screen begins work to convert your data. When this process is complete, click Next.

- On the Scoping screen, you can select the Patients, Users and Contacts to

If there are existing users in your Bp Premier database, the Users tab allows you to map a user from your Source data to a user in your Bp Premier
- Select the Users tab.
- Identify the user to map and click the corresponding Map User... button, the Please select a user to map to appears.
- Select the user to map to in the Target Users drop down. Click OK.

- The Duplicates screen displays Patients and Contacts from your Source data that match existing data in your

- The Begin Load screen displays a summary of the conversion actions.
Check the Assign Location to converted prescriptions with Locationld = 0 checkbox to assign prescriptions with no location to a location. Select the location to map to in the Location selection list.
Review the summary and click Next when ready.

- The Loading screen completes the remainder of the conversion process. This step takes some time to complete depending upon how much data is converted. Click the Next button when the Loading step completes.

- The Complete screen displays a summary of the conversion process. Click Finish.


Click Next.
When you have chosen which items to
When merging, one of the following rules available from the drop-down is implemented.
Use newest data | The newest data from either |
Use target system data | The data from Bp Premier |
Use source system data | The data from the Source is used. |
NOTE It is essential to merge pathology contacts, so they do not duplicate on the laboratory preferences screen in Bp Premier. The pathology contacts appear first in the Contacts list of merge items.

Click Next.
Run Update Database Utility
Ensure your Bp Premier database has the latest composition by running the Update Database utility.
-
Open Update Database. You can do this by either:
- Click the Start button and finding Update Database.
- Opening Windows Explorer and navigate to your Bp Premier installation folder, this is typically C:\Program Files\Best Practice Software\BPS. Locate the Update Database icon.
- Double click Update Database.
- If User Account Control asks if you want to proceed, click Yes.
- The Update Bp databases screen appears.
- Click Run. The process takes several minutes to complete.

Rebuild SQL Indexes
Rebuild the SQL indexes after the
- Open BP Utilities. You can do this by either:
- Click the Start button and finding BP Utilities.
- Opening Windows Explorer and navigate to your Bp PremierBp Premier installation folder, this is typically C:\Program Files\Best Practice Software\BPS. Locate the BPS Utilities icon.

- Double click the Rebuild SQL Indexes icon. The Rebuild Indexes window opens.
- Click Run.
- When the indexing process is complete, click the Close button.

Check merge results
Check the result of the merge process. Ensure there is no unexpected duplicate patients or users and that the data appears in good order. Use the following table as a guide.
Patient demographics correct | Correspondence In and Out present and accessible |
Past Visit records present and accessible | Reminders present, correct and accessible |
Current and Past RX are present and correct | Appointments |
Investigation results present and accessible | Custom Templates present and correct |
Immunisation records present and accessible | Contacts address book correct |
Reminders |
|
Submit conversion logs to Bp Premier support
When you are confident that the data has converted correctly:
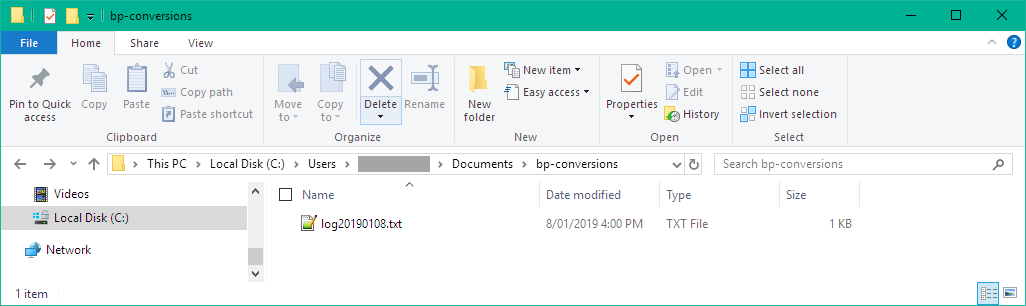
- Email all conversion logs to bpconversions@bpsoftware.net. These logs files are in the C:\Users\<YourUserName>\Documents\bp-conversions folder. Include your contact details and practice name in the email.
- Bp Premier support will review the conversion logs to ensure there are no issues with the files.
Once your logs have been reviewed by support, you can run another database merge, and restore the merged data into your live environment.
Restore Data into Your Live Environment
Only restore the merged data into your live environment when you are sure that the merge has succeeded and you are happy with the quality of the data.
- Back up Bp Premier to obtain a backup of your merged data on your Target machine.
- Copy the backup file to your Bp Premier database server machine.
- Restore the backup to restore your merged data into your live environment.
- Uninstall Bp Premier on the machines that held your Source and Target databases. Having multiple Bp Premier databases on a network can cause issues.
Ensure Medicare Claiming Works in the Merged Dataset
Follow the below instructions if you intend on using Medicare online claiming with your new dataset. These steps create a dummy service to ensure that the Medicare identifiers are correctly generated by Bp Premier after your data has been merged.
- From the main Bp Premier screen, navigate to Management > Create patient account.
- On the Select patient screen, search for and select a patient that has a Medicare number. The Account details screen appears.
- Click Add item. The Account item screen appears. Select item 23 and click Add.
- On the Account details screen, select Medicare Direct Bill in the Bill to field.
- Take note of the user selected in the Provider field.
- Click Store. The Account details screen closes.
- From the main Bp Premier screen, navigate to Management > Manual direct bill batches.
- Click File > New batch. The Direct bill batch appears.
- In the Batch No field enter in a batch number that is one letter greater than the most recent batch number submitted to Medicare in either database. For example, if the most recent batch number sent in Database A is "E0020" and batch number "A0050" in Database B, set Batch No to "F0001".
- Click Create batch.
- Click Print & Save. The Direct bill batch screen closes, and the batch appears in the main Direct bill batches screen list.
- Double click the batch from the Direct bill batches list. The Reconcile Direct Bill batch screen appears.
- Ensure the service is selected and click Adjust service. The Adjust billing screen appears.
- On the Adjust billing screen select Write off service and click OK. The Adjust billing screen closes.
- Click Save on the Reconcile Direct Bill batch screen.
- The process is now complete.


You can now start using the merged Bp Premier data in your live environment.
Merge. Merging Bp Premier. Merging Best Practice. Merging Databases. Merge two databases. Merge two practices. Merge two clinics.
Troubleshooting
If you receive certificate errors when using Medicare services after merging your databases, please contact the Medicare Helpdesk on 1800 700 199 and advise that you have merged two databases which may have changed the certificate in use, and may be causing a 9123 error. You will need to quote the RA of the certificate that is in use in the merged data set”.
Feedback


This material is classified as commercial-in-confidence. Unauthorised distribution of this information may constitute a breach of our Code of Conduct, and may infringe our intellectual property rights. This information is collected and managed in accordance with our Privacy Policy, available on our website. © Copyright 2020