Banking batches allow a practice to reconcile their payments taken against their EFT receipts, cash drawer, cheque on hand, and direct deposits.
Before creating a banking batch
Prior to creating a banking batch, Best Practice Software recommends your practice print the Daily Takings report and use the report to confirm that your takings are correct. This report is broken down by payment method and date, and payments are listed in the order they were taken, which should relate to your EFT listing.
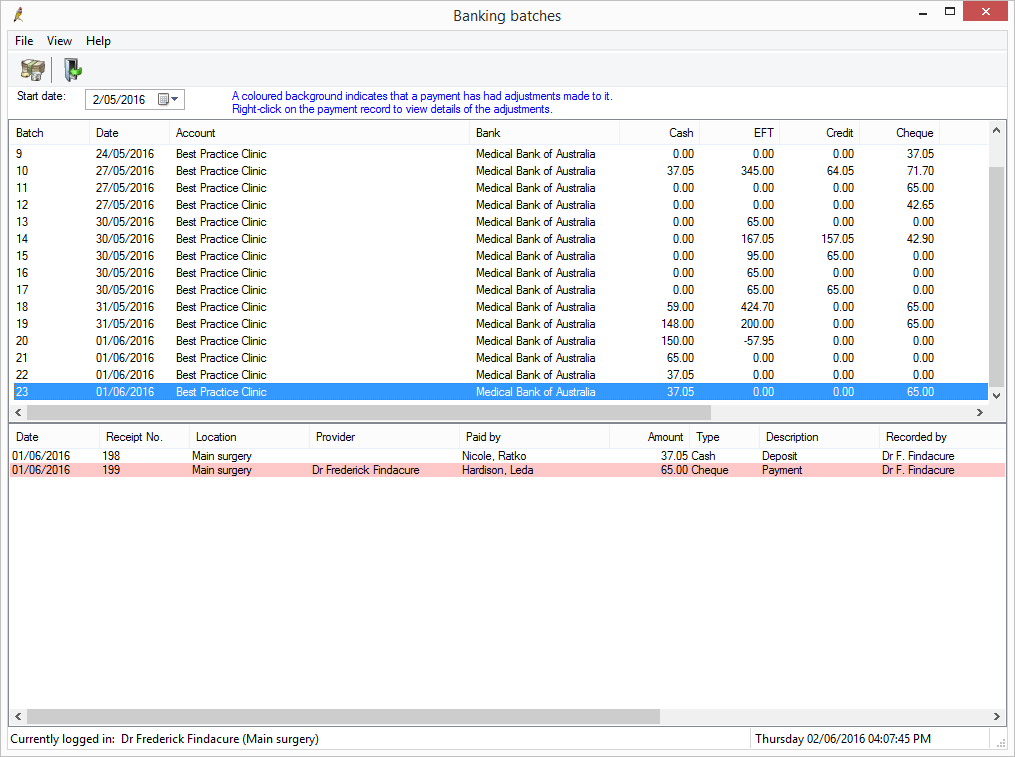
View banking batches
To access the Banking batches screen, select Management > Banking from the main Bp Premier screen.

Each line shows the batch number, bank account name, bank name, payment method breakdown, total banked, who created the banking batch and the creation date and time.
Select a batch to see the list of payments and deposits that form part of that batch.
Items highlighted in pink indicate that before the batch was created, the item was adjusted through a payment reversal or adjustment, or deposit adjustment or refund.
Create a new banking batch
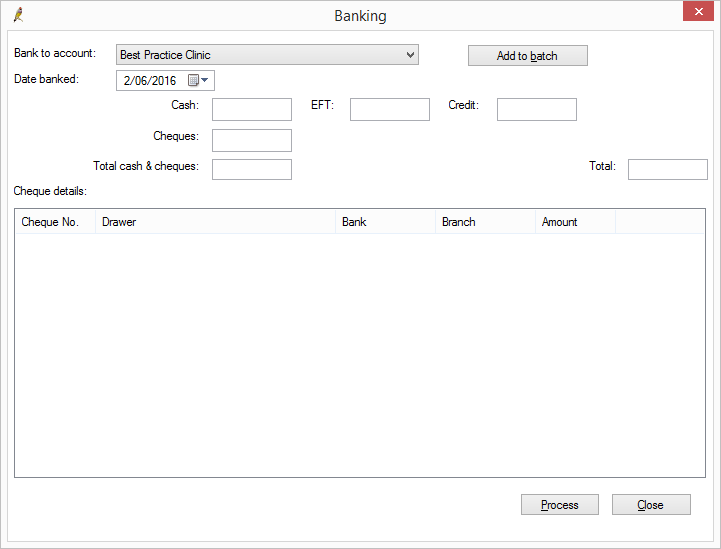
- From the Banking Batches screen, select File > New batch or click the Create new banking batch icon in the toolbar. The Banking screen will appear.
- Select the Bank to account this batch is intended for and set the Date banked value.
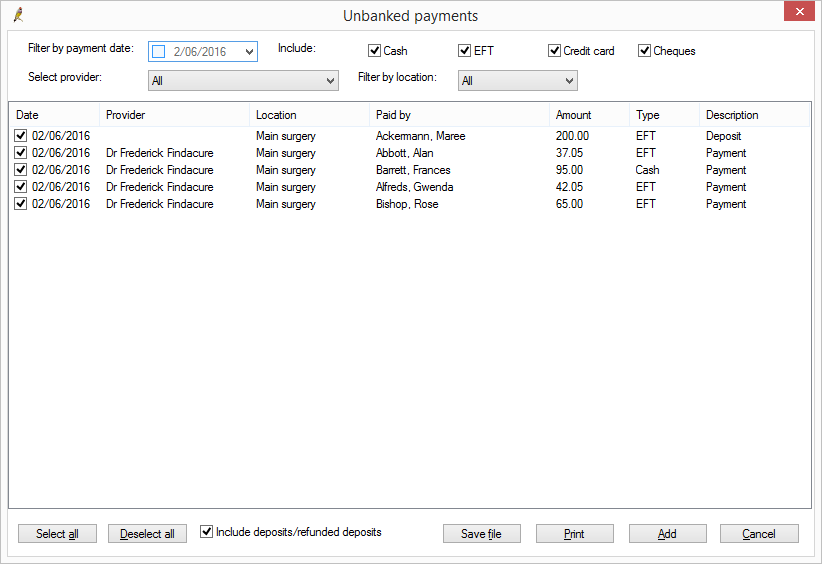
- Click Add to batch to display the Unbanked payments screen.
- Filter the list by Payment date, Payment method, Provider, or Location.
- Tick the Include deposits / refunded deposits checkbox if you want these items included in the list.
- To export the transactions in the list to file to be worked on externally, click Save file. Saving to file does not affect the transactions' banked status.
- To print a list of the transactions in the list, click Print.
- Tick all the payments that should be included in this banking batch and click Add. The Unbanked payments screen will close and the Banking screen will update the totals by payment method from the selected transactions.
- Click Process. A Banking details report with the summary of the batch will be printed.


All payments or deposits record via Cash, EFT, Credit card and Cheque will be displayed by default.
NOTE Direct credit transactions are not shown on this banking screen. Direct credit payments, such as those manually created via the Payment details screen, or those created via the Online Claiming check for payments function, are automatically treated as banked. Direct credit payment transactions will be reflected on new banking reports. See Banking Reports in for further information.
NOTE The Banking details report can be used as a deposit form to take to the bank, but in this case you should create a batch that only includes cash and cheques.
