Bp Premier supports e-ordering of pathology and radiology investigations from laboratories that accept e-orders.
Before you begin
You will need the NATA code for any pathology laboratories. The NATA code determines the list of tests available from a pathology lab. If you wish to set up recommended tests based on clinical details, you will need to consult the laboratory for a recommended test list. Radiology labs do not require a NATA code for e-ordering from Bp Premier.
You may also need to install messaging software on each Bp Premier server or workstation that will be generating e-orders. The lab can tell you if you need to install any software (such as Fetch) and if the HL7 e-order files need to be stored on a specific location on the machine.
How do I update the test list?
The e-ordering test list for registered laboratories is checked for updates and included in each monthly Bp Premier drug and data update. You do not need to do anything to update the test list.
Set up e-ordering for pathology
You must add the laboratory as a contact in Bp Premier and enable e-ordering.
- From the Bp Premier main screen, select View > Contacts. The Contacts screen will appear.
- Click Add new. The Contact details screen will appear.
- Select Company/Institution and select a Category of 'Pathology provider'.
- Complete the rest of the contact and identity details.
- Enter the NATA code for the laboratory and tab out of the field. If the NATA code is valid, the Setup E-ordering button will appear.
- Click Set up E-ordering. The Setup electronic ordering screen will appear.
- Tick Send electronic orders to this provider.
- Enter the path on this machine to store electronic requests. The pathology laboratory can tell you if e-order files need to be in a specific folder.
- The Import test list button allows you to manually update the test list for the NATA code.
- If the pathology lab has supplied you with a list of recommended tests, click Import recommended tests and supply the location of the recommended tests .csv file.
- Click Save and click Save again to save the Contact record.
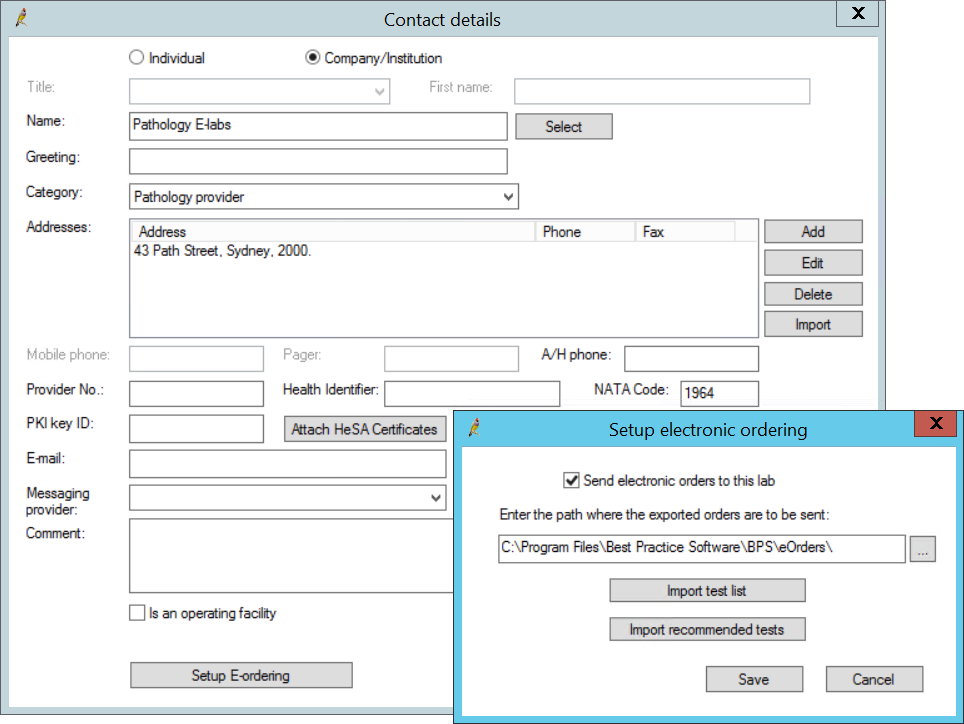
If the nominated folder does not exist, Bp Premier will not create the folder, but will place e-order files in a default system folder when the request is generated.
NOTE Test lists are updated with each Bp Premier data update; you will very rarely be required to manually update the list.
You can now send e-orders to this laboratory.
Submit a pathology e-order
- Open the patient record for whom you are requesting pathology.
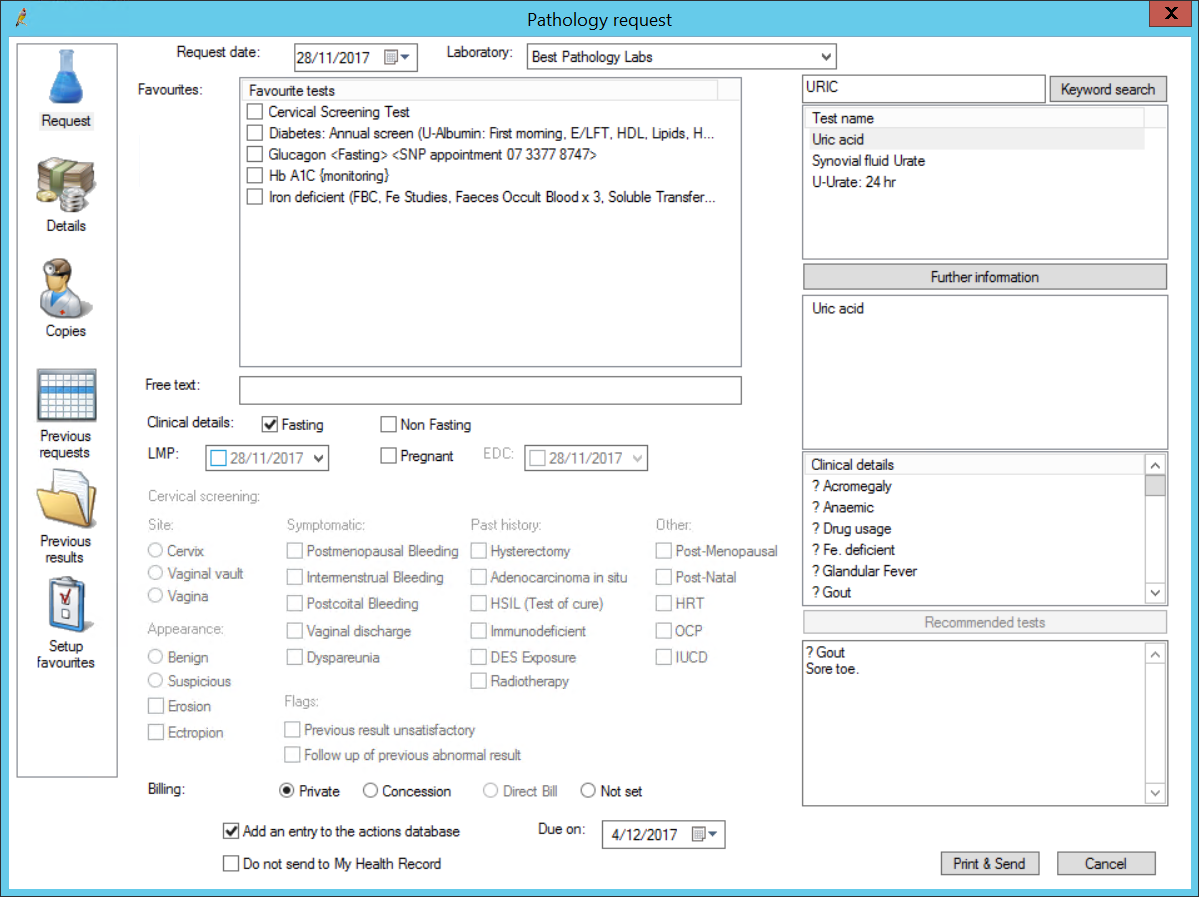
- Select Request > Pathology from the menu. The Pathology Request screen will appear.
- If the e-ordering lab is set to the provider's preferred laboratory (Setup > Preferences > Pathology), the Pathology Request screen will show the 'e-ordering' version of the screen.
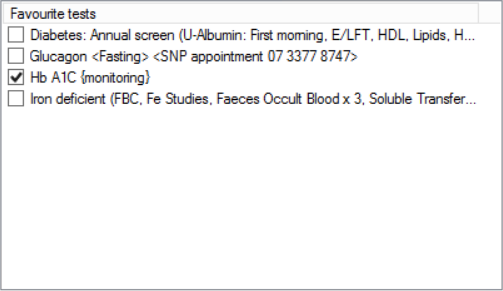
- If you have a list of Favourite tests set up, tick the tests you want to request. Ticked tests will be added to the test list on the right hand side.
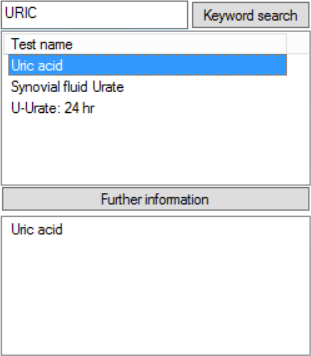
- Start typing the name of the test you want to order in the search field above the Test name list. The list will be populated with tests that start with the same letters.
- To use the entered text as a general search term (which searches inside test names), click Keyword search.
- Double-click a test in the Test name list to move it to the list below. Click Further information to open up an information screen about the test.
- Double-click a clinical context in the Clinical details list to move it to the list below.
- If you have imported recommended tests, the Recommended tests button will be enabled. Select a clinical context and click Recommended tests to view recommended tests for that context.
- You can also type free text clinical details into the text box.
- Tick if any of the requested tests requires Fasting, or if all tests are Non Fasting.
- Tick Pregnant if the patient is pregnant, and enter the LMP and EDC if known.
- If requesting cervical cytology, add any Site and Appearance details and whether to Send to Register.
- Change the Billing type from the default if required.
- Tick Add an entry to the actions database to automatically create a Bp Premier action to follow up the test.
- Tick Do not send to My Health Record if the patient does not want the imaging or pathology result uploaded to their My Health Record.
- Click Print and Send to print the pathology form for the patient and store the HL7 request file in the export folder.
Otherwise, select the e-ordering Laboratory from the drop-down menu at the top of the screen. The screen will change to reflect e-ordering.
Order favourites
Search tests to add
Add free-text request
If you cannot find a test through searching, you can enter a test name as Free text. The free text will be added to the list of tests.
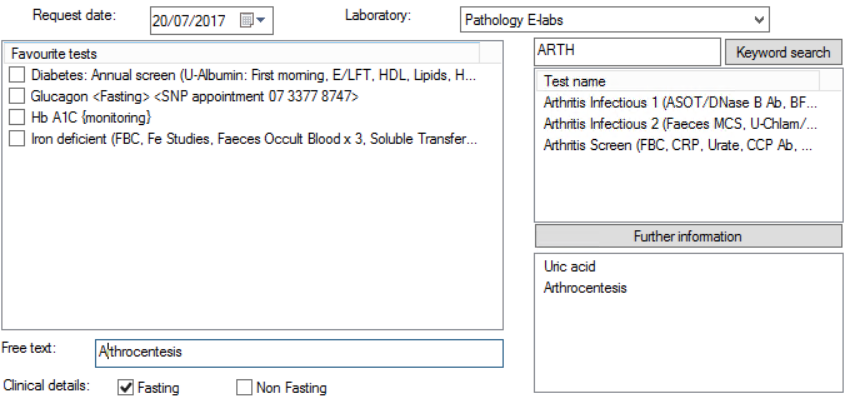
NOTE Defined tests are always preferable to entering free text.
Add clinical details
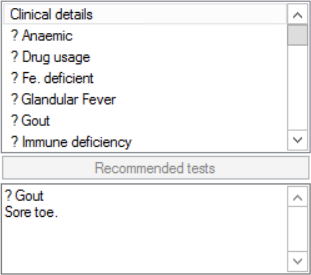
Finalise and send the request
The messaging software will pick up the request from the export folder at the next scheduled export and forward the request to the laboratory.
Set up e-ordering for radiology
You must add the laboratory as a contact in Bp Premier and enable e-ordering.
- From the Bp Premier main screen, select View > Contacts. The Contacts screen will appear.
- Click Add new. The Contact details screen will appear.
- Select Company/Institution and select a Category of 'Imaging provider'.
- When you enter the company Name, make sure that the text in Name matches the name of the supplied imaging provider exactly.
- Complete the rest of the contact and identity details.
- Click Set up E-ordering. The Setup electronic ordering screen will appear.
- Tick Send electronic orders to this provider.
- Enter the path on this machine to store electronic requests. The laboratory can tell you if e-order files need to be in a specific folder.
- Click Save and click Save again to save the Contact record.
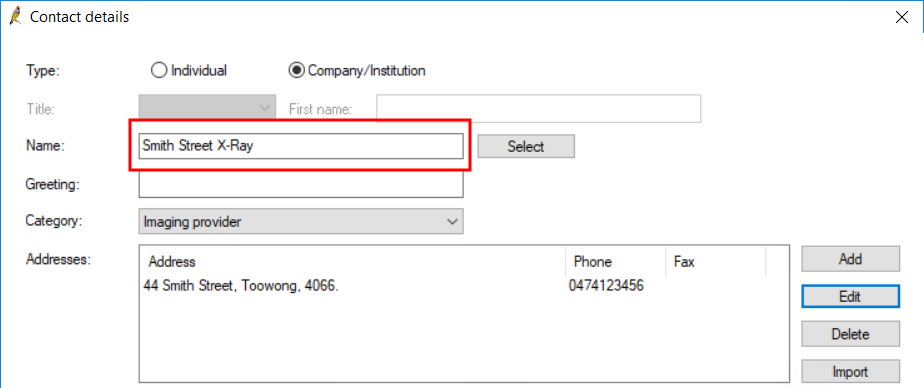
Bp Premier will look up the imaging provider name in the database and name the outgoing HL7 file correctly.
If the nominated folder does not exist, Bp Premier will not create the folder, but will place e-order files in a default system folder when the request is generated.
You can now send e-orders to this laboratory.
Submit a radiology e-order
Submitting a radiology e-order is the same as submitting a regular radiology investigation. See Request radiology for more information.
The only difference is that the Print button in the lower right becomes Print & Send if e-ordering is enabled for the selected laboratory. When Print & Send is clicked, the messaging software will pick up the request from the export folder at the next scheduled export and forward the request to the laboratory.
