Additional information about recording notes is included in Frequently asked questions about the patient record.
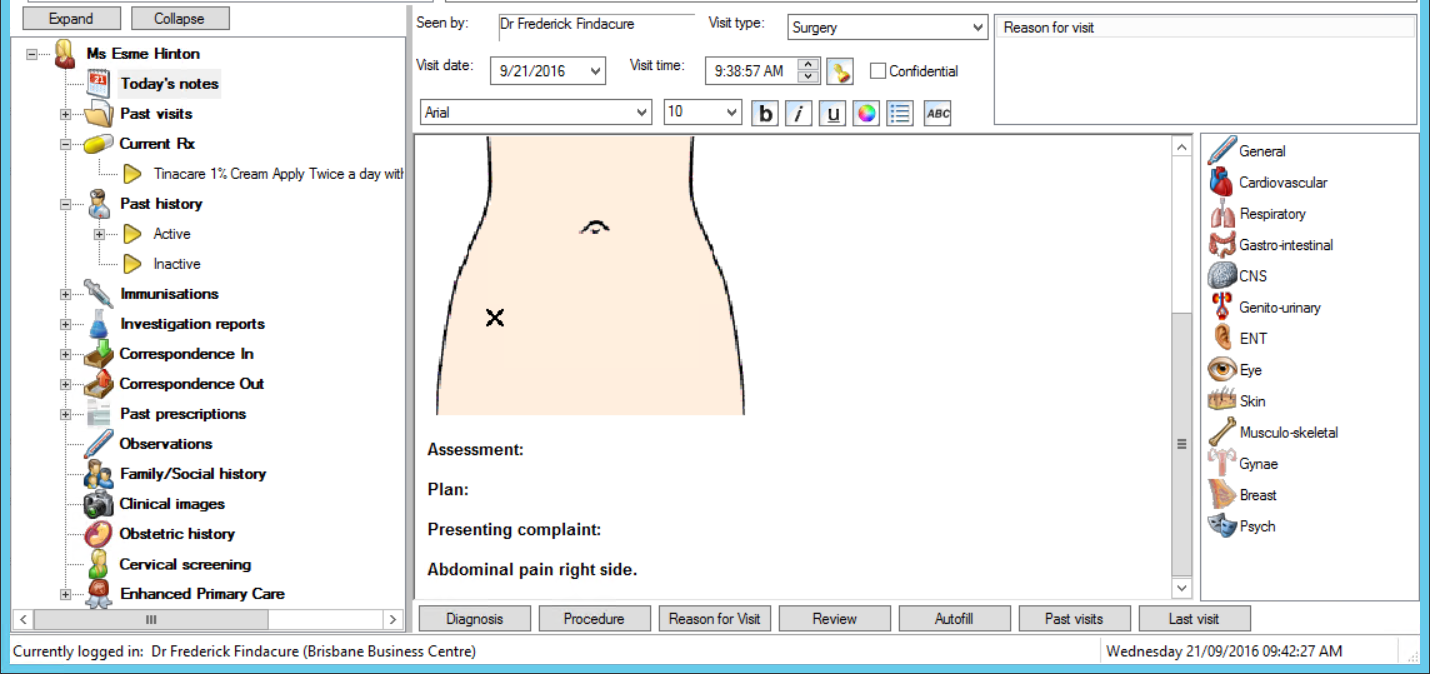
Patient notes are recorded from the Today's Notes section in the patient record.

What's the best way to record notes?
There are three ways of manually adding notes:
- Type notes as free text into the default sections, using shortcuts and autofill text. See Keyboard and autofill shortcuts for notes for more information. Style the text in the notes using the formatting toolbar along the top.
- Use the buttons along the bottom of the screen to record diagnoses and procedures.
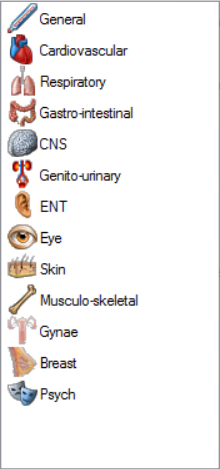
- Use the History and Examination bar along the right hand side.
You can use a combination of all three methods to enter notes. Bp Premier will also automatically add notes as a result of information recorded by the provider in other areas of the patient record and software, such as completing a health assessment, or sending a HL7 ereferral.
Keyboard and autofill shortcuts for notes
The following keyboard shortcuts are useful for navigating the left hand patient tree. Press the keyboard combination to switch to that component of the tree.
Keyboard shortcut | Go to |
|---|---|
Shift+F4 | Open medical certificate template in word processor |
Ctrl+Alt+T | Today's notes |
Ctrl+Alt+V | Past visits |
Ctrl+Alt+X | Current Rx |
Ctrl+Alt+H | History |
Ctrl+Alt+I | Immunisations |
Ctrl+Alt+R | Investigation Reports |
Ctrl+Alt+C | Correspondence Out |
Ctrl+Alt+N | Correspondence In |
Ctrl+Alt+P | Past prescriptions |
Ctrl+Alt+O | Observations |
Ctrl+Alt+F | Family/Social |
Ctrl+Alt+Y | Obstetric |
Ctrl+Alt+S | Pap smears |
Ctrl+Alt+E | EPC |
Ctrl+Alt+A | Health assessments |
Ctrl+Alt+L | Care plans |
Ctrl+Alt+M | Medication reviews |
Ctrl+Alt+D | Diabetes cycle of care |
Alt+D or Alt+G | Open Diagnosis window |
Autofill entries allow a provider to enter text using a shortcut of only a few letters. Type the shortcut text into Today's Notes and press Enter to substitute the full text. The following shortcuts are already available.
Autofill shortcut | Description |
|---|---|
PC | Presenting complaint: |
HX | History: |
OE | Examination: |
MX | Management: |
DX | Diagnosis: |
RV | Review interval: |
S: | Subjective: |
O: | Objective: |
A: | Assessment: |
P: | Plan: |
AX | Actions: |
You can create your own autofill shortcuts. See Autofills for more information.
By default, Today's notes shows a standard SOAP heading structure (Subjective, Objective, Assessment, Plan). To turn this off, go to the Clinical tab of the User Preferences screen and disable Load SOAP headings on opening notes.
History and examination
The History and Examination tools on the right hand side of the patient record comprehensively record particulars of a patient's condition, including images to indicate placement.

Double-click on any of the icons to open the History & Examination screen. Select a tab from the right hand side of this screen to record notes for different systems.
Most of the fields in the History & Examination screen are self-evident, and require you to tick a checkbox, enter free text, or select from a dropdown.
Create a descriptive diagram
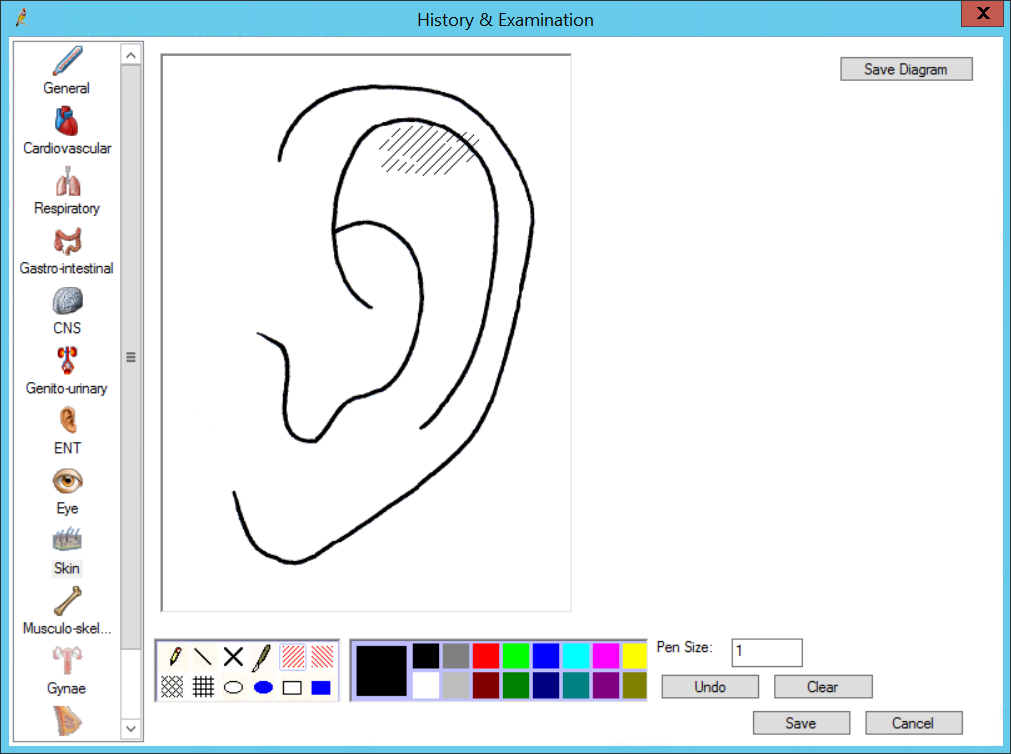
Some tabs offer a graphic of an area of the body. For example, from the Skin tab , you can edit diagrams that represent the entire skin surface: head, body, hands and feet.
- Click on the graphic to open the diagram editor.
- Select a colour, markup type, and Pen size, and mark the image to graphically indicate the condition.
- Click Undo to undo the latest change, or click Clear to clear all marking and start again.
- Click Save Diagram in the top right to save the image.
- Click Save to save the History and Examination details and write the information to Today's notes.

The first toolbox of icons offers different ways of marking the image, such as cross-hatching, circles, stitches, or squares. The second toolbox selects the colour to use for the marking.
Button toolbar
The buttons along the bottom of the clinical record add significant details or related information.
IMPORTANT Your practice's policy will determine if free text diagnoses and reasons for visit are allowed. It is good practice to always use coded conditions for diagnoses, since using coded conditions means that your practice's data will be consistent. Bp Premier provides a cleanup tool for converting past history free text diagnoses into coded conditions.
Button | Description |
|---|---|
Diagnosis | Records a coded diagnosis for the patient, which can be added to past history and uploaded to the patient's My Health Record. |
Procedure | Records a medical procedure for the patient, which can be added to past history and uploaded to the patient's My Health Record. |
Reason for visit | Records a reason for visit. Details are similar to Diagnosis. If you have recorded a Diagnosis or Procedure and ticked Save as Reason for visit, there is no need to also record a reason for visit. |
Review | Books a prospective followup appointment for the patient. |
Autofill | Opens autofilll options for notes. |
Past visits | Opens all of the patient's past visits in a single printable document. Confidential visits are not included. |
Last visit | Opens the patient's last visit from the Past visits section. Past visits can be appended. See Search past visits for more information. |
You can also add and delete reasons for visit by right-clicking in the Reason for visit list above the notes section. For same-day notes, you can also Edit from the right-click menu.

Related topics
Last updated 23 July 2020