After a patient has arrived at the practice and their appointment has been marked as 'arrived', the provider can start the visit from the appointment or waiting room.
To open the waiting room from the main Bp Premier screen, select View > Waiting room or press Ctrl + F12.
Preview patient notes
Previewing from the waiting room opens the patient’s record, but does not start the consultation timer. No visit is created in the database and Today’s notes is not available. The patient’s name is not removed from the waiting room. This allows a provider to view a patient record without starting a visit.
Select a patient in the waiting room and click Preview notes to open the patient record in preview mode.
Start the visit
Providers may prefer to open records from the Waiting Room, which only displays information about patients who have arrived.
To start a visit from the Appointment Book, choose one of:
- double-click the appointment in the appointment book
- select the appointment and click the Start Visit button on the left hand side
- right-click an appointment and select Start visit.
To start a visit from the Waiting Room, choose one of:
- double-click on the appointment in the waiting room
- press the F2 button on the keyboard
- select the patient record and click the Start Visit button at the top of the screen
- right-click an appointment and select Start visit.
The Patient clinical record will now open and the provider can begin the consultation. See Recording Today's Notes for more information.
Finalise a visit
Finalising a consultation generates invoice items and other billing information, ready for front desk staff to process payment after the patient returns to reception.
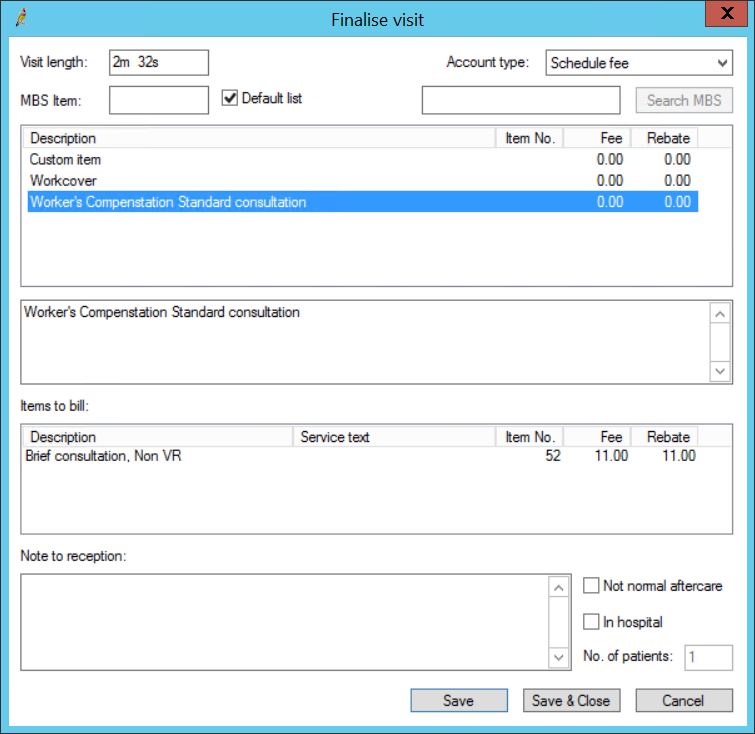
- When you have finished consulting with the patient, click Finalise visit from the patient record to display the Finalise Visit screen.
- The Account type defaults according to the billing configuration:
- If Setup > Configuration > Billing > Billing precedence is set to ‘Patient’, the type defaults to the Usual account recorded in the patient’s demographic.
- If Billing precedence is set to ‘Doctor’, the type defaults to the Default account type recorded in the provider’s Edit user details.
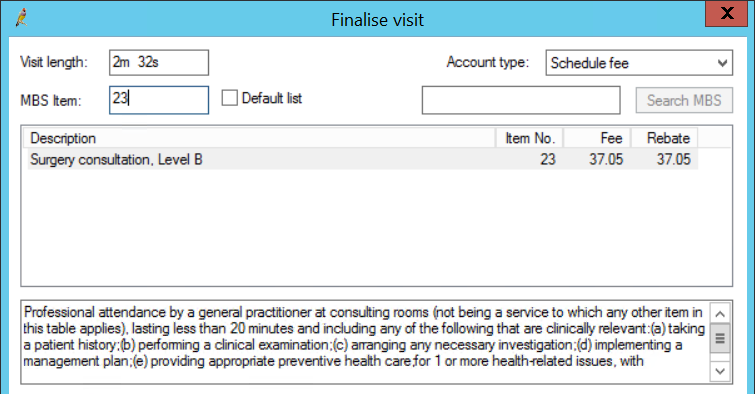
- Search for the MBS item you require and double-click on the description to populate the Items to bill list.
- To add additional items, repeat step 3.
- Items to bill displays items that have been selected or added automatically. Right-click items in this list for the following options:
- Delete: remove an item from the list.
- Add text: add service text if the item needs further description, such as a Care plan or Excision. Click ... to enter predefined invoice notes.
- Vary item: if the Account type is a custom schedule, you can enter a specific fee to be charged for the item.
- Enter any Notes to reception if required. Text entered here will appear when reception staff create the patient account, and will be recorded on the account notes. Provider notes do not appear on the invoice.
- Tick Not normal aftercare or In hospital if applicable.
- If the consultation was performed in a nursing home, indicate the No of patients seen so the correct fee is charged.
- If you are done with the patient clinical record, click Save and Close.
TIP If the patient record was opened from the appointment book or waiting room, the Finalise visit screen automatically opens when a patient record is closed after consultation, and you do not need to click Finalise visit.
If you click Finalise visit, Bp Premier will insert an entry into the appointment book for the current time and mark the appointment as 'At billing'.

Selecting the account type Direct Bill indicates that the account will be billed to either Medicare or DVA.

1. Select Setup > Users > Edit. Add the item number to the Default Item no: field.
2. Tick Always use the default MBS Item in the Finalise window checkbox in Setup > Preferences > General.
3. Set Billing precedence to 'Doctor' in Setup > Configuration > Billing.
The default item will appear regardless of the visit length. If there is no default item, the visit length will determine the default consultation item.
TIP Medicare rules mean that it is not possible for two consultation items to be added to the one account . The Finalise visit screen will remove any existing consultation item number if you add a new one.
If further information needs to be recorded after the consultation, click Save and continue working in the patient record.
Clicking either button will change the status of the appointment to At Billing (green shading) in the Waiting Room and Appointment Book.
Retrieve a patient seen that day
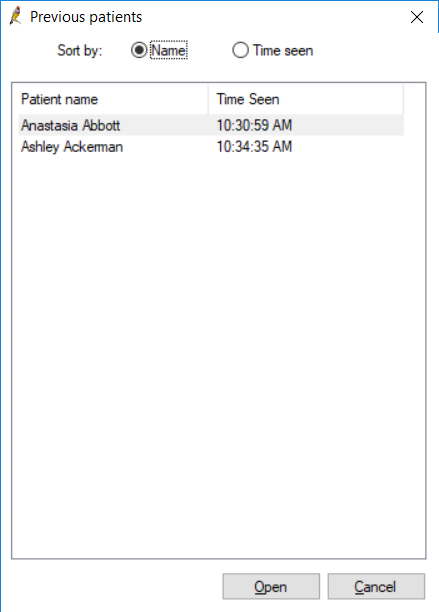
The Previous Patients screen shows all of the patients that have their record opened on a workstation that day for the logged-in user, and when they were seen. This screen is a convenient shortcut if a provider needs to reopen a record for a patient seen earlier. If a patient has seen multiple providers in one day, the patient will appear on all of the providers’ Previous Patients screen.
To view the Previous Patients screen, press Shift+F2, or from the main screen select View > Previous patients.

Related topics
Last updated 23 July 2020