
This article explains how to resolve WebView2 issues in Bp Premier.
Update on WebView2 known issues
WebView2 Evergreen, the third-party application used to view documents in Bp Premier, has been updated automatically by Microsoft over the weekend of 10-11 December 2022 to version 108.0.1462.46.
Users have reported some errors after the automatic upgrade, and that the document viewer will not display documents inside Bp Premier.
Best Practice Software are investigating this issue and will communicate with our practices when a resolution is available.
Review this Known Issue guidance article for more information.
What is WebView2?
WebView2 is Microsoft’s new embedded web control, built on Microsoft Edge. Web controls allow web-related technology to be embedded in software. Visit the Microsoft website to find out more about WebView2.
Why does Bp Premier use WebView2?
Bp Premier uses WebView2 to display web content and documents directly within Best Practice. WebView 2 was introduced in Saffron SP2, and uses less memory than previous web content and document display methods.
WebView2 troubleshooting
You may require assistance from your IT provider to complete the below troubleshooting steps.
WebView2 Runtime error
If you experience the below WebView2 error, this means that WebView2 has failed to download during your install of Bp Premier.
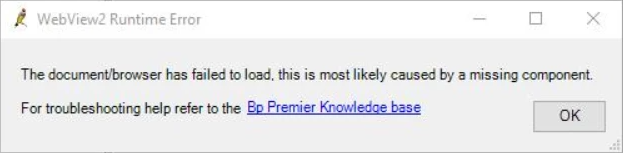
This is likely due to the computer not being connected to the internet at the time of installation.
To resolve this error:
- Click here to download the Microsoft WebView2 runtime.
- Once the download has finished, navigate to the Downloads folder on your computer and locate the file MicrosoftEdgeWebview2Setup.exe.
- Right-click on MicrosoftEdgeWebview2Setup.exe and select Run as administrator. If the User Account Control alert appears, click Yes.
- Restart Bp Premier to run it with WebView2.
The WebView2 runtime download screen will appear.
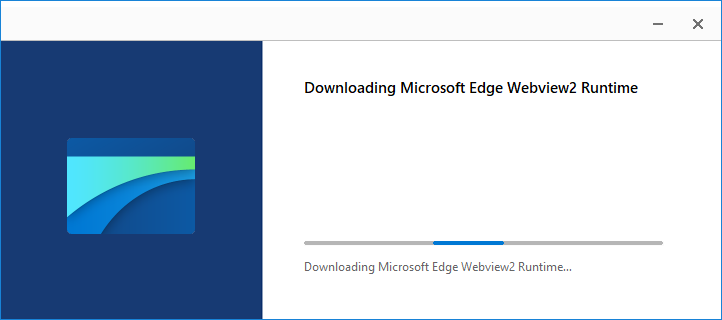
Once the download is complete, the screen will close.
Documents appearing blank
If the document viewer displays a blank screen when you attempt to view a document, try the following solutions.
Run Bp Premier as an administrator
- Close Bp Premier.
- Right-click the Bp Premier desktop item and select Run as administrator.
- Access the file you are having issues viewing.
- Close Bp Premier.
- Re-open Bp Premier as a normal user.
- Navigate to the file again and see if you can access it.
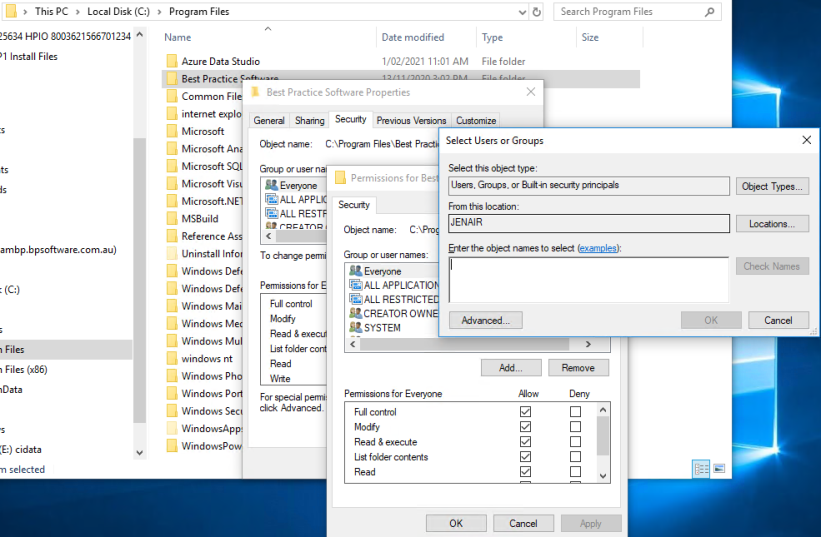
Change the Best Practice Software folder permissions
- In your computer's file browser, navigate to C:\Program Files, right-click Best Practice Software and select Properties. The Best Practice software Properties screen will appear.
- Select the Security tab, and click Edit > Add. The Select Users or Groups screen will appear.
- In the Enter the object names to select field, type Everyone and click OK.
- Select the new Everyone group in the Group or user names section and tick Allow for the Full control permission.
- Click Apply.
Change the Edge Web View Application folder permissions
- In your computer's file browser, navigate to C:\Program Files (x86)\Microsoft\EdgeWebView, right click Application and select Properties. The Application Properties screen will appear.
- Follow steps 2-5 in the Best Practice Software folder section above.
Change Temp folder permissions
- In your computer's file browser, navigate to C:\Users\%Userprofile%\AppData\Local, right click Temp and select Properties. The Temp Properties screen will appear.
- Follow steps 2-5 in the Best Practice Software folder section above.
- Repeat for all user profiles in C:\Users.
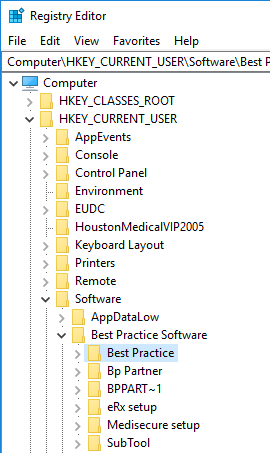
Change Registry key permissions
- Search for 'registry editor' or 'regedit' in the Windows search bar and click on the search result. The Windows Registry Editor will appear.
- Navigate to Computer\HKEY_CURRENT_USER\SOFTWARE\Best Practice Software\Best Practice.
- Right-click on the Best Practice folder and select Permissions. The Permissions for Best Practice screen will appear.
- Click Add. The Select Users or Groups screen will appear.
- In the Enter the object names to select field, type Everyone and click OK.
- Select the new Everyone group in the Group or user names section and tick Allow for the Full control permission.
- Click Apply, then click OK.
- Navigate to Computer\HKEY_LOCAL_MACHINE\SOFTWARE\WOW6432Node\Best Practice Software.
- Repeat steps 3-7 for the Best Practice Software folder.
Add exceptions in Anti-virus software
In your practice's anti-virus software, set up exceptions for each user profile's Temp folder (e.g. C:\Users\%Userprofile%\AppData\Local\Temp).
An exception will also need to be set up in your anti-virus software for msedgewebview2.exe.
Clear the temp directory
Navigate to C:\Users\%Userprofile%\AppData\Local\Temp and remove all contents from this folder.
Sites using a Citrix Environment
If your site uses a Citrix environment, your IT provider may need to disable Citrix API hooks.
See How to Disable Citrix API Hooks on a Per-application Basis for more information.
Sites using FSLogix
If your practice uses the latest version of FSLogix and has a file redirection in place for the temp directory (C:\Users\%Userprofile%\AppData\Local\Temp), disable the redirection
Update the following registry key:
- Search for 'registry editor' or 'regedit' in the Windows search bar and click on the search result. The Windows Registry Editor will appear.
- Navigate to HKEY_LOCAL_MACHINE\SOFTWARE\FSLogix\Profiles.
- On the right side of the screen, there will be an entry called SetTempToLocalPath. Right-click SetTempToLocalPath and select Modify. The Edit DWORD (32-bit) Value screen will appear.
- Update the Value data field to 2 and Click OK.
Last updated 21 December 2021


 AU
AU 