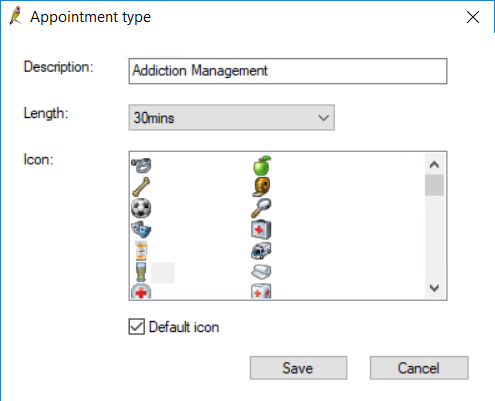
Appointment types help indicate what should be booked into an available slot. Types also define the default appointment length, and the icon that appears in the appointment book.
- Select Setup > Configuration from the main menu. Select the Lists tab.
- Under the Appointment Type list, click Add. The Appointment type screen will appear.
- Enter a Description for the type and select the default appointment Length when this type is booked.
- Select an Icon to represent the type in the appointment book, or tick Default icon to use the default system icon.
- Click Save to save the appointment type and return to the Configuration screen.

Non-patient appointment types
You can use the following appointment types to create non-patient appointments in the Appointment Book:
- Meeting
- Assist
- Nursing Home visit
- Teleconference
- Drug rep
- Other.
If these appointment types do not adequately describe the non-patient appointment, book the non-patient appointment under Other, and add further information in the Details: field. See Book or update an appointment for more information.
Deleted appointment types
Appointment types that are removed from the list in the Configuration screen are not deleted, but removed from display. Tick Show deleted to view types that have been removed.
To restore a removed type, add a new type with the same name as the removed type. Bp Premier will prompt if you want to restore the deleted appointment type. Click Yes.
Appointment cancellation reasons
You can create practice-specific reasons for patients or the practice cancelling an appointment. This saves practice staff free-typing a cancellation reason.
- From the main Bp Premier screen, select Setup > Configuration. The Configuration screen will appear.
- Select the Lists tab.
- Select Add under the list Reason for cancelling appointments to add a new reason.
- Click Save.
What do I do next?
Last updated 17 March 2021