Online Directories are available from the word processor. When editing documents, you can look up and insert details for a health service provider from the online directories, as well as contacts stored in Bp Premier's local contacts list.
Before you can use an online directory, you must have it configured. See Set up a FHIR online directory for more information.
Add contact details from the Online Directory
- Press F4 or select Utilities > Word processor to open the word processor. Open a blank document or template.
- Position the cursor where you want to insert contact details in the document.
- From the list of fields on the left-hand side, double-click any of the fields under Addressee or Other contact.
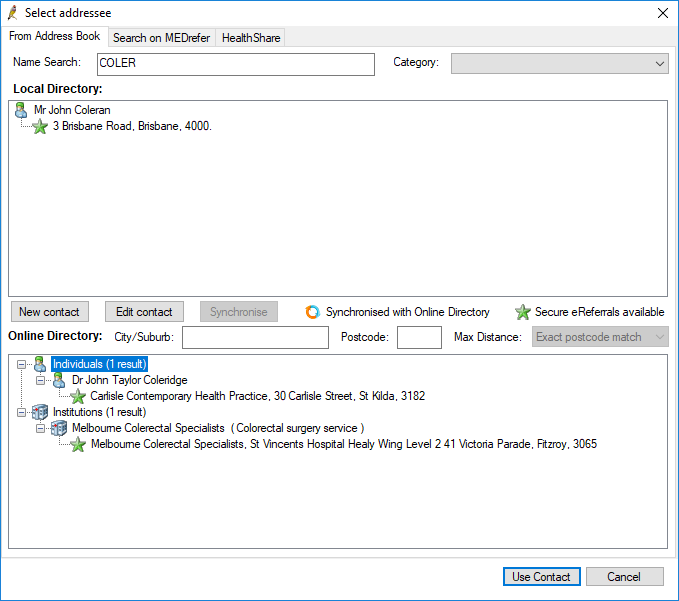
- The new Select addressee or Select other contact window will open, showing the Local Directory contacts directory in the top half and the Online Directory contacts in the bottom half.
- Start typing in the Name Search field to filter both lists by surname or by institution name. For example, typing 'Cole' into the Name Search: field will display results for any providers with 'Cole' in their surnames, and for institutions with 'Cole' in their names.
- You can filter the Online Directory by Postcode to narrow the results.
- Click on a contact in the bottom list and select Use Contact to insert the specified field. For example, if you added the Name template field, the contact's name will be retrieved from the Online Directory and inserted.
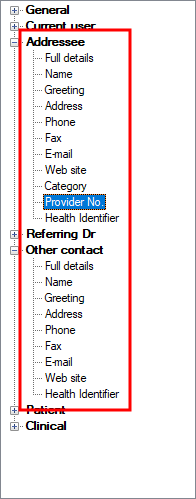
NOTE There is still a 1:1 relationship between the Addressee and a letter. If you have inserted an Addressee template field, any other Addressee fields will insert data from the same contact. To insert other contact details, select fields from Other contact.
The Online Directory shows the provider's specialty in brackets and the practice name in the address line for easier identification.
Synchronise the Online Directory with local contacts
You can synchronise a contact shown in the Online Directory list with the Local Directory list, which is stored in Bp Premier's database. Synchronisation performs the following:
- If the selected contact in the Online Directory list does not exist as a contact in Bp Premier, Bp Premier will create a new local contact record with details imported from the Online Directory.
- If a synchronised contact exists in the local directory, the local contact will update details from the Online Directory.
- If a similar, unsynchronised contact already exists in the local directory, Bp Premier will prompt you to select whether to overwrite the local record or create a new local record. Bp Premier will look at the first name, surname, phone number, and email address to judge similarity.
- From the Select addressee or Select other contact window, use the Name Search and Postcode fields to filter the list of results shown in the Online Directory in the bottom half.
- Click on a contact in the Online Directory. Click Synchronise.
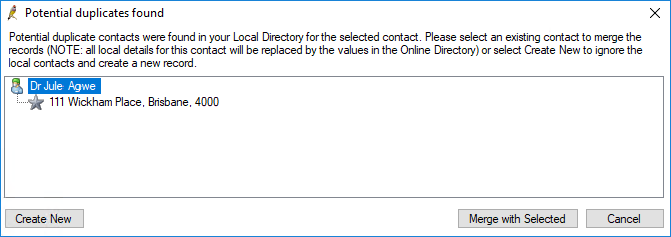
- If a similar local record exists, Bp Premier will prompt to overwrite or create a new contact:
- Click Create New to create a new local contact, or select the record to overwrite and click Merge with Selected to overwrite a local record.
- Bp Premier will add or merge the local contact and display the updated Local Directory list with the new record.

During synchronisation, Bp Premier may prompt you to map a contact's specialty code to a Bp Premier contact category. See Mapping SNOMED specialty codes to contact categories for more information.
Mapping SNOMED specialty codes to contact categories
The following window may appear during synchronisation:
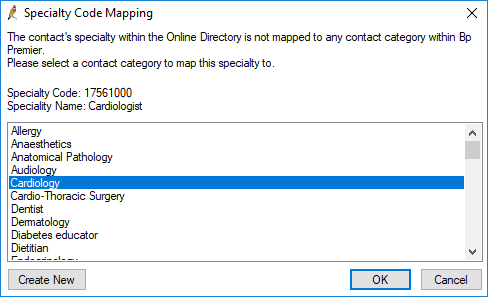
Contacts recorded in the Online Directory use a SNOMED code to indicate the provider's specialty. Bp Premier does not record the SNOMED specialty code for a contact. Instead, Bp Premier contacts use a Contact Category to indicate a health service provider's specialty. The contact category list is a user-editable list maintained from the Bp Premier configuration settings.
This window asks you to select which contact category you would like to map to the displayed Speciality Code. Click the category from the list that best maps to the displayed Specialty Code and Specialty Name and click OK. In the example above, the Specialty Code '17561000' is being mapped to the contact category 'Cardiology'.
SNOMED value sets implemented for HL7 Australia FHIR online directories can be viewed here.
If you cannot find a suitable contact category, you can create one from this window. You can also record Specialty Code mappings for a contact category, so that future synchronisations will automatically map.
Create a new contact category
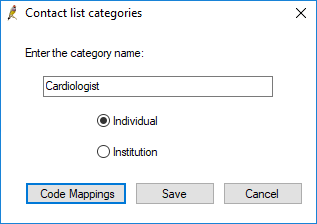
- Click Create New from the Specialty Code Mapping window. The Contact List Categories window will appear.
- Enter a meaningful category name and leave the Individual option selected. Click Save to save the new category.
Map a Specialty Code to a contact category
- From the Specialty Code Mapping window, select the contact category you want to add a mapping to.
- Click Create New from the Speciality Code Mapping window. The Contact List Categories window will appear.
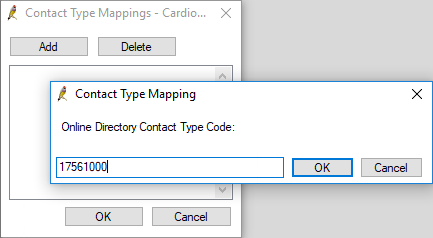
- Click Code Mappings. The Contact Type Mappings window will appear.
- Click Add. The Contact Type Mapping window will appear.
- Type a SNOMED specialty code into the text field and click OK. This will map the specialty code to the Bp Premier category you selected back in the Specialty Code Mapping window.
- Repeat to map as many specialty codes to the contact category as you need.
- Click OK from the Contact Type Mappings window to save the mapping.

The next time you import directory contacts into the local contact list, Bp Premier will automatically map any specialty codes to the specified contact category.
Unlink a synchronised local contact
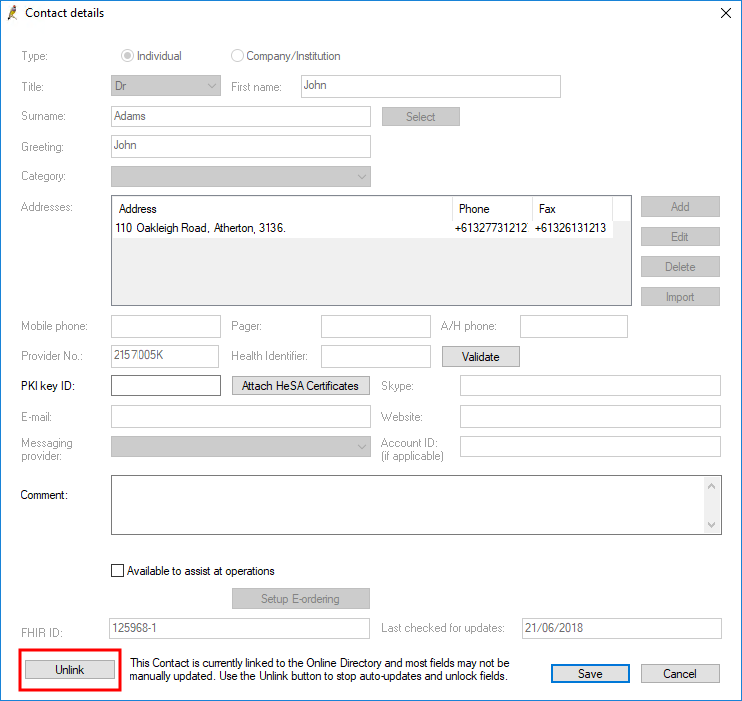
You can unlink a local contact from the Online Directory. Unlinked local contacts will no longer have details updated during a synchronisation. However, unlinked records will still trigger the 'Potential Duplicates Found' alert.
- Select View > Contacts or press F11 from the main Bp Premier screen to open the Contacts window.
- Double-click a contact from the left hand list to open the Contact Details window.
- Click Unlink in the bottom left.
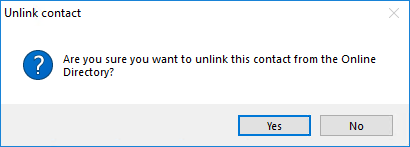
- Bp Premier will prompt you to confirm the unlink.
- Click Yes. The local contact will no longer be synchronised with the Online Directory.
Inactive contacts
When using a local contact that has been synced from an online directory, Bp Premier will check if the contact has been marked as inactive in the online directory since it was downloaded.
If the contact has been marked as inactive in the online directory, an alert will appear asking if you wish unlink the contact.
Click Yes to unlink the contact. The contact will not be selected, however you will have the option to select it gain if you wish, or search for an alternative contact.
Click No to keep the contact linked to the online directory. The contact will be selected.
Last updated 23 July 2020