
Bp Premier provides a number of options to import documents into a patient's notes:
- Scan in using the Bulk document import utility and assign to the patient record
- Scan directly into Correspondence In form your practice's scanner
- Import an existing document into the patient record.
The Bulk document import utility allows staff to scan or import documents and assign them to a patient record without Bp Premier running. See Import bulk clinical documents for more information.
You can also move documents from one section of the patient record to another.
Scan a document into Correspondence In
Ensure that the scanner is installed and working on the workstation. The scanner must use a TWAIN interface. Consult your scanner's user documentation if you are unsure of the scanner type.
- Open the patient record you want to scan into.
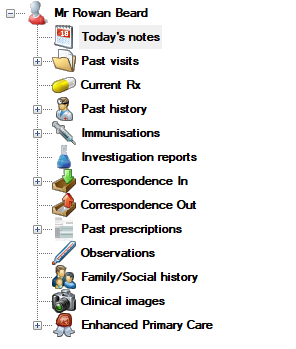
- Select Correspondence in from the left hand tree.
- Click the Scan button. The Scan document screen will appear.
- Select the Source if you have multiple scanners connected to the network. Most TWAIN scanners will be prefixed with the letters 'TW'.
- Select the image colour, DPI, and page size from the three fields below the Source setting.
- If you have a document feeder, tick Autofeed sheets as single document to save a batch of documents as one multi-page file.
- Click Scan. If you are using a flat bed scanner, scan multiple pages together by clicking Scan between pages.
- After the pages are scanned, a preview will appear in the right hand pane. If there are multiple pages, the Next and Previous buttons will be available.
- Complete the Document details fields:
- Document date – defaults to today's date, but can be changed to reflect the date the document was received.
- Category – select the Bp Premier document category for the document.
- From – type in the sender of the document or click Search to select a contact.
- The Subject field supplies a brief description of the document contents. This field is optional.
- Enter a detailed description for the document in the Detail field. This field is optional.
- Enter a reference in the User Ref field, if your practice uses references. This field is optional.
- You can mark the document as Confidential. If the patient has been set up to Deny access to other users, the document will only be available to the user set up as Usual doctor.
- Use the controls in the View panel to adjust the zoom and rotation of the scanned document. If the buttons are greyed out, untick the Fit to window checkbox.
- If the document has been scanned poorly or is unrecoverable, click Clear to clear the preview and start again.
- Click Save to save the document into Correspondence in of the patient's record.

TIP Best Practice Software recommend trying B/W, 100 DPI, and A4, which will reproduce very closely when printed. If the printed version is not the desired quality, increase the DPI value.
Import documents into Correspondence In
- Open the patient record you want to scan into.
- Select Correspondence in from the left hand tree.
- Click the Add button. A file explorer will open.
- Browse to the folder where the scanned document is located, select the file, and click Open. The Correspondence screen will appear.
- Enter the date, category, sender, subject and specific details to associate with the document. Click Search to select a contact.
- You can mark the document as Confidential. If the patient has been set up to Deny access to other users, the document will only be available to the user set up as Usual doctor.
- Enter a reference in the User Ref field, if your practice uses references. This field is optional.
- Click the Save button to save the document into Correspondence in of the patient record.

Import documents into Correspondence Out
- Open the patient record and select Correspondence Out. Click the Import button and browse to the folder containing the file to be imported. Files can be any document or image format such as PDF, TIF, JPG, DOC, DOCX, or XLS.
- Select the document to import and click Open. The Document details screen will appear.
- Complete the From, To, Subject, and Comment fields for the outgoing document.
- You can mark the document as Confidential. If the patient has been set up to Deny access to other users, the document will only be available to the user set up as Usual doctor.
- Tick Add follow up note to actions and select a date to add a note to the patient’s Action list.
- Click Save to import the document.

Correspondence out documents will be displayed in Bp Premier's document viewer and cannot be edited from within Bp Premier. However, documents can be printed or opened externally.
Move a document
This example shows how to move a document from Correspondence In, but you can move documents between multiple sections, or to another patient.
- Open the patient record and select Correspondence In.
- Right-click on the document you wish to move from the right side list and select Move to Correspondence Out.
- A message will be displayed asking you to confirm that you want to move the document. Select Yes to move the document.
- The document will now be displayed in the Correspondence Out section of the patient record.

If the document has contact notes attached, the contact notes will move with the document and the contact Reason will be updated to the new section.
Related topics
Last updated 23 July 2020


 AU
AU 