Bp Premier installation requires administrator permissions to install software and configure Windows components. Before starting any of the instructions below, log in to the server computer as a Windows Administrator, or have your IT support carry out the installation.
Changing a trial version to a licensed version
If you have already successfully installed a trial or evaluation copy of Bp Premier on the server machine, and the installation is working smoothly, you do not need to uninstall and reinstall the software if you intend to use the machine as the production server. To upgrade from a trial version of Bp Premier to a licensed version, you only need to enter the licence key issued to you after purchase from Best Practice Software. After you supply the licence key at the login prompt, all of the functionality permitted by your licence will be available. See Update or check your Bp Premier licence for more information.
NOTE The only exception would be if your site recorded data in the trial server database that you do not intend to keep. In this instance, you will have to manually delete the data from the database, or uninstall and reinstall the database. Best Practice Software recommend that trial sites use the Samples database for any staff training or practice with the software during the trial phase. See Access the samples database for more information.
Before you begin
Always install a new Bp Premier server first, then install workstations.
If you need to view PDF release documents, such as the Bp Premier Release Notes or System Requirements, you will need Adobe Reader installed.
Before you start the installation, you should know the following information:
- Will your practice be using the default SQL Server Express Engine, or does your practice have a licence for a full edition of SQL Server that you intend to use as the database?
- If you are installing a live production version of Bp Premier, you will need your practice's Site ID Number and Licence code to activate the software, supplied to you by your Best Practice Software Sales or your Commercial Enterprise representative.
Obtain installation media
If you are installing Bp Premier for the first time, you will have downloaded an ISO file (which is a disc image file) for the latest version of Bp Premier.
Follow the instructions below to 'mount' the ISO file and start the installation.
- Download or copy the .iso file (such as BP1.11.2.951DVD.iso) to your Bp Premier server.
- Open a Windows File Explorer and browse to the downloaded file.
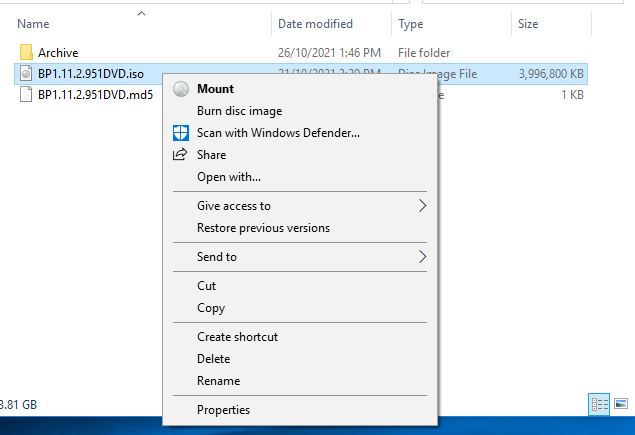
- Right-click the file BP<version>.iso and select Mount.
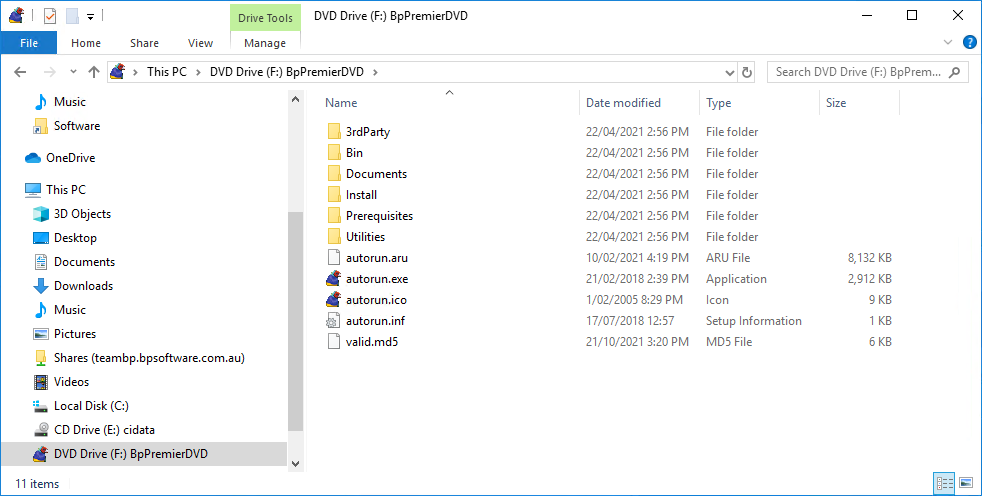
- The DVD contents may open automatically. If not, in the File Explorer, select This PC from the left hand side. A new DVD Drive BpPremierDVD will appear, indicated by the Best Practice Software bird icon. Windows has mounted the ISO file and considers the file a virtual DVD.
- If the DVD contents is not already open, select DVD Drive BpPremierDVD to show the contents of the mounted ISO.
- Double-click the application file autorun.exe to start the installation. Follow the instructions in the installation wizard.
Install Bp Premier Server
NOTE The Bp Premier version number displayed in the following example screenshots may not match the exact version you are installing.
- Insert the Installation DVD or double-click Autorun.exe.
- If you have User Access Control or SmartScreen enabled on Windows, Windows will ask if you want to allow the installer to make changes to your device. Click Yes.
- The installer will open at the Prerequisites panel. This screen lists the supported operating systems.
- The buttons on the left hand side provide further information about Bp Premier and installation:
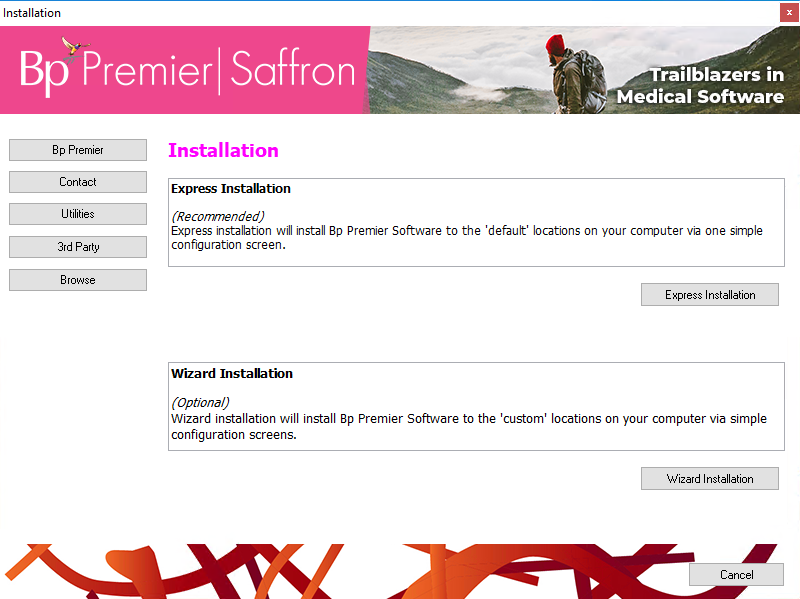
- Make sure your server computer meets the requirements and click Next. The installation option panel is displayed.
- If you need to install Bp Premier in a specific location on the server computer, such as a hard drive that is not mapped to 'C:\', click Wizard Installation. Otherwise, click Express Installation.
- Windows User Account Control will prompt to proceed. Click Yes. The command prompt will briefly open as the installation starts.
- If you selected either installation method, the database selection screen will appear.
- Select the Server option in the Installation Type column, as shown.
- The Medicare Online Module is a legacy feature whose functionality has been replaced in Saffron SP3 and later by Medicare Web Services. You are no longer required to Install the Medicare Online Module.
- Select I agree at the bottom of the screen and click Next.
- If you selected the Wizard Installation option, the destination folders screen will appear. If you selected Express Installation, skip to step 14.
- Click Browse to change the installation destination for the SQL Server database or Bp Premier server application.
- Click Next.
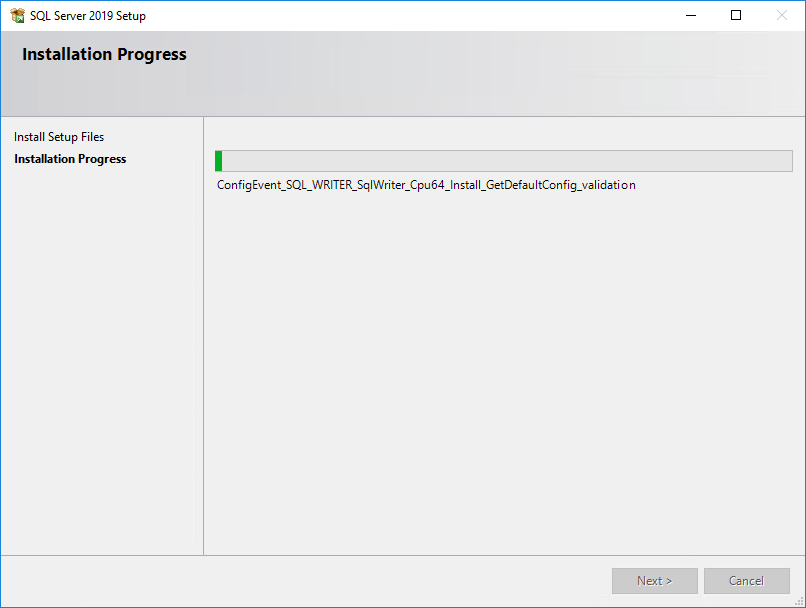
- The installer will begin installing the database. After a short while, the SQL Server Setup screen will appear while the selected version of SQL Server is being installed.
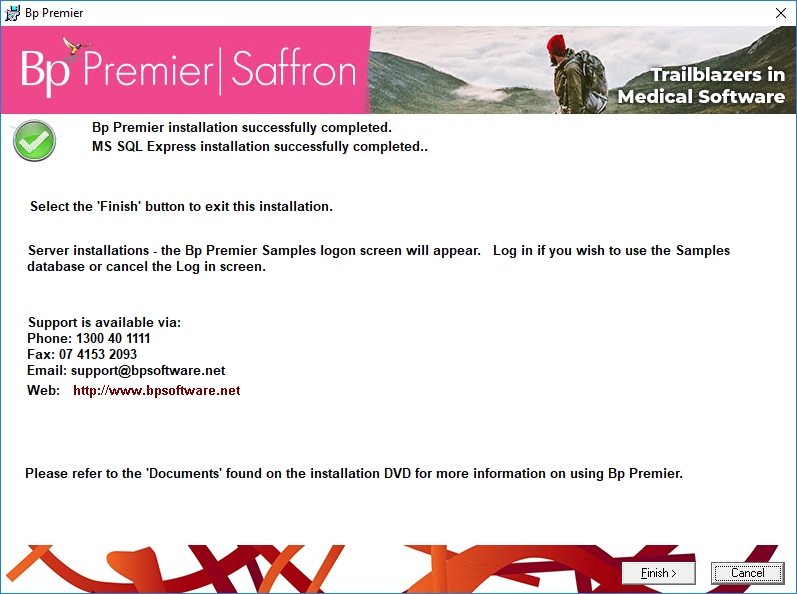
- You do not need to do anything in this screen while the SQL Server installation proceeds. After some time, Bp Premier will be installed, and you will be presented with the Finish screen.
- Click Finish to end the installer.
- Bp Premier will automatically open using the samples database, which is a small database of 'dummy' patient records useful for training and familiarisation. You can return to the samples database at any time. Exit Bp Premier.
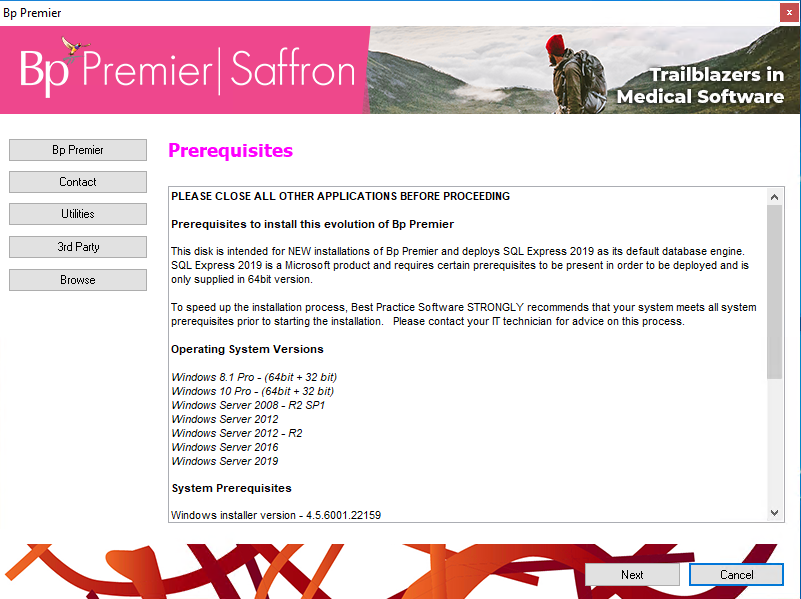
Bp Premier | Prerequisites home screen. |
Contact | Contact details for Best Practice Software, including Sales and Support and knowledge bases. |
Utilities | Provides some utilities that can be run after installation to configure TCP/IP ports automatically. |
3rd Party | Options to install several 3rd party integrations after successfully installing a Bp Premier server or workstation, such as Argus or HealthLink. |
Browse | Opens the DVD contents in a file explorer. |
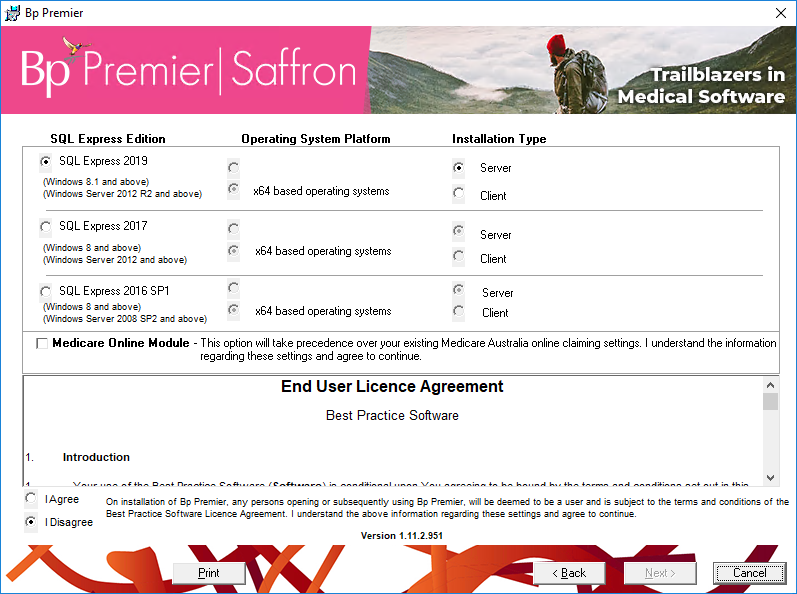
What SQL Server version should I select?
The installer will automatically select the most recent version of Microsoft SQL Server Express edition that your operating system will support. If you select a recent version that is not supported by the version of Windows running, the installer will alert the user and return to the database selection screen.
Most practices will not need to change the default option in this screen. You only need to change the default option selected here if your practice has an existing licence for a full edition of SQL Server (such as SQL Server 2017 Standard Edition) and you plan to upgrade to the full edition. If this applies, select the Express version that matches the full version you plan to upgrade to.
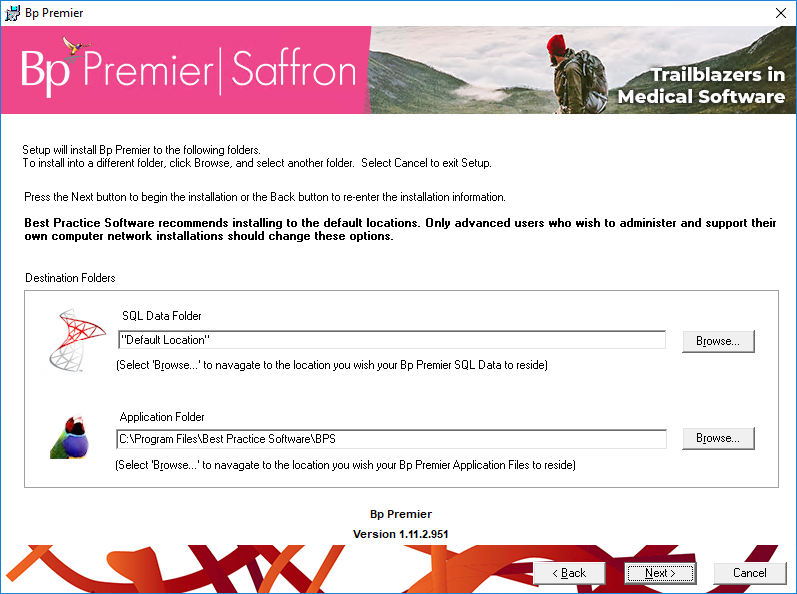
IMPORTANT Make sure you communicate to those staff who will be configuring the software what the new installation folders are. All configuration articles in the Bp Premier Knowledge Base assume that Bp Premier has been installed in the default location. Configurers will need to be able to browse to utilities supplied when Bp Premier is installed.
The installer will place shortcuts on the desktop:
- Best Practice — Starts Bp Premier.
- Best Practice Samples — Starts Bp Premier using the samples database.
Log in to Bp Premier
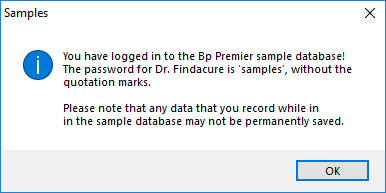
- At the end of the installation, Bp Premier will prompt you to log in to the samples database for evaluation, warning that nothing in the samples database is permanent.
- Click Ok to proceed to the login screen. The password for all users in the samples database is 'samples'.
- If you have finished evaluation and are using Bp Premier as a Production installation for the first time, close down Bp Premier.
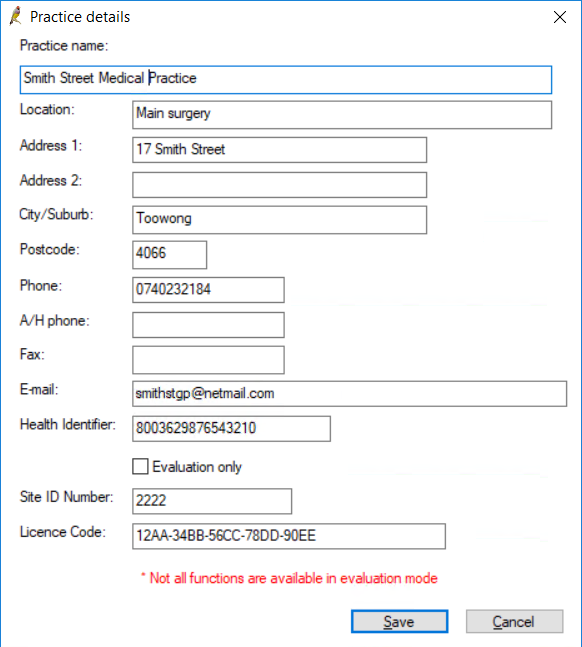
- Double-click the Best Practice icon to log in to Bp Premier production database. Bp Premier will prompt you to enter your practice details for the first time.
- Most of the fields in this screen are mandatory. The Health Identifier (your practice's HPI-O number), Site ID Number, and Licence Code must be valid to save these values.
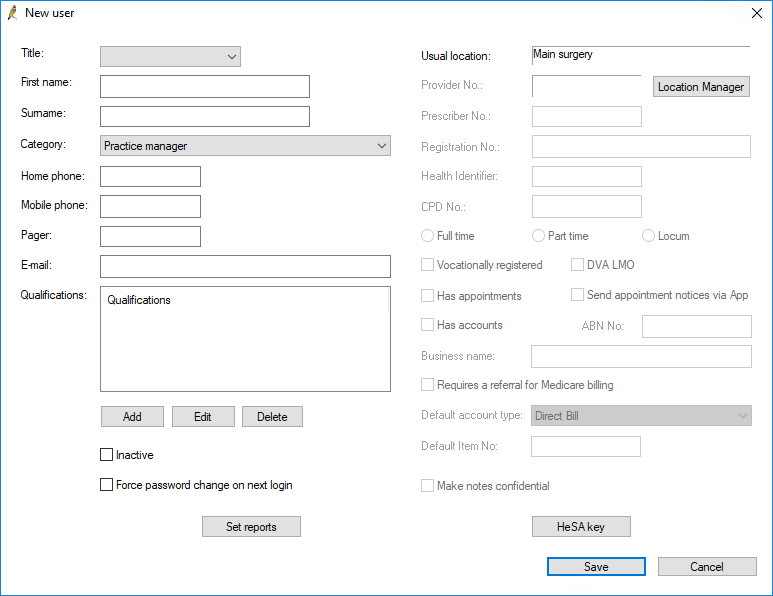
- Click Save. The New user screen will appear, so that an administrator user can be created. The first user created can only be a Practice manager or Principal Doctor.
- Click Save.
- Enter and confirm a password for the new user and click Save.
- Bp Premier will prompt you to log in using the password you just created.
You can now begin configuring and using the software.
After a successful server installation
- Install any third-party software that your practice requires. See Install third-party software for more information.
- You may need to update your drug database.
- Install Bp Premier clients on all workstations.
- Configure the Clinical and Management components of Bp Premier for the first time to get your live site running.
- Import patient data from your previous practice management software, if applicable.
- Import contacts saved from a previous installation of Bp Premier.
Troubleshooting
Last updated 26 October 2021