Additional information is included in Frequently asked questions on importing and exporting records.
Bp Premier can import one or more patient records into the database.
For example, if a new patient signs up or a new doctor begins work at your practice, they may be able to bring electronic copies of their patient records from a previous practice.
NOTE The Patient Import-Export function requires the user permissions Configuration, Export clinical Data, and Import clinical data set to 'Allow access'.
Import a small number of patient records
Use this method when you only have one or two patient record files to import.
- From the desktop, click on the Windows flag icon in the bottom right, select the down arrow to view apps, and click on Patient Import-Export under Best Practice Software.
- Log in using your username and password. The Import/Export utility screen will appear.
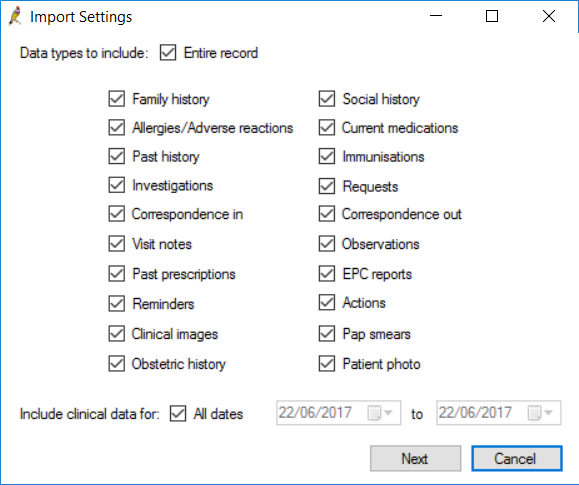
- Click Import Single Patient. The Import Settings screen will appear.
- Tick the data you want included in the import.
- Tick All dates to import all data in the file, or select a start and stop date range to import only data between the dates.
- Click Next. Browse to the location of the patient XML and select the file you wish to import.
- If the file can be imported, Bp Premier will import the patient record and display a message to indicate that the patient has been successfully imported. The record can now be viewed in Bp Premier.
- Repeat steps 3–6 for each individual record you want to import.
- Click Close to close the Patient Import-Export utility.
You can also navigate directly to the utility .exe file in a file explorer. Browse to the default install directory C:\Program Files\Best Practice Software\BPS\BPSupport\ and double-click the file BPS_ImportExportUtility.exe.

An item is included if the clinically significant date falls between the date range; the clinically significant date is the date of administering, not the date when the item is recorded by a Bp Premier user. Items without clinically significant dates, such as demographic information, are imported by default.
Bp Premier will check that the XML file is in the correct format. If any issues are found, a message will be displayed and an entry written to the BPS Bulk Export Error.log file with more information. The XML file may be in a format that Bp Premier cannot import, or the file may have been edited or corrupted and contain errors.
Import multiple patient records
Use this method if you have an entire folder of patient records in XML format you wish to import into Bp Premier, for example, loaded onto a memory stick. There must be no other files in the folder.
- Click on the Windows flag icon in the bottom right, select the down arrow to view apps, and click on Patient Import-Export under Best Practice Software.
- Log in using your username and password.
- Click Import bulk patients. The Import Settings screen will appear.
- Tick the data you want included in the import.
- Tick All dates to import all data in the file, or select a start and stop date range to import only data between the dates.
- Click Next. Browse to the folder containing the patients record to import. Click OK.
- Note down the name of any file that is not in a valid format. You will need to obtain a correct version of the file after the bulk import process and import the patient record individually.
- At the end of the import process, a message will indicate how many patient records have been successfully imported.
- Click Close to close the Patient Import-Export utility.
You can also navigate directly to the utility .exe file in a file explorer. Browse to the default install directory C:\Program Files\Best Practice Software\BPS\BPSupport\ and double-click the file BPS_ImportExportUtility.exe.

An item is included if the clinically relevant date falls between the date range; the clinically significant date is the date of administering, not the date when the item is recorded by a Bp Premier user. Items without clinically significant dates, such as demographic information, are imported by default.
Bp Premier will check that all XML files in the folder are in the correct format. If any issues are found, a message will be displayed and an entry written to the BPS Bulk Export Error.log file with more information. The XML file may be in a format that Bp cannot import, or the file may have been edited or corrupted and contain errors.
Clearing the temp folder
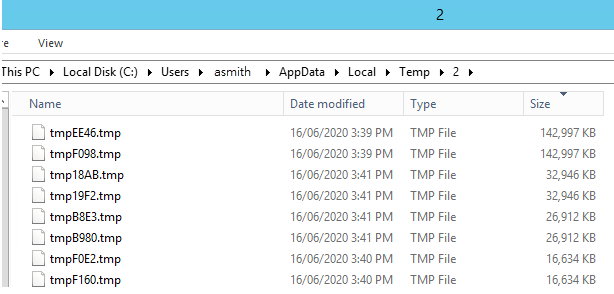
The contents of the Windows temp directory will not clear automatically at the end of the bulk patient import process. Larger files may have been added to the temp folder during the import process, which could decrease the space available on your hard drive. You can manually remove the contents by navigating to C:\Users\%Userprofile%\AppData\Local\Temp and deleting all files with a TMP extension.

View a patient record's import history
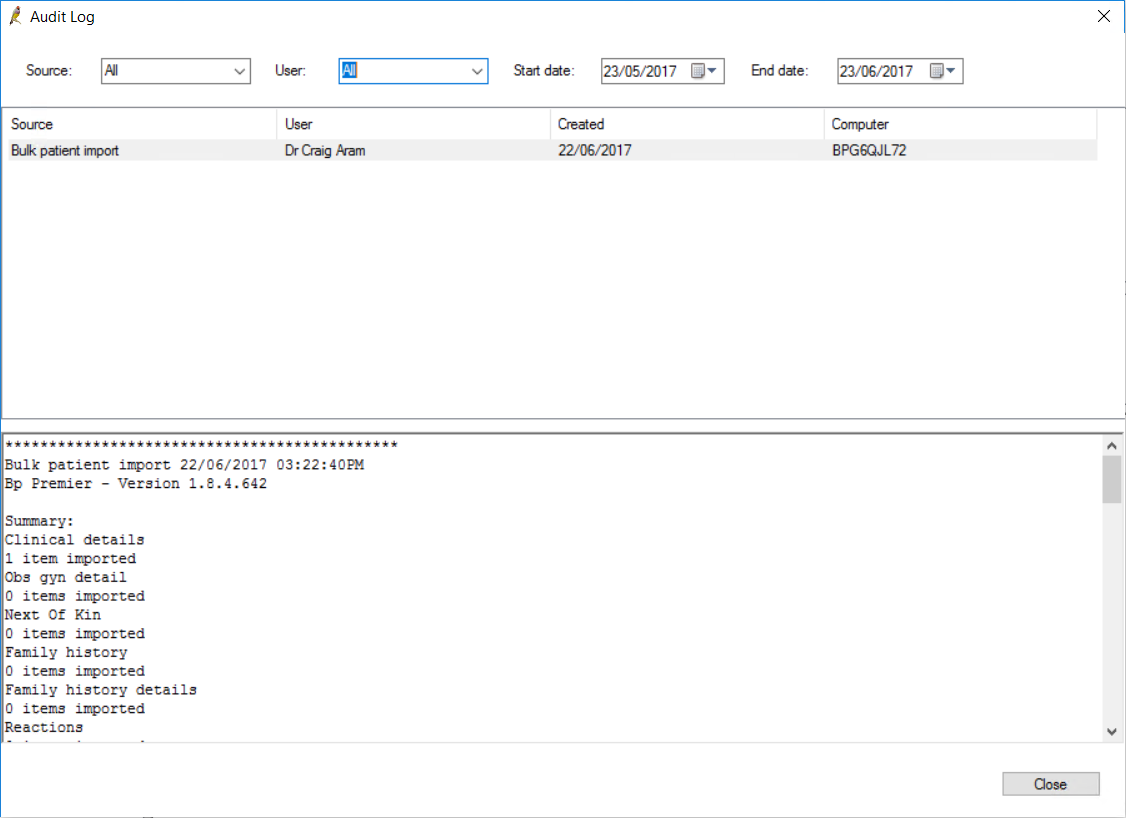
Bp Premier records details of imported patient records, including the data imported. This allows providers to which patient data was imported from another practice, and who imported the record.
- Select View > Audit Log from the patient record to open the Audit Log screen.
- Filter by Source (type of import), User (who imported), and date range.
- Select a record in the top half to view the details in the bottom half of the screen.

Related topics
Last updated 23 July 2020