Download Quick Reference Guide
The Bp Premier Reporting tool extracts data for use in the Practice Incentives Program - Quality Improvement (PIP QI).
Visit the Department of Health website to find out more about PIP QI.
Before you begin
To run the reporting tool for PIP QI, you will need to know:
- The username and password of a Bp Premier user with the Reports permission set to 'Allow access'.
- Your PIP QI Practice ID number. Your Practice ID is a unique identification number the Department of Human Services uses to identify your practice. You can find your Practice ID located on your payment statement, or it can be found in the PIP details in HPOS.
Download and install the reporting tool
- Open an Internet browser and enter the following address in the URL bar at the top, or click the link and allow the link to open in a browser.
- The file will download to the default download directory for your version of Windows, such as Favorites > Downloads. You may be asked to confirm that you want to download the file.
- Copy the downloaded file to the Bp Premier server or any workstation and double-click the file to start the installation.
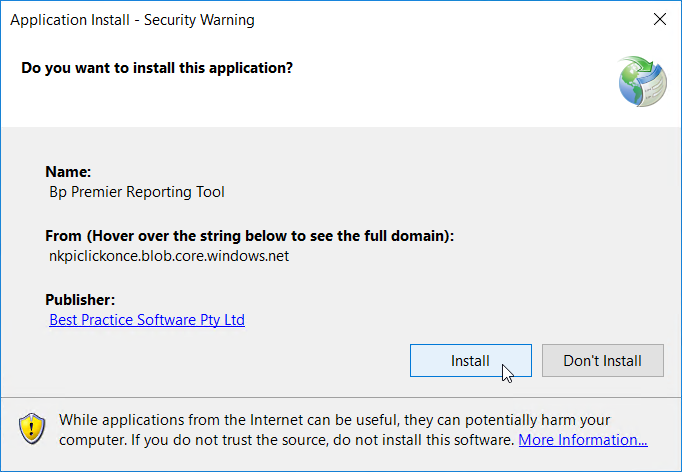
- Windows User Access Control or SmartScreen may prompt for permission to proceed. Click Yes. The Application Install screen will appear.
- Click Install. A progress dialog will show the report utility being installed.
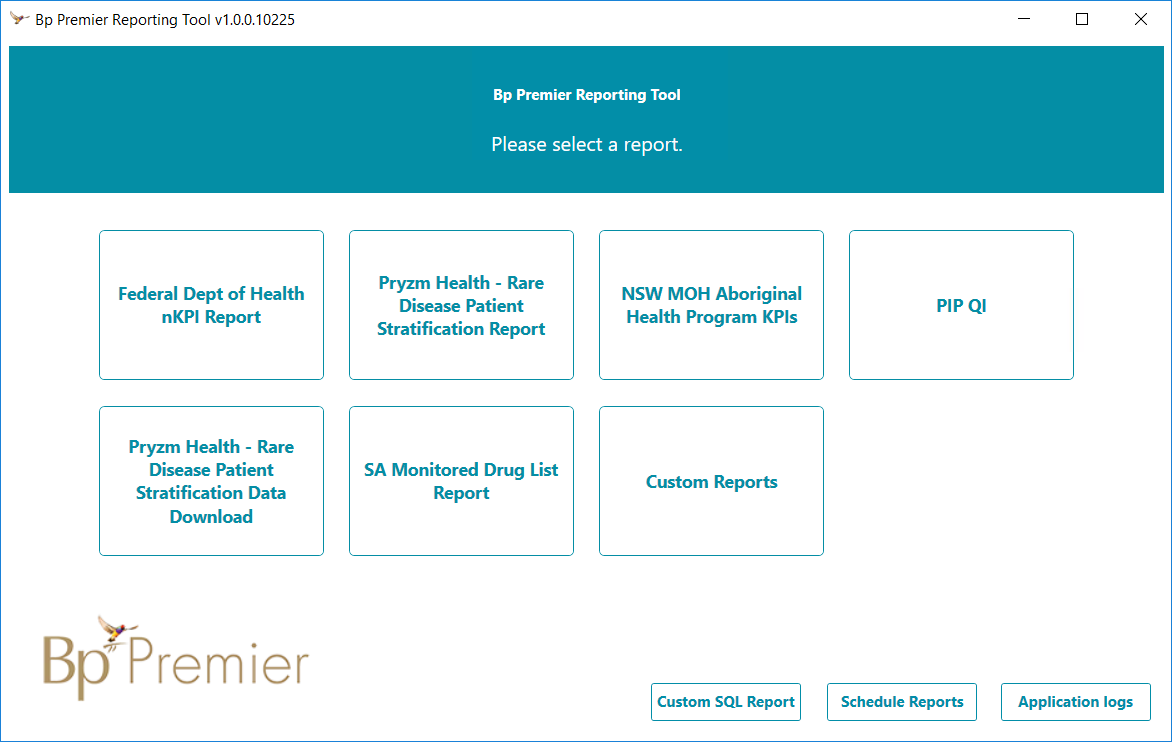
- When the utility has been installed, the Bp Premier Reporting Tool will open. A Bp Premier Reporting Tool icon will also be created on the Windows desktop.
https://nkpi.bpsoftwareportal.net/prod/Bp.Integrations.Wpf.application

Installation is complete.
Run the reporting tool
Double-click the desktop icon to start the reporting tool.
Run the Reporting Tool for PIP QI
- Click PIP QI. The login panel will appear.
- Enter the username and password of a Bp Premier user. The user must have the Reports permission set to 'Allow access'.
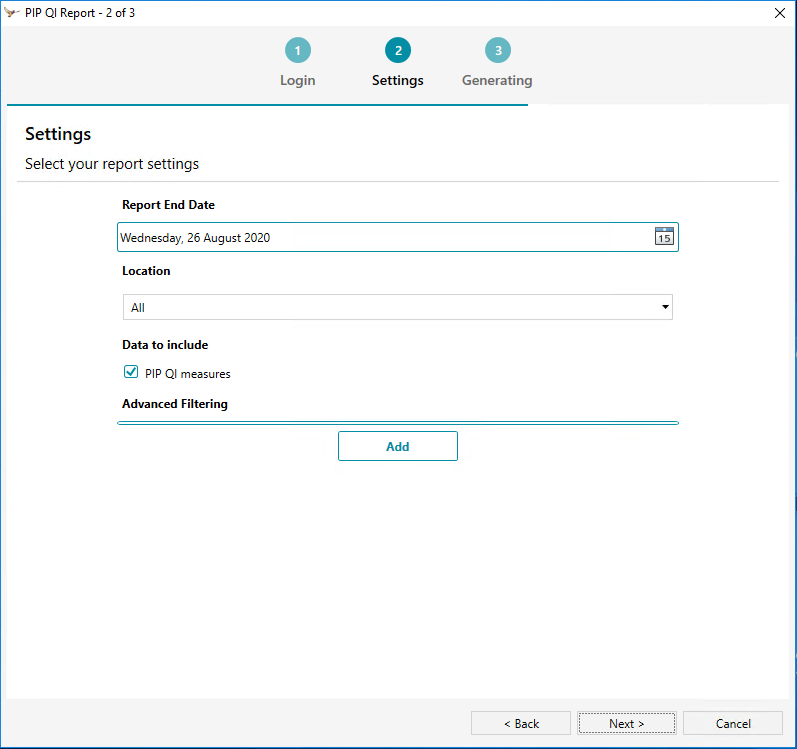
- Click Next. The Settings panel will appear.
- Select the Report End Date. This should match the end date of the reporting period.
- If you are reporting on a single practice location only, select that location. Otherwise, leave Location set to All.
- PIP QI measures under Data to include will be ticked by default. Do not untick this checkbox.
- If required, click Add to open the advanced filtering options. Select like or not like from the dropdown menu, and enter an SQL seach in the text field.
- Click Next. The Generating panel will appear.
- Save a copy of the report as a JSON file.
- Click Finish to return to the Reporting tool.
- Forward a copy of the report to your local PHN. Contact your PHN directly if you are unsure of how they would prefer the report sent.

Only use the advanced filtering options if your practice has complex reporting requirements.
Reporting periods
Practices are required to submit data to their local PHN at least once within the date range specified in the data submission period.
Reference Period | Data Submission Period | Payment Month |
|---|---|---|
1 August to 31 October | 1 August to 15 October | November |
1 November to 31 January | 1 November to 15 January | February |
1 February to 30 April | 1 February to 15 April | May |
1 May to 31 July | 1 May to 15 July | August |
Visit the Department of Health website to find out more about payment periods.
Troubleshooting
Best Practice Software support
If you are having any issues with using the Reporting Tool, please ensure you read this article carefully in the first instance. If you are unable to resolve the problem, please contact support on 1300 401 111.
PIP QI incentive exemption
If you have questions or concerns regarding the PIP QI Incentive exemption, please contact PIPQIExemptions@health.gov.au, or contact your local PHN.
Last updated 16 September 2020
