
For additional questions you might have about patient details, see Frequently asked questions about the patient demographic. For information about deactivating a patient record, see Mark patients as inactive or deceased.
NOTE As of Saffron SP2, you can select the non-binary title 'Mx' from the Title field in the New patient or edit patient screens.
There are at least three ways of adding a new patient to Bp Premier:
- When booking an appointment. From the Add appointment screen, click New patient to open the New patient screen.
- When searching for a patient. Press F2 from the main screen, and click Add new from the Open patient screen to open the New patient screen.
- From the Patient List. Press F10 from the main screen, and click Add new.
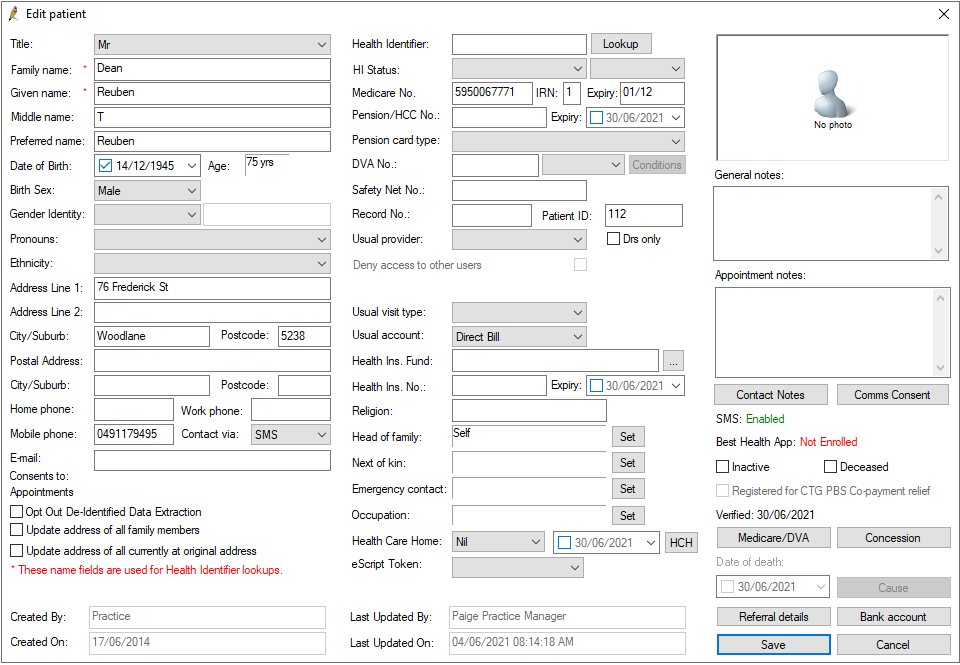
The information in the New Patient screen is called the 'patient demographics' in Bp Premier.
After you have created the patient record and added a minimum of details, the following tasks are also suggested.
Verify Medicare numbers, concession cards, and Health Identifier numbers
You will need an active internet connection to verify Medicare numbers, concession cards, and HI numbers.
Verify Medicare numbers
- To verify a Medicare number, populate the Medicare No., IRN, and Expiry fields and click Medicare/DVA.
- If the patient also has a DVA number entered in Bp Premier, an alert will appear asking whether you wish to check Medicare or DVA eligibility. Select Medicare.
If the Medicare number (or DVA number if entered) has been verified previously, the date it was verified on will appear above the Medicare/DVA button. If the number has not been verified, Not yet verified will appear above the button instead. If you attempt to verify the Medicare number (or DVA number if entered) and the verification fails, the date will revert to Not yet verified.
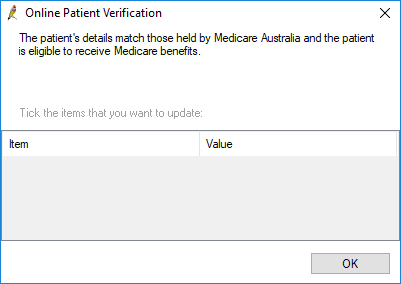
If the eligibility check is successful, An alert will appear indicating that the patient is eligible to receive Medicare benefits.
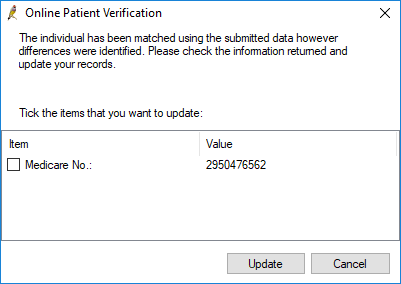
If the Medicare number entered in Bp Premier does not match the number held by Medicare, an alert will appear indicating that the number does not match. To update the Medicare number, select the checkbox next to the number listed in the alert and click Update.
Verify DVA numbers
- To verify a DVA number, populate the DVA No. field, select a card type from the drop-down menu, and click Medicare/DVA.
- An alert will appear asking whether you wish to check Medicare or DVA eligibility. Select DVA.
If the Medicare or DVA number has been verified previously, the date it was verified on will appear above the Medicare/DVA button. If the numbers have not been verified, Not yet verified will appear above the button instead. If you attempt to verify the Medicare or DVA number and the verification fails, the date will revert to Not yet verified.
If the eligibility check is successful, An alert will appear indicating that the patient is eligible to receive DVA benefits.
If the DVA number entered in Bp Premier does not match the number held by the DVA, an alert will appear indicating that the number does not match. To update the DVA number, select the checkbox next to the number listed in the alert and click Update.
Verify concession cards
Concession cars can be verified as of Saffron SP2. To verify that a patient has a concession card, click Concession. The patient must have a Medicare number entered before the concession card can be verified. An alert will appear indicating the result.
When verifying a concession card, if there are any issues with the patient's Medicare details, you will be given the option to update them.
NOTE This process confirms whether the patient has a concession card, but will not return the patient's concession card number. Ensure you obtain the concession card number from the patient and enter the number in the Pension/HCC No: field.
Verify Health Identifier numbers
To verify a Health Identifier value, click Validate next to the number field. If the validation is successful, an alert will appear indicating whether the Health identifier in Bp Premier matches the number returned from the HI service.
See Validate Health Identifiers for more information.
Upload a patient photo
A photo record of patients for visual identification can be useful, particularly if your practice allows arriving patients to self-check in. You must have an existing scanned or captured image file to import, such as from a digital camera at reception.
- Click the Patient Photo box in the top right. Browse to the photo you want to import and click Open. The photo will be displayed in a preview window.
- Click Save. The photo will be loaded into the photo area.
- Click Save to save the photo to the patient demographic.
Bp Premier will try to save the photo in the original format. However, if the format is not recognised, the photo will be saved as a .jpg file. The file is resized according to the dimensions set in Setup > Preferences > General > Resize Patient Photo if larger than Width x Height. The default size is 200 x 200.
The photo is also displayed in the top right of the patient's clinical record. You can also:
- insert a photo into a template or document in the word processor
- include a photo when exporting patient records to XML or HTML.
Set Head of Family
You can designate a patient to be the ‘Head of Family’ for one or more other patients. When practice staff finalise an account for a member of the family, such as a minor, the staff member can select 'Head of family' from the Bill to field and automatically bill to the patient’s designated head of family.
Automatically add a new patient to a family
To automatically add a new patient to a family:
- Press F10 or select View > Patients to open the Patient list screen.
- Search for the head of family.
- Right-click the head of family and select Add to family. The New patient screen will open with the Surname, address, phone number, Medicare number, health insurance and head of family fields already populated.
- Fill in the remaining fields and click Save.
Set next of kin
- From the New patient screen, click Set next to the Next of kin field. The Next of kin screen will appear.
- The Next of kin options are:
- Complete the contact details. Manually entered details do not need to be a current patient.
- Tick Use Head of family details if you just want to use the patient's head of family without linking. Changing the patient’s head of family will not automatically update the next of kin.
- Tick Link to Head of family to link to the patient’s head of family. Changing the patient’s head of family will automatically update the next of kin.
- Click Save to return to the New patient screen.
Set emergency contact
- From the New patient screen, click Set next to the Emergency contact field. The Emergency contact screen will appear.
- The emergency contact options are:
- Complete the contact details. Manually entered details do not need to be a current patient.
- Tick Link to Head of family to link to the patient’s head of family. Changing the patient’s head of family will automatically update the emergency contact.
- Tick Link to next of kin to link to the patient’s next of kin. Changing the patient’s next of kin will automatically update the emergency contact.
- Click Save to return to the New patient screen.
Set a usual provider
Use the Usual Provider: menu to select the patient's preferred, or usual provider. Practice nurses can also be selected from the Usual Provider: menu. If you only want doctors to appear in the Usual Provider: menu, tick Drs only.
Tick Deny access to other users to limit the patient's entire record to access by the patient's usual doctor only. Patients who have Deny access to other users set in the patient demographic are excluded from appearing in search utility results.
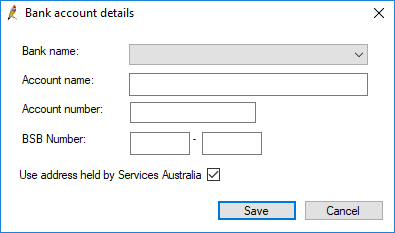
Add bank account details
In Saffron SP2 or later, click Bank account to add a patient's bank account details to Bp Premier.
If a patient's bank account details are added in Bp Premier, When a patient pays their account and the claim is sent via patient claiming, the bank account details entered into Bp Premier will be sent with the claim, and the patient's rebate will be paid into that account.
These bank account details are not saved to Medicare, and will not save over any existing bank account details that Medicare has recorded for the patient.
If Use address held by Services Australia is unticked, the patient's address in Bp Premier will also be sent with the claim.
When a claim is sent to Services Australia for an unpaid or partially paid account, Services Australia will send the patient a Pay Doctor Via Claimant (PDVC) cheque, which the patient needs to forward to you as payment for the service. If Use address held by Services Australia is unticked, the cheque will be sent to the patient's address recorded in Bp Premier.
See Processing Gap Payments for more information.
What do I do next?
Last updated 19 April 2022


 AU
AU 